Counter-Height Bar Table
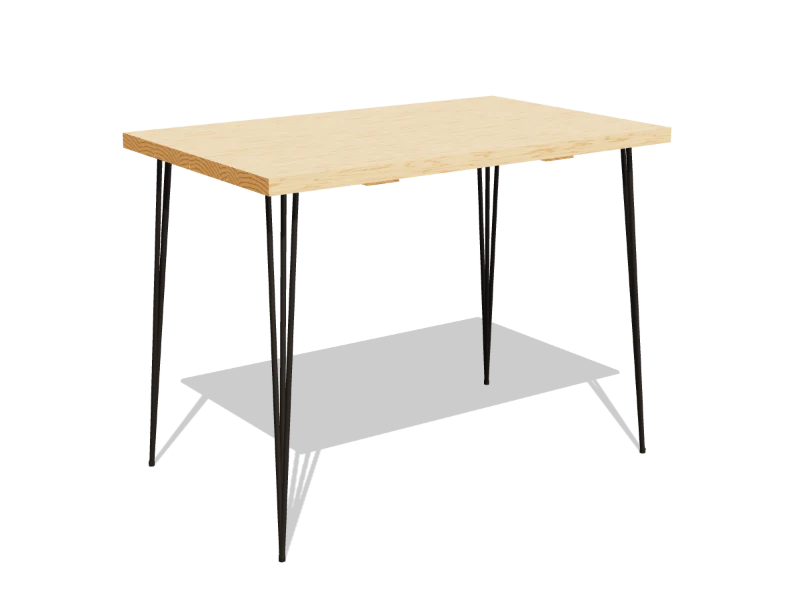
A counter-height table for the kitchen: a thick 2x8 plank top on four 34″ steel hairpin legs, 35½″ tall, with room for four counter stools.
- Skill
- Level 2 of 5 · Beginner
- Build time
- 4 to 6 hours, plus finish
- Lumber
- 2 2x8s and 1 1x4
- Joinery
- Pocket holes and leg screws
- Stools
- Counter stools with a 24″ to 26″ seat
- Finished size
- 47″ L × 29″ W × 35½″ H
What you need
A 2x8 is actually 1½″ × 7¼″ and a 1x4 is ¾″ × 3½″. Every measurement in this plan uses the real size.
Shopping list
- 22x8, 8 ftThe top. Pick the flattest, driest boards in the pile; let them sit indoors a week before you build.
- 11x4, 6 ftThe cleats.
- 1 set34″ hairpin legs, set of 4Three ½″ rods per leg.
- ~20#10 × 1″ pan-head screwsFor the leg plates, if your legs don't come with screws.
- ~202½″ coarse-thread pocket-hole screwsFor joining the top boards.
- ~201¼″ wood screwsFor the cleats.
- 1Wood glue
- —Sandpaper, 80 to 220 grit
- 1Stain and a clear topcoatPolyurethane stands up to spills.
Tools
- Miter saw or circular saw
- Pocket-hole jigSet for 1½″.
- Drill/driverWith a ⅛″ and a ¼″ bit.
- ClampsTwo that open 30″ or more.
- Random orbit sander
- Speed square, tape measure, pencil
Cut list
Six pieces from three boards. Label each piece with its letter in pencil as you cut it.
| Part | Qty | Size, inches | From |
|---|---|---|---|
| ATop boards | 4 | 1½ × 7¼ × 47 | 2x8 |
| BCleats | 2 | ¾ × 3½ × 24¾ | 1x4 |
Board layout. Each row is one board, cut left to right, with the remainder hatched. Dark lines are saw cuts, about ⅛″ wide.
Hardware & tools
Everything besides the lumber, with a link for each.
Links go to Amazon. Woodable earns a small commission at no cost to you.
Required part
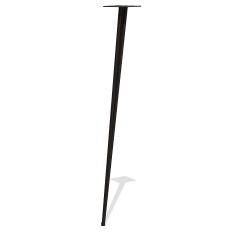 34″ hairpin legs, 3-rod heavy duty (set of 4)The plan is drawn for 34″ legs with three ½″ rods. Check your legs' instructions for the screw holes before drilling.1 set of 4View on Amazon
Fasteners
- #10 × 1″ pan-head screwsFor the leg plates, if your legs don't come with screws.~20View on Amazon
- 2½″ coarse-thread pocket-hole screwsFor joining the top boards.~20View on Amazon
- 1¼″ wood screwsFor the cleats.~20View on Amazon
Glue & finish
- Wood gluePVA wood glue for indoor projects.1View on Amazon
- Sandpaper, 80 to 220 grit5″ hook-and-loop discs for a random orbit sander, 80 to 220 grit.View on Amazon
- Clear polyurethaneWater-based polyurethane, satin, for a clear topcoat.View on Amazon
- Wood stainOil-based or water-based interior wood stain.View on Amazon
Tools
- Miter saw or circular saw10″ compound miter saw: square, angled and beveled crosscuts.View on Amazon
- Pocket-hole jigSet for 1½″.View on Amazon
- Drill/driverWith a ⅛″ and a ¼″ bit.View on Amazon
- ClampsTwo that open 30″ or more.View on Amazon
- Random orbit sander5″ random orbit sander.View on Amazon
- Speed square7″ rafter square for marking and guiding cuts.View on Amazon
- Tape measure25 ft tape measure.View on Amazon
Build it
Seven steps. The 3D view follows along as you scroll. The parts you're working on are yellow, and the pocket holes or screws for that step are red.
- 01
Cut the pieces
Cut every piece on the cut list:
- A Top boards, four at 47″
- B Cleats, two at 24¾″
Lay the four top boards side by side, best faces up, and shuffle them until the grain looks good. Alternate the curve of the end grain, smile, frown, smile, so the top stays flatter. Draw a big V across them.
- 02
Drill the pocket holes
With the jig set for 1½″, drill four pocket holes along one edge of three of the top boards (A), on the underside: 5″ and 17″ from each end.
- 03
Join the top boards
Lay the boards (A) face down in order on a flat floor or two sawhorses, pocket holes along the joints. Clamp them flat, glue the edges and drive 2½″ pocket screws from the middle out, one joint at a time.
Watch outClamp across each joint right at the screw you're driving, so the faces stay flush. A plank top shows every step between boards. - 04
Add the cleats
Screw a cleat (B) across the underside of the top (A), 13″ from each end to its center, centered front to back. Make the outer holes ¼″ wide so the boards can move with the seasons, and drive six 1¼″ wood screws in each. No glue.
- 05
Sand and finish the top
Sand the top with 80 grit to flatten the seams, then 120, 180 and 220, and ease every edge and corner. Finish it now, before the legs go on: stain if you like, then three coats of polyurethane, top, edges and underside, sanding lightly between coats.
- 06
Screw on the hairpin legs
Lay the top (A) face down on a blanket. Set a hairpin leg in each corner with its plate 1″ in from both edges, the rods leaning out toward the corner. Mark the holes, drill ⅛″ pilot holes no deeper than 1″, and drive a #10 × 1″ pan-head screw in every hole.
Check your legs' own instructions first. The plan is drawn for legs 34″ tall with three ½″ rods and a 4″ plate. The screws must stay shorter than the 1½″ top is thick.
Watch outThe top weighs about 35 lb. Get a helper to turn the table over.Get this hardware: 34″ hairpin legs, 3-rod heavy duty (set of 4)
- 07
Stand it up
Flip the table onto its feet. Press on the plastic foot caps that come with most hairpin legs. If it rocks, add a felt pad under the short leg.
The top sits 35½″ off the floor, counter height. Counter stools with a 24″ to 26″ seat slide under it.
Build at your own risk. Check every measurement against your own lumber before you cut, test-fit before you glue, and wear eye and ear protection. Full disclaimer.