









Cedar Planter Box
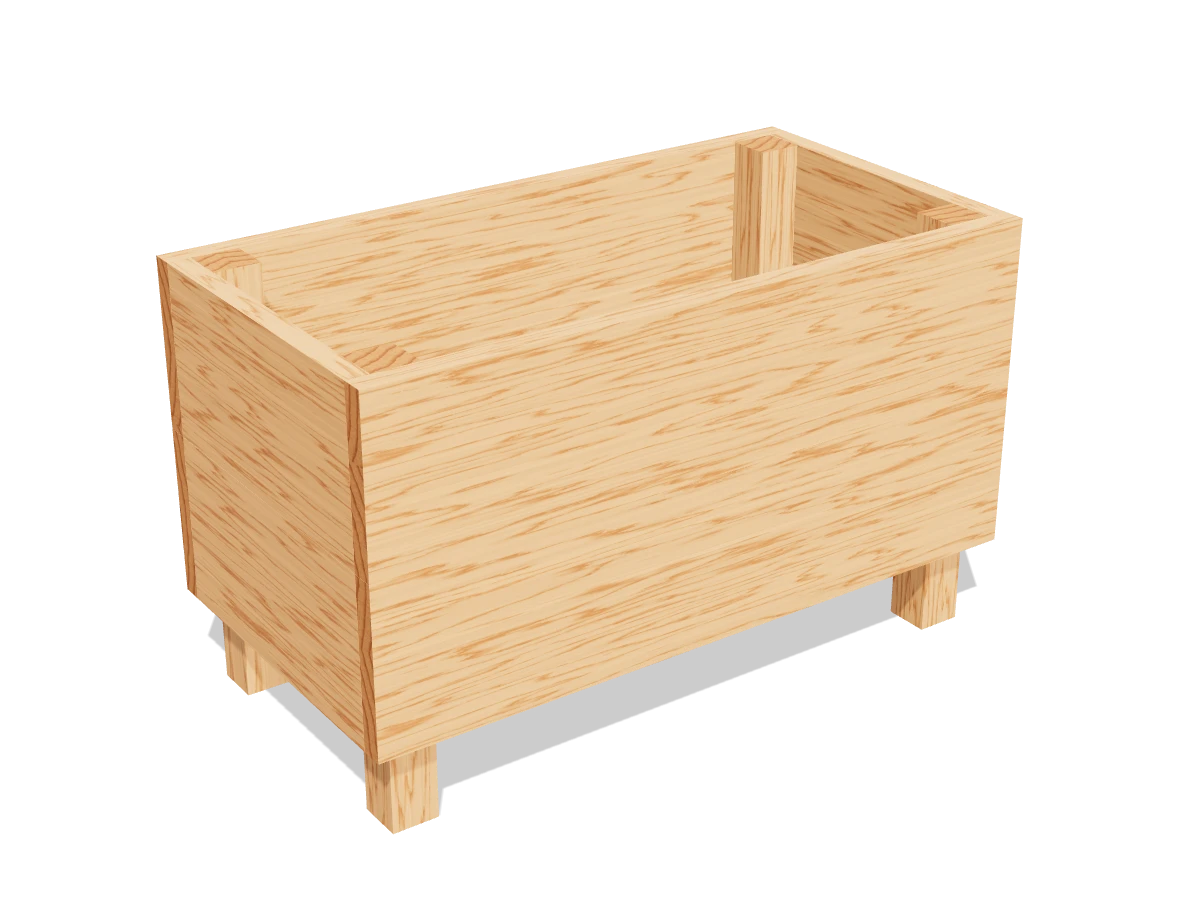
Draft · not yet checked by a carpenterA cedar box on short feet for herbs or flowers, with a slatted floor that drains. Straight cuts and screws only.
- Skill
- Beginner
- Build time
- 2 to 3 hours
- Lumber
- 1 2x2 and 2 1x6s
- Joinery
- Exterior screws
- Finished size
- 23″ L × 12″ W × 14″ H
A 2x2 is actually 1½″ × 1½″ and a 1x6 is ¾″ × 5½″. Every measurement in this plan uses the real size.
Shopping list
- 1Cedar 2x2, 8 ftCedar, for the legs and floor cleats.
- 2Cedar 1x6, 8 ftCedar boards, not fence pickets.
- ~601⅝″ exterior screwsCoated or stainless.
- 1Landscape fabricAbout 3 ft × 4 ft.
- opt.Staple gun and staples
- ~2Cubic feet of potting mix
Tools
- SawMiter saw, circular saw or hand saw. All cuts are crosscuts.
- Drill/driverWith a ⅛″ bit for pilot holes.
- Speed square, tape measure, pencil
Cut list
| Part | Qty | Size, inches | From |
|---|---|---|---|
| ALegs | 4 | 1½ × 1½ × 14 | 2x2 |
| BLong sides | 4 | ¾ × 5½ × 23 | 1x6 |
| CShort sides | 4 | ¾ × 5½ × 10½ | 1x6 |
| DFloor cleats | 2 | 1½ × 1½ × 18½ | 2x2 |
| EFloor boardsSame length as C. | 3 | ¾ × 5½ × 10½ | 1x6 |
Board layout. Each row is one board, cut left to right, with the remainder hatched. Dark lines are saw cuts, about ⅛″ wide.
Build it
 01
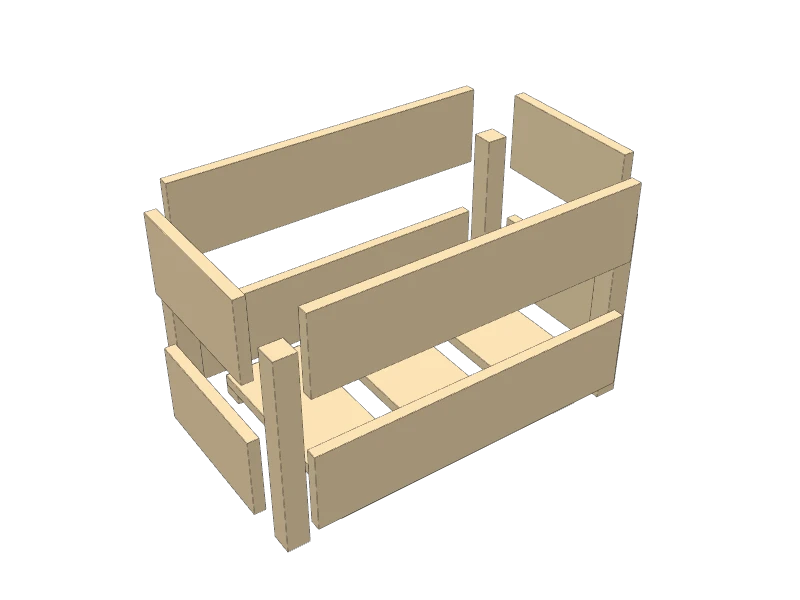
Cut the pieces
Cut every piece on the cut list:
- A Legs, four at 14″
- B Long sides, four at 23″
- C Short sides, four at 10½″
- D Floor cleats, two at 18½″
- E Floor boards, three at 10½″
Watch outBuy cedar 1x6 boards, not fence pickets. Pickets are only about ⅝″ thick and the screws won't hold as well.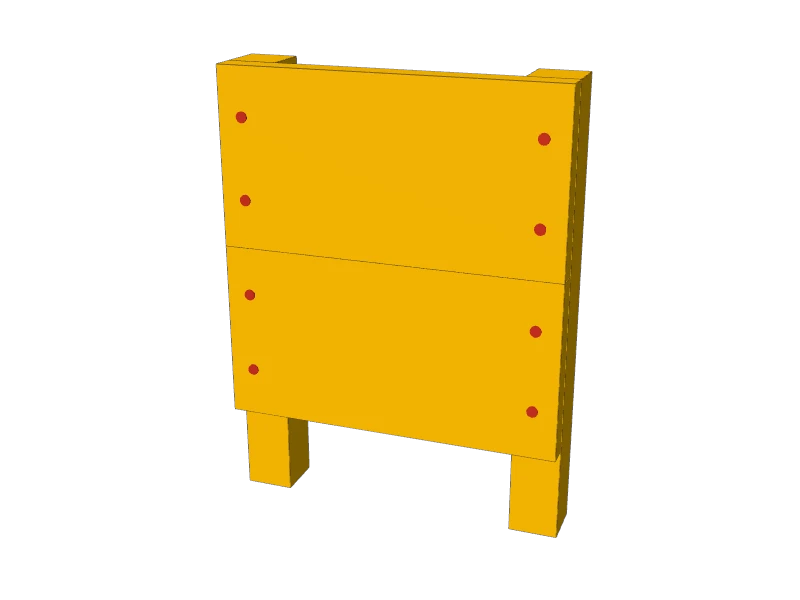 02
Build the two ends
Lay two legs (A) on the bench. Lay two short sides (C) across them, one above the other, with the board ends flush with the outside faces of the legs and the top board flush with the leg tops. That leaves 3″ of leg below the bottom board as feet.
Pre-drill and drive two 1⅝″ exterior screws through each board end into the leg. Build the second end the same way.
 03
Add the long sides
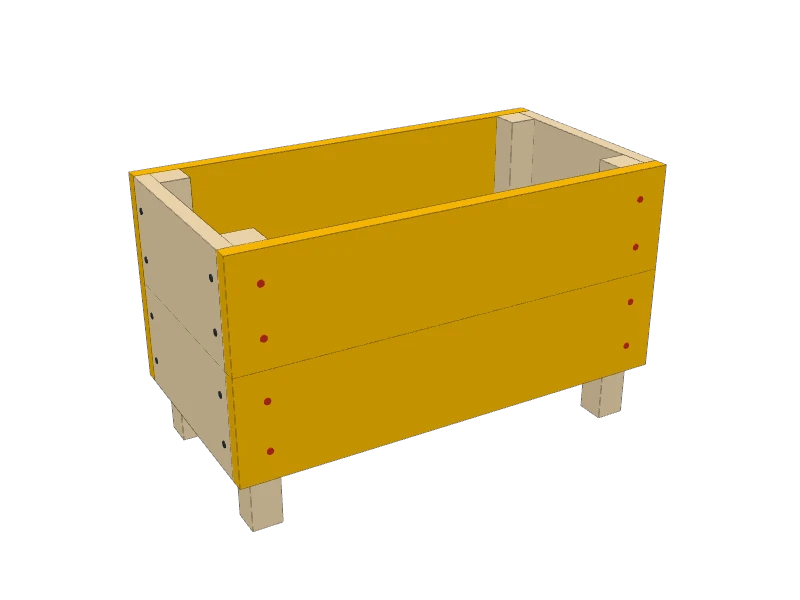
Stand the two ends up. Screw the long sides (B) across the legs in two rows, lined up with the short sides, with the ends flush with the outside faces of the short sides. Two screws through each board end.
Check that the box sits flat on all four feet before the last screws go in.
 04
Add the floor cleats
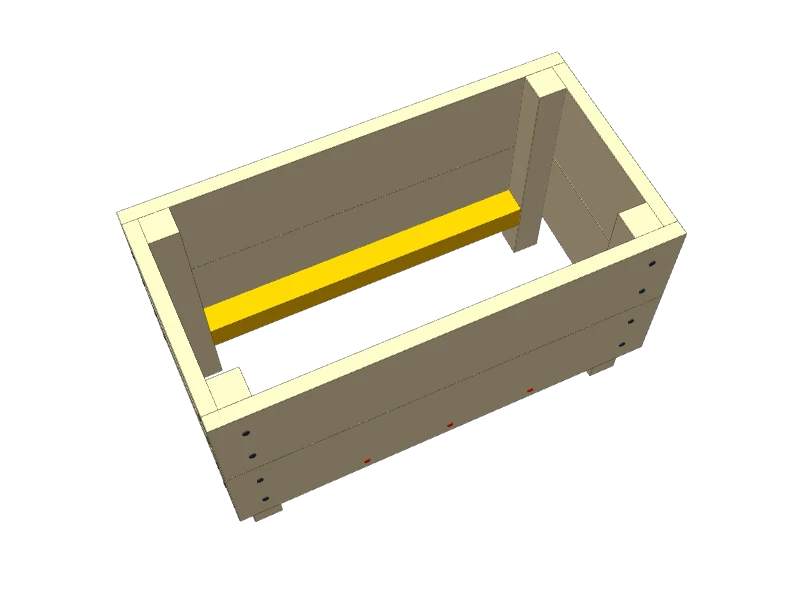
Set a floor cleat (D) inside each long side, between the legs, with its bottom flush with the bottom edge of the lower side board. Drive three screws through the side into each cleat.
 05
Lay in the floor
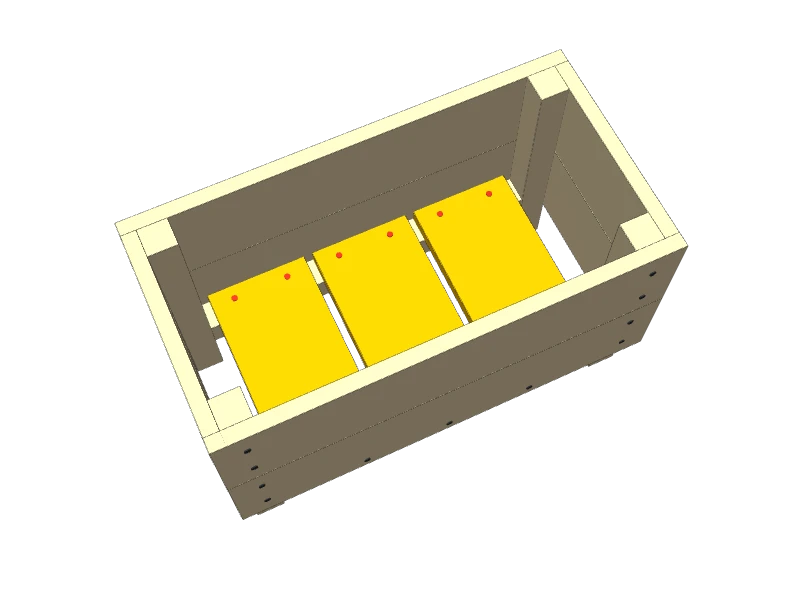
Drop the three floor boards (E) onto the cleats. Space them evenly, about ½″ apart and from the legs, so water can drain. Drive two screws through each end into the cleat.
 06
Line it and plant it
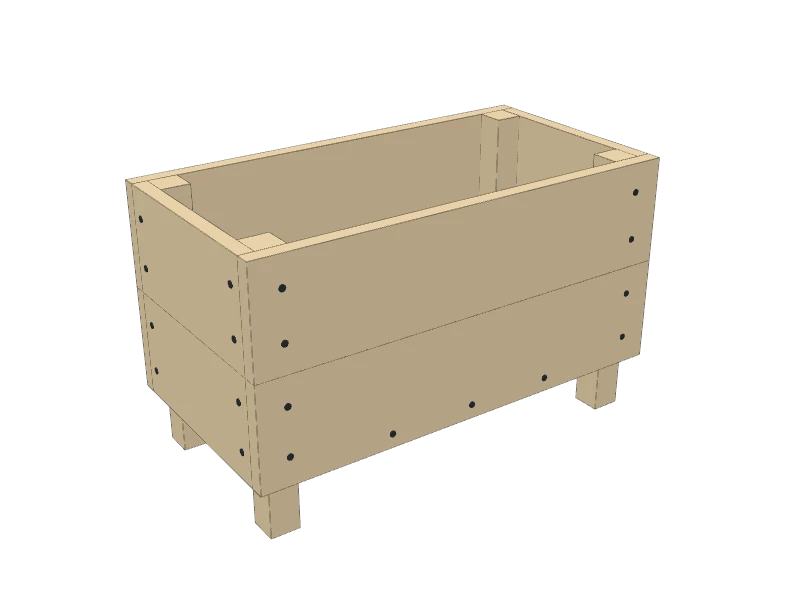
Staple landscape fabric up the inside walls to keep soil off the wood. Lay a piece over the floor too: it lets water out and keeps the soil in.
Fill it with potting mix, not garden soil, which packs down in a box. Leave cedar bare or oil the outside only.
TipSet the planter on pavers or bricks if it sits on a deck. Air under the feet keeps the deck boards from staining.
Build at your own risk. Check every measurement against your own lumber before you cut, test-fit before you glue, and wear eye and ear protection.