









Cedar Deck Storage Box
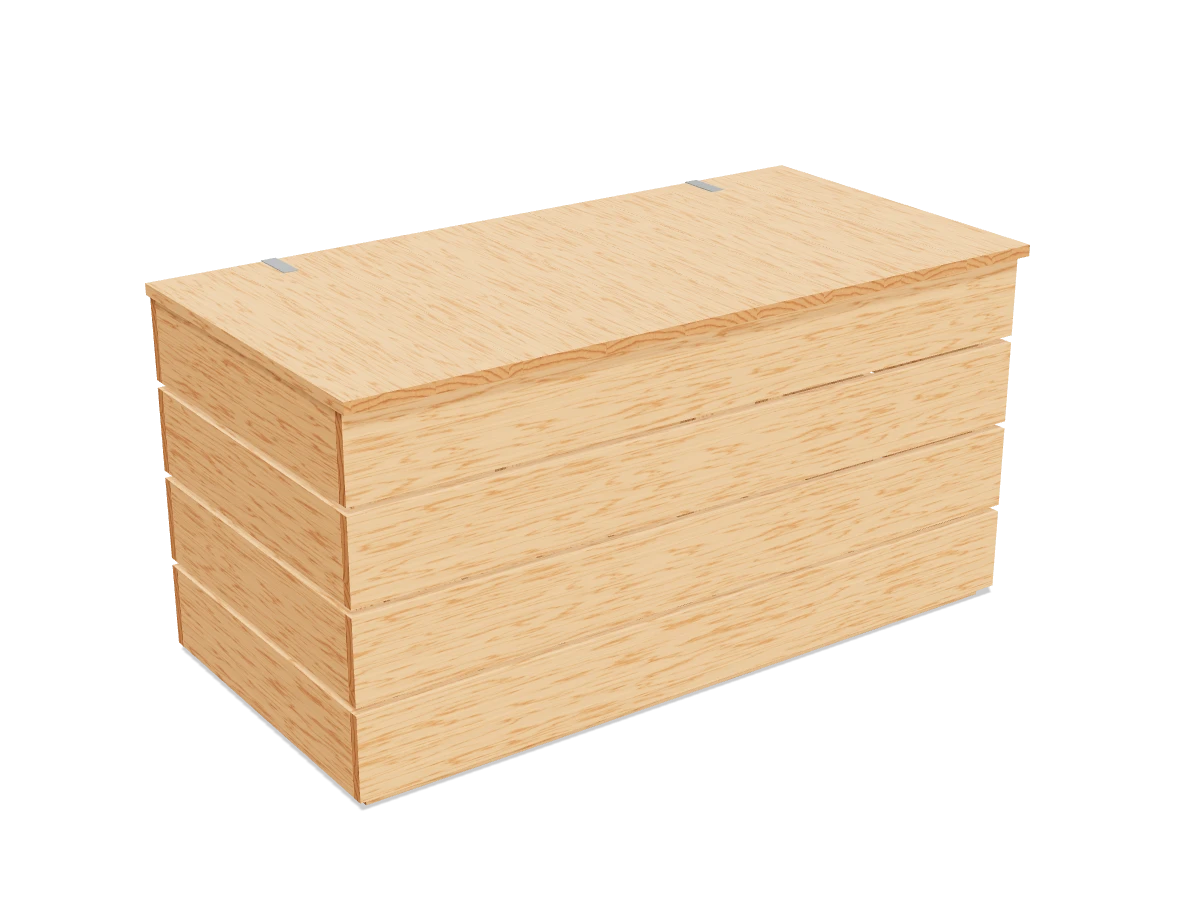
A slatted cedar box for cushions and pool toys, 49″ wide, with drain gaps in the floor and a lid that stays open wherever you leave it. No latch, and gaps on every side for air.
- Skill
- Level 2 of 5 · Beginner
- Build time
- 6 to 8 hours, plus finish
- Lumber
- 3 2x2s, 13 1x6s and 1 1x4
- Joinery
- Exterior screws
- Inside
- 22″ deep from the floor to the lid, 47½″ × 22½″ across
- Finished size
- about 49½″ W × 24¾″ D × 25″ H
A 2x2 is actually 1½″ × 1½″, a 1x6 is ¾″ × 5½″ and a 1x4 is ¾″ × 3½″. Every measurement in this plan uses the real size.
Shopping list
- 3Cedar 2x2, 8 ftCedar. The skids and posts.
- 12Cedar 1x6, 8 ftCedar boards, not fence pickets. The floor, walls and lid.
- 1Cedar 1x6, 6 ftCedar boards, not fence pickets. The floor, walls and lid.
- 1Cedar 1x4, 8 ftCedar. The lid battens.
- ~1501⅝″ exterior screwsCoated or stainless.
- ~501¼″ exterior screwsLid battens to the lid.
- 26″ strap hingesExterior-rated, with their screws.
- 1 pairToy box lid supportsOnes that hold the lid in any position, rated for a lid of about 15 lb.
- —Sandpaper, 120 grit
- opt.Exterior oilFor the outside only.
Tools
- Miter saw or circular sawAll the cuts are square crosscuts.
- Drill/driverWith a ⅛″ bit for pilot holes.
- Clamps
- Speed square, tape measure, pencil
Cut list
| Part | Qty | Size, inches | From |
|---|---|---|---|
| ASkids | 3 | 1½ × 1½ × 47½ | 2x2 |
| BFloor slatsSame length as E. | 8 | ¾ × 5½ × 22½ | 1x6 |
| CPosts | 6 | 1½ × 1½ × 22 | 2x2 |
| DFront and back slats | 8 | ¾ × 5½ × 49 | 1x6 |
| EEnd slats | 8 | ¾ × 5½ × 22½ | 1x6 |
| FLid slats | 9 | ¾ × 5½ × 24¾ | 1x6 |
| GLid battens | 2 | ¾ × 3½ × 43½ | 1x4 |
Board layout. Each row is one board, cut left to right, with the remainder hatched. Dark lines are saw cuts, about ⅛″ wide.
Build it
 01
Cut the pieces
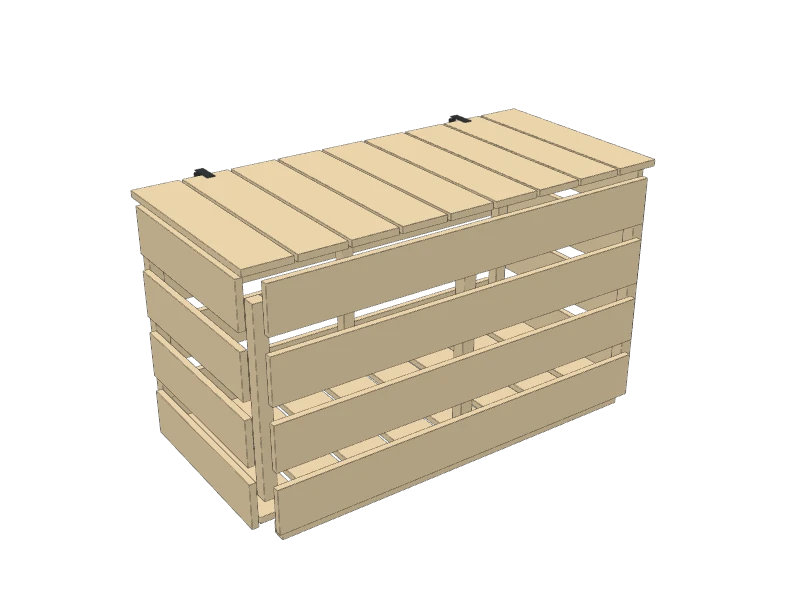
Cut every piece from cedar. All the cuts are square crosscuts:
- A Skids, three at 47½″
- B Floor slats, eight at 22½″
- C Posts, six at 22″
- D Front and back slats, eight at 49″
- E End slats, eight at 22½″
- F Lid slats, nine at 24¾″
- G Lid battens, two at 43½″
TipCut the floor slats (B) and end slats (E) together with one stop block: they are the same length. Sand the cut ends lightly so they don't splinter.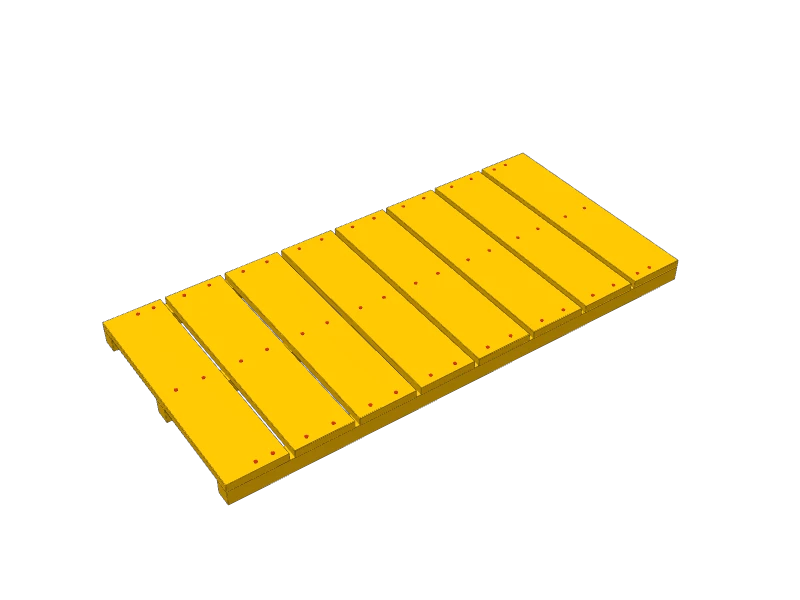 02
Build the base
Lay the three skids (A) on a flat floor, parallel, one along the back, one along the front and one in the middle. The outside edges of the front and back skids are 22½″ apart.
Lay the eight floor slats (B) across them, ends flush with the outside edges of the front and back skids. Start flush with the ends of the skids and space the slats ½″ apart: that's the drain gap. Pre-drill and drive two 1⅝″ exterior screws through each slat into each skid. Check the base is square by measuring the diagonals.
 03
Build the two ends
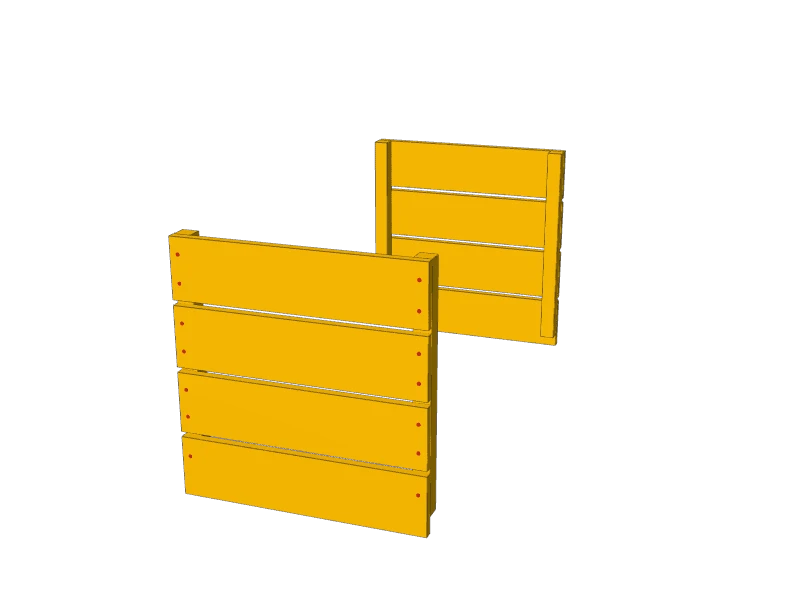
Lay two posts (C) on the bench, 22½″ apart at the outside. Screw four end slats (E) across them, ends flush with the outside faces of the posts. Leave the posts 1½″ short of the bottom of the lowest slat and flush with the top of the top slat. Space the slats ½″ apart.
Use two 1⅝″ exterior screws through each slat end into the post, and pre-drill near the ends so the cedar doesn't split. Build the second end the same way.
 04
Stand the ends on the base and add the front and back
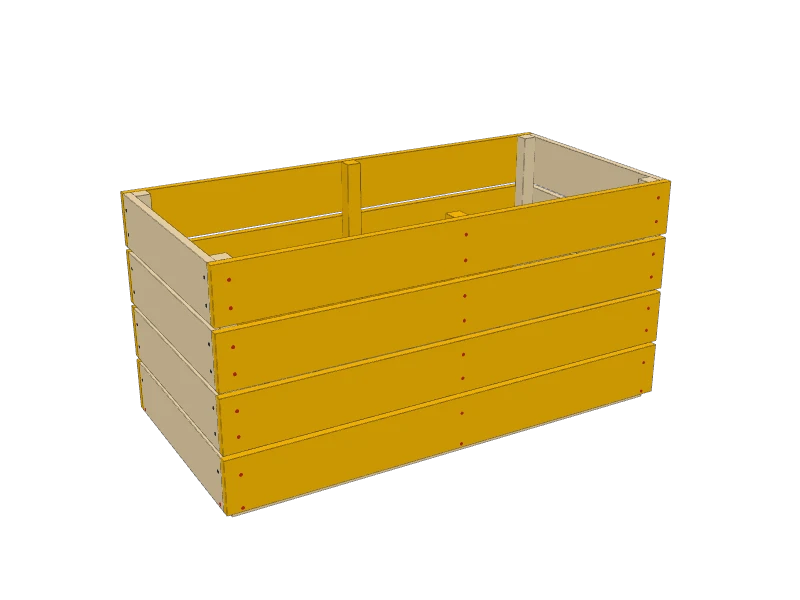
Stand the two ends on the base, posts on the floor slats (B) and the lowest end slats (E) over the ends of the skids (A). Screw through the lowest end slats into the skids.
Screw the front and back slats (D) across the posts in four rows, lined up with the end slats, ends flush with the outside faces of the end slats. The lowest row also screws into the front and back skids. Stand the two center posts (C) on the floor at the middle of the front and back and screw every slat to them too. Two screws at every post.
TipA ½″ scrap of plywood or two stacked paint sticks makes a good spacer for the gaps. Keep the gaps open: they let air through and water out.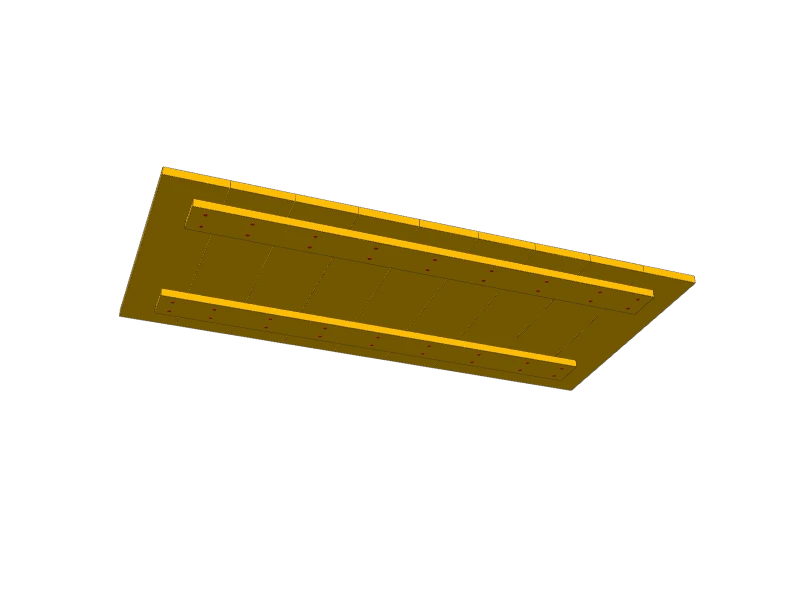 05
Build the lid
Lay the nine lid slats (F) face down on a flat surface, edges tight together and ends lined up. Lay the two lid battens (G) across them, 3″ in from each end of the lid, one 2½″ from the back edge and one 3¼″ from the front edge.
Pre-drill and drive two 1¼″ exterior screws up through the battens into each slat. They won't come through the top.
 06
Hinge the lid
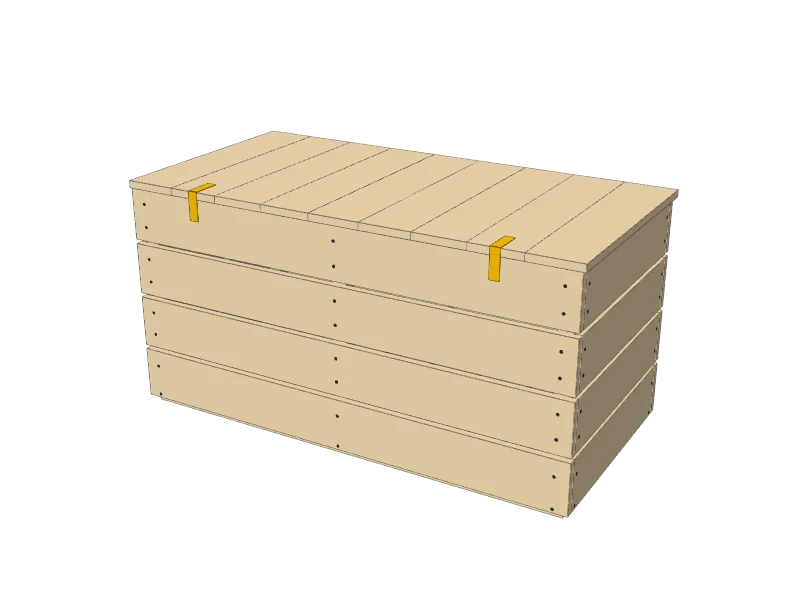
Set the lid on the box, battens down, flush at the back, overhanging ¾″ at the front and ¼″ at each end. The battens drop inside the walls.
Screw two strap hinges across the back, 8″ in from each end: one strap on top of the lid (F), the other down the back of the top back slat (D). Use the exterior screws that come with them, short enough not to poke through.
 07
Add the lid supports
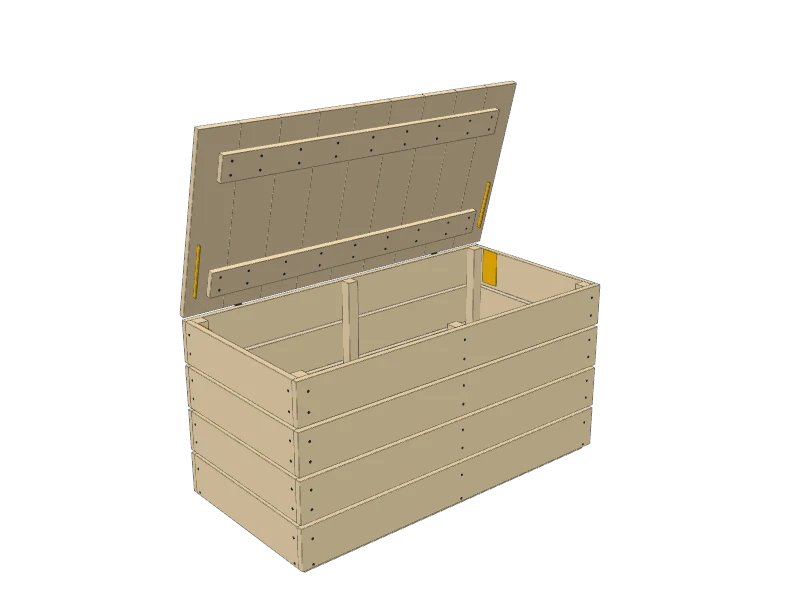
Screw a toy box lid support to the inside of each top end slat (E) and to the underside of the lid (F), following the maker's instructions for this lid's weight, about 15 lb. The supports have to hold the lid open in any position, not just fully open.
Test it: lift the lid partway and let go. It must stay where you left it, at every height. If it drifts down, adjust or tighten the supports until it doesn't.
Watch outKids climb into boxes like this. A falling lid can hit a child's head or neck, so never use the hinges without the supports, and never add a latch, hasp or lock. The gaps between the slats let air in if a child gets shut inside: don't line the walls or block the gaps.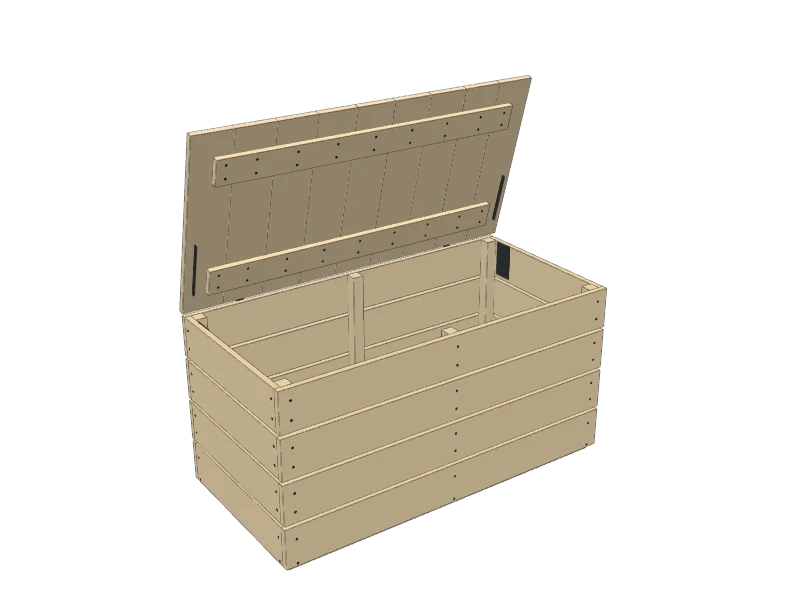 08
Finish
Ease every edge and corner with sandpaper, the lid edges especially. Leave the cedar to weather silver, or oil the outside once a year.
The box keeps rain off but isn't waterproof. Store cushions in a breathable cover inside it, and let wet pool toys drip dry first.
Watch outThis is a storage box, not a seat or a step. The lid is built to keep things dry, not to carry people: don't sit, stand or let kids jump on it. Check the lid supports every few months and tighten their screws.
Build at your own risk. Check every measurement against your own lumber before you cut, test-fit before you glue, and wear eye and ear protection.