









Elevated Planter Box
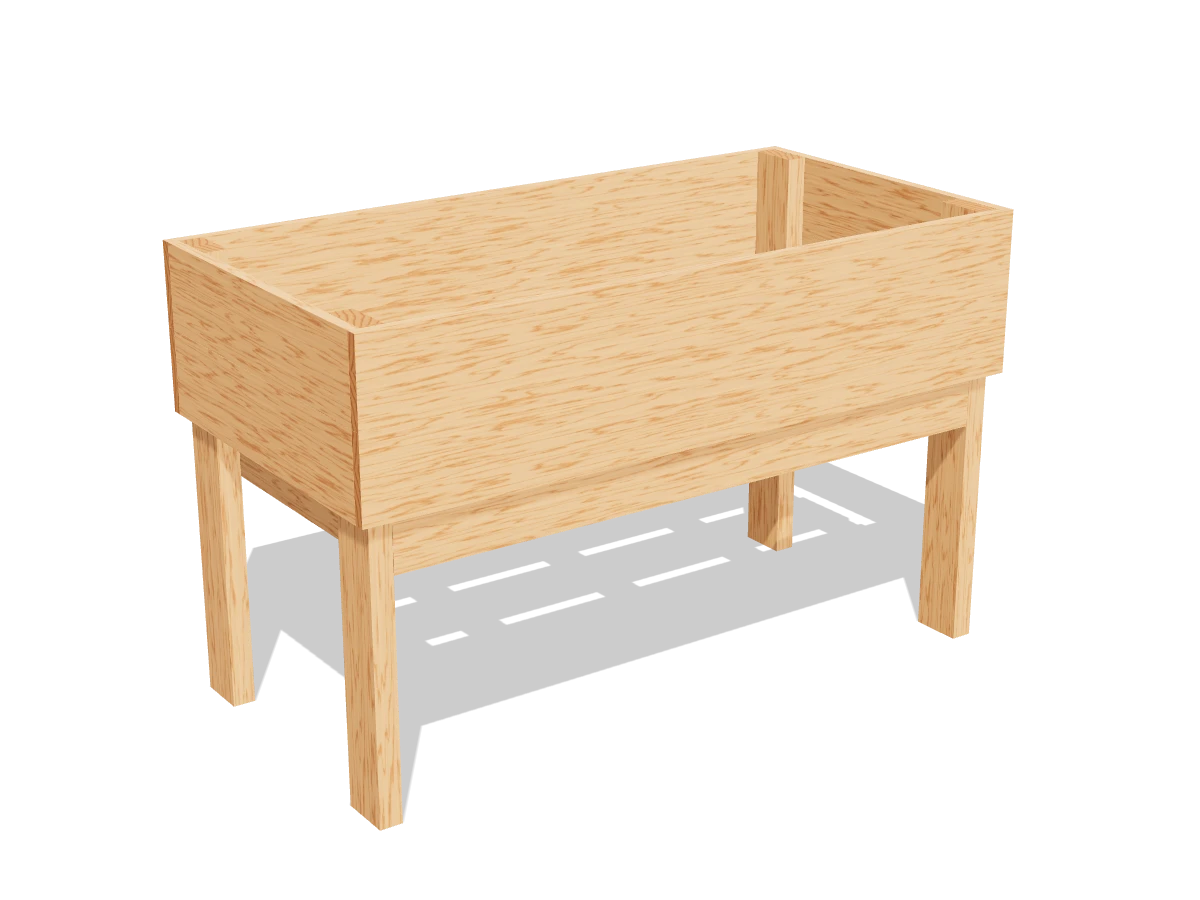
Draft · not yet checked by a carpenterA waist-high cedar planter you can garden at without bending over. The floor is built like a deck because wet soil weighs over 500 lb.
- Skill
- Intermediate
- Build time
- 4 to 6 hours, plus finish
- Lumber
- 4 2x4s and 5 1x6s
- Joinery
- Structural and deck screws
- Finished size
- 48″ L × 24″ W × 30″ H
A 2x4 is actually 1½″ × 3½″ and a 1x6 is ¾″ × 5½″. Every measurement in this plan uses the real size.
Shopping list
- 4Cedar 2x4, 8 ftLegs, rails and supports.
- 4Cedar 1x6, 8 ftSides and floor.
- 1Cedar 1x6, 6 ftSides and floor.
- 283″ structural wood screwsCoated for outdoor use, such as GRK or Spax.
- ~601⅝″ exterior deck screwsCoated or stainless.
- 1Landscape fabricAbout 4 ft × 6 ft, plus staples.
Tools
- Miter saw or circular saw
- Drill/driverWith a ⅛″ bit for pilot holes.
- Staple gun
- Tape measure, pencil
Cut list
| Part | Qty | Size, inches | From |
|---|---|---|---|
| ALegs | 4 | 1½ × 3½ × 30 | 2x4 |
| BFront and back boards | 4 | ¾ × 5½ × 48 | 1x6 |
| CEnd boards | 4 | ¾ × 5½ × 22½ | 1x6 |
| DFloor rails | 2 | 1½ × 3½ × 43½ | 2x4 |
| ECross supports | 5 | 1½ × 3½ × 19½ | 2x4 |
| FFloor slats | 3 | ¾ × 5½ × 43½ | 1x6 |
Board layout. Each row is one board, cut left to right, with the remainder hatched. Dark lines are saw cuts, about ⅛″ wide.
Build it
 01
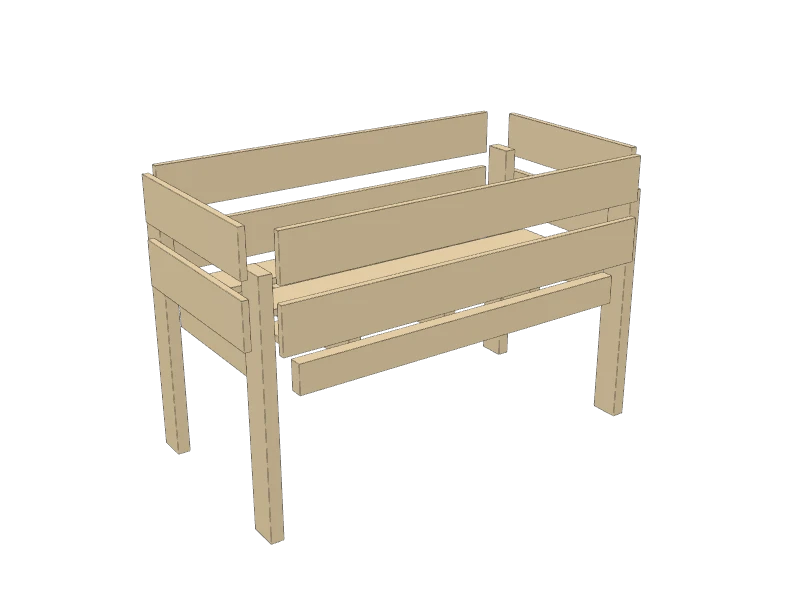
Cut the pieces
Cut every piece on the cut list:
- A Legs, four at 30″
- B Front and back boards, four at 48″
- C End boards, four at 22½″
- D Floor rails, two at 43½″
- E Cross supports, five at 19½″
- F Floor slats, three at 43½″
 02
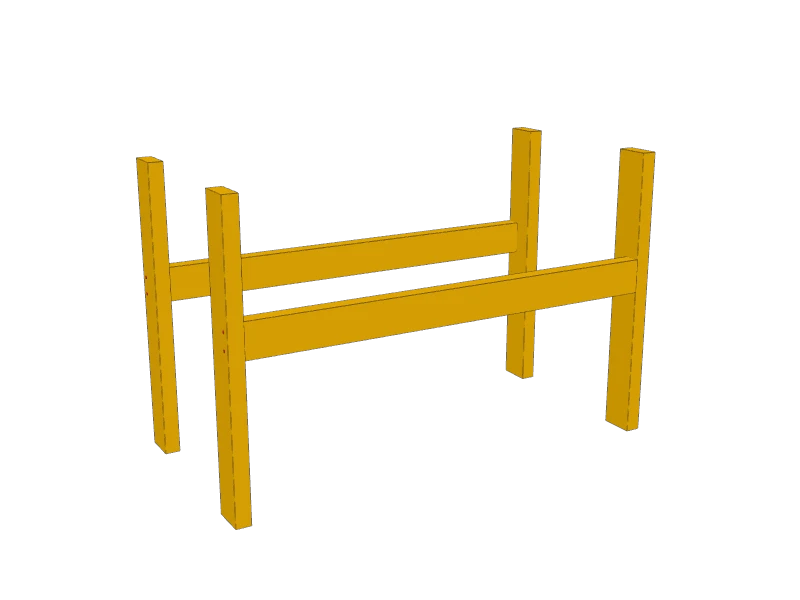
Build the back and front frames
Lay two legs (A) on the bench, narrow faces up, 46½″ apart at the outside. Fit a floor rail (D) between them with its top edge 19″ up from the floor ends. Pre-drill and drive two 3″ structural screws through each leg into the end of the rail. Build the second frame to match.
 03
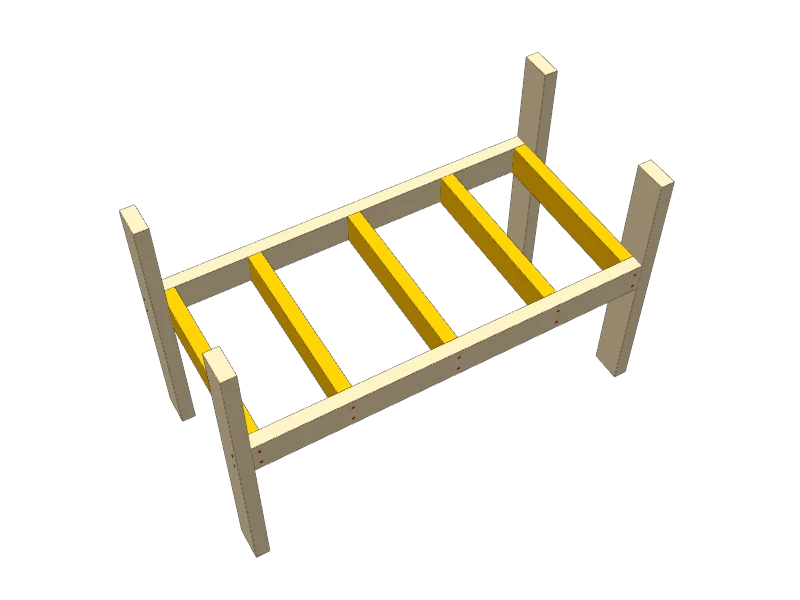
Join the frames with the cross supports
Stand the two frames up and fit the five cross supports (E) between the floor rails, flush with the tops: one tight inside each pair of legs, and three spread across the middle, centered 12½″, 24″ and 35½″ from the left end. Drive two 3″ structural screws through each rail into each support.
TipThese carry most of the soil. Don't skip any, and use structural screws rather than deck screws here.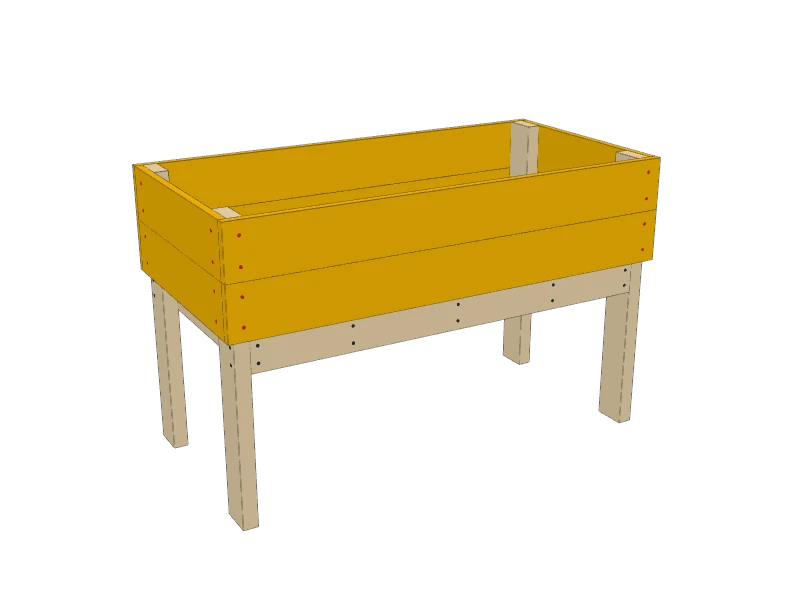 04
Add the side boards
Screw the front and back boards (B) and the end boards (C) to the outside of the legs in two rows, the bottom row with its bottom edge 19″ up from the floor and the top row flush with the leg tops. The front and back boards run past the end boards to close the corners.
 05
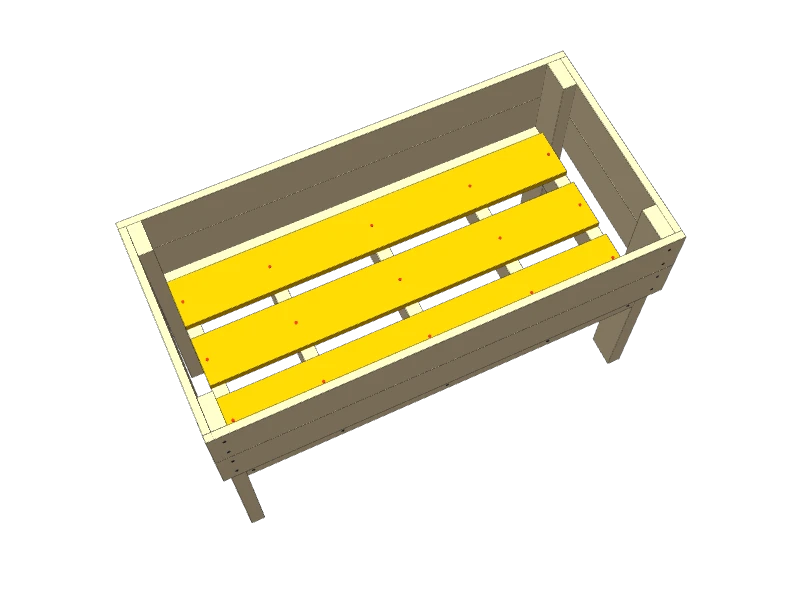
Lay the floor slats
Lay the three floor slats (F) on the rails and supports with even gaps between them, and screw each one down at every support.
 06
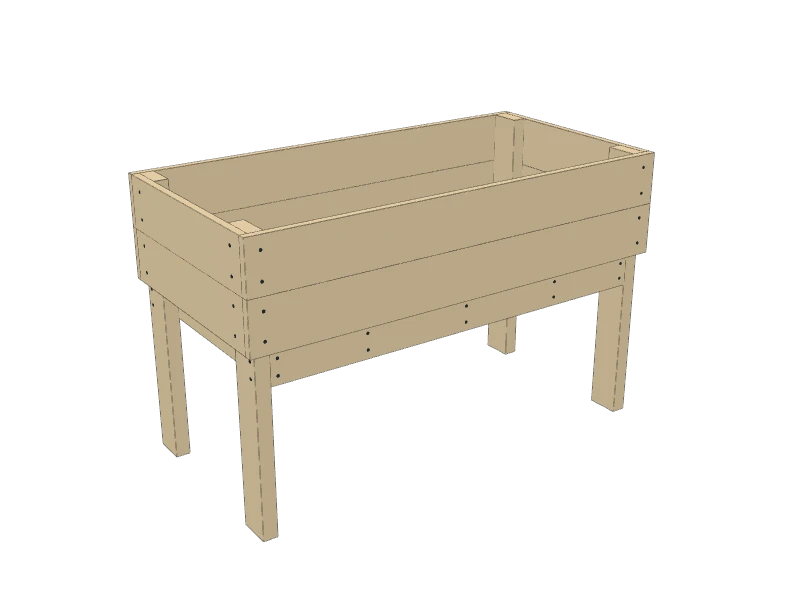
Line and fill
Staple landscape fabric over the floor and up the inside of the sides. Leave the cedar bare outside.
Watch outFull of wet soil this weighs over 500 lb. Set it on level, firm ground or pavers before you fill it, and don't move it full.
Build at your own risk. Check every measurement against your own lumber before you cut, test-fit before you glue, and wear eye and ear protection.