









Farmhouse Bench
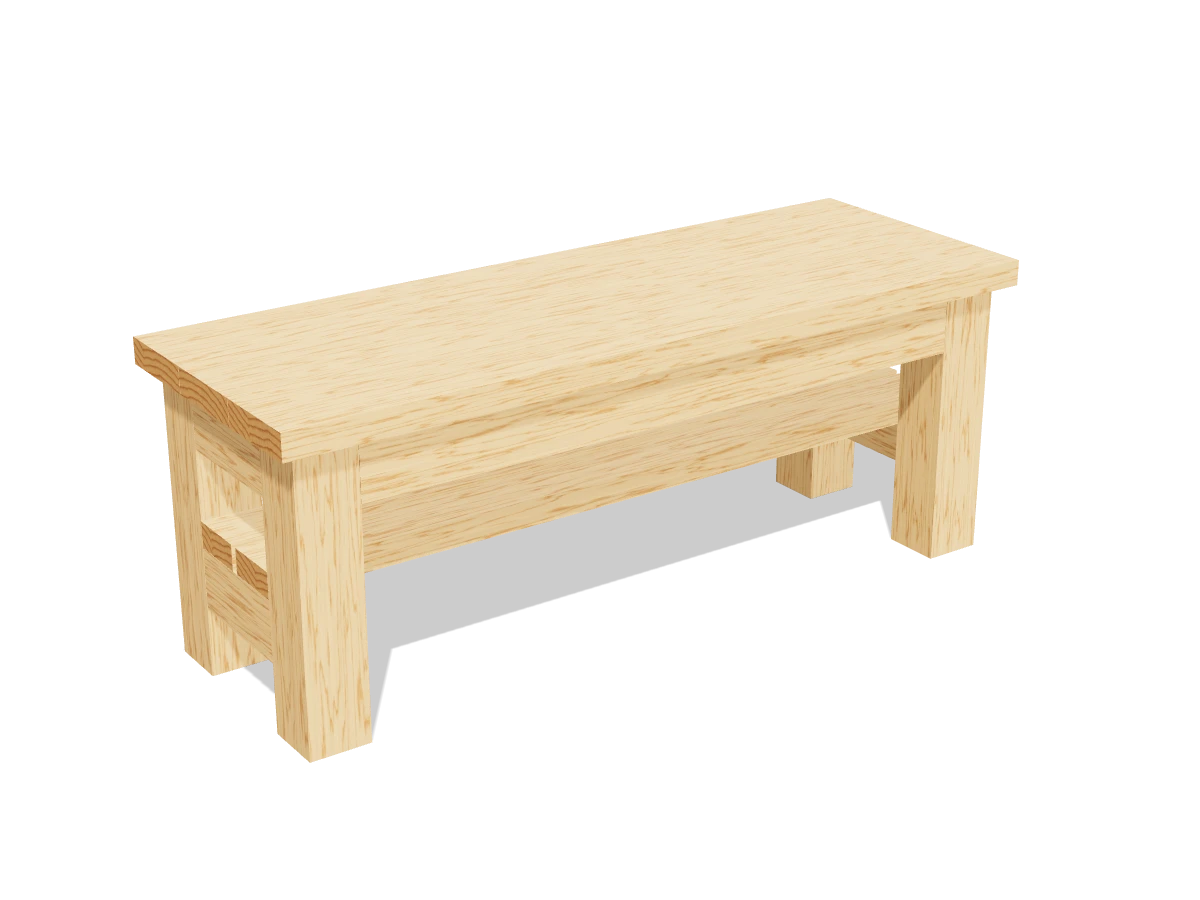
Draft · not yet checked by a carpenterA sturdy bench for the entry or the end of the table: 4x4 legs, a three-plank seat with a brace under the middle, and a shelf for shoes.
- Skill
- Beginner
- Build time
- 4 to 6 hours, plus finish
- Lumber
- 1 4x4, 3 2x4s and 2 2x6s
- Joinery
- Pocket holes
- Finished size
- 47″ L × 16½″ W × 18″ H
A 4x4 is actually 3½″ × 3½″, a 2x4 is 1½″ × 3½″ and a 2x6 is 1½″ × 5½″. Every measurement in this plan uses the real size.
Shopping list
- 14x4, 8 ftFor the legs.
- 32x4, 8 ftAprons, rails, shelf boards and the brace.
- 22x6, 8 ftSeat. Pick the straightest boards in the pile.
- ~602½″ coarse-thread pocket-hole screwsA box of 100 covers it.
- 82½″ wood screwsFor the shelf boards.
- 1Wood glue
- —Sandpaper, 80, 120, 180 and 220 grit
- opt.Stain and a clear topcoat
Tools
- Miter saw or circular sawThe 4x4 legs may take two passes.
- Pocket-hole jigSet for 1½″ material.
- Drill/driver
- ClampsAt least two that open 24″ or more, for the seat.
- Speed square, tape measure, pencil
- Random orbit sander
Cut list
| Part | Qty | Size, inches | From |
|---|---|---|---|
| ALegs | 4 | 3½ × 3½ × 16½ | 4x4 |
| BLong aprons | 2 | 1½ × 3½ × 38 | 2x4 |
| CShort aprons | 2 | 1½ × 3½ × 7½ | 2x4 |
| DShelf rails | 2 | 1½ × 3½ × 7½ | 2x4 |
| ESeat boards | 3 | 1½ × 5½ × 47 | 2x6 |
| FShelf boards | 2 | 1½ × 3½ × 45 | 2x4 |
| GCenter brace | 1 | 1½ × 3½ × 11½ | 2x4 |
Board layout. Each row is one board, cut left to right, with the remainder hatched. Dark lines are saw cuts, about ⅛″ wide.
Build it
 01
Cut all the pieces
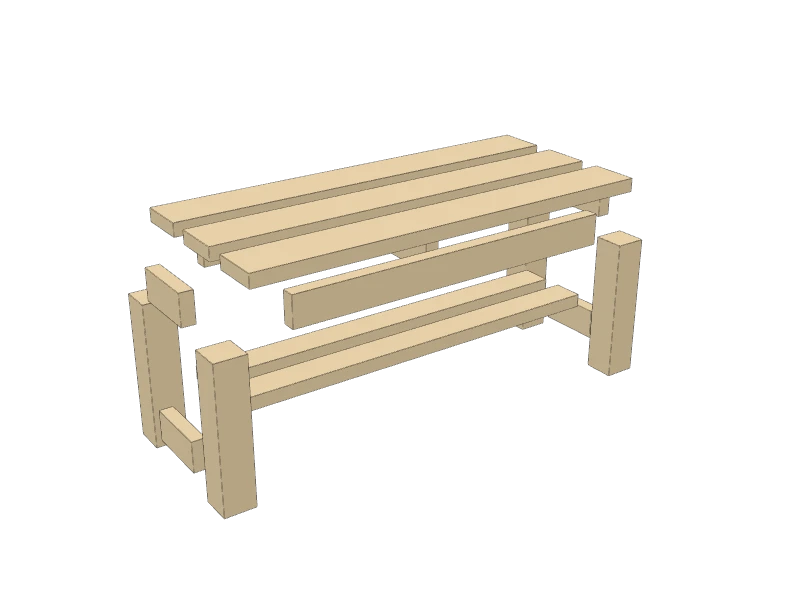
Cut every piece on the cut list. Before you start on the 2x6s, sight down each board and save the straightest for the seat.
- A Legs, four at 16½″ from the 4x4
- B Long aprons, two at 38″
- C Short aprons, two at 7½″
- D Shelf rails, two at 7½″
- E Seat boards, three at 47″
- F Shelf boards, two at 45″
- G Center brace, one at 11½″
Watch outAll four legs must be exactly the same length or the bench will rock. Clamp them side by side and check that the ends line up.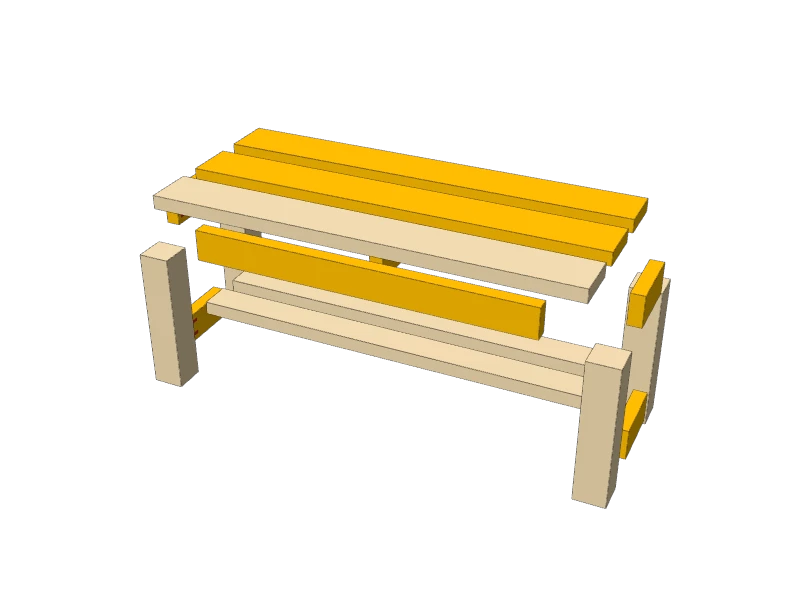 02
Drill the pocket holes
Set your jig for 1½″ material. Drill on the inside faces only, so no holes show on the finished piece:
- B long aprons: 2 at each end, plus 4 along the top edge for attaching the seat
- C short aprons: 2 at each end, plus 1 along the top edge
- D shelf rails: 2 at each end
- G center brace: 2 at each end, plus 2 along the top edge, all on the same face
- E seat boards: 5 along one edge of two boards, starting about 4″ from each end. The last board needs none.
TipMark the inside face of every piece with a big pencil X before you drill. It's easy to drill a show face by mistake.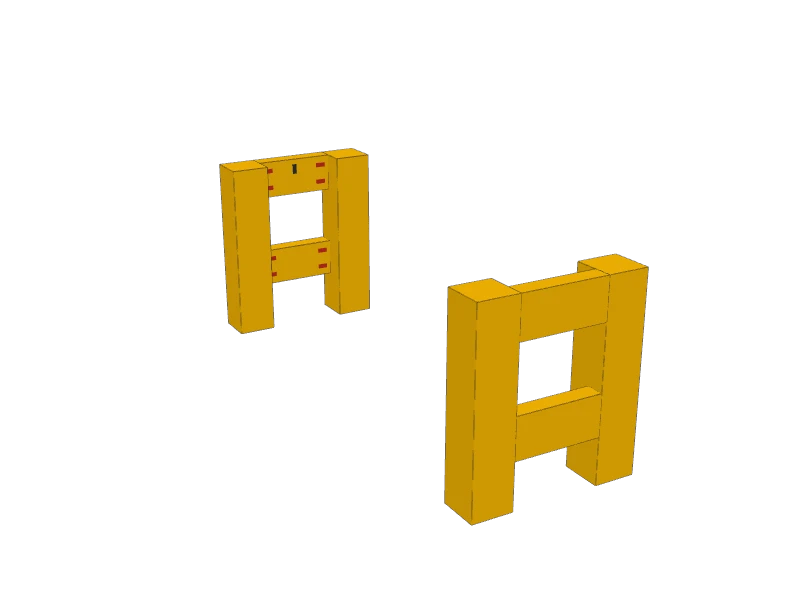 03
Build the two leg ends
Lay two legs (A) on the bench. Fit a short apron (C) between them at the top, flush with the tops and the outside faces of the legs, pocket holes facing in. Glue and drive 2½″ pocket screws.
Fit a shelf rail (D) between the same legs with its bottom edge 4″ up from the bottom of the legs, flush with the outside faces. Then build the second end to match.
TipCut a 4″ scrap block and stand the rail on it while you screw. Both ends come out identical.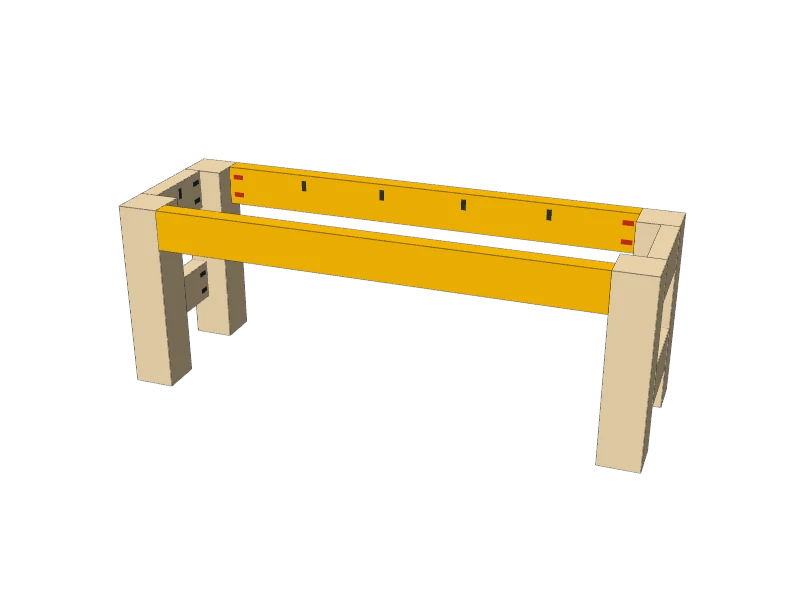 04
Connect the ends with the long aprons
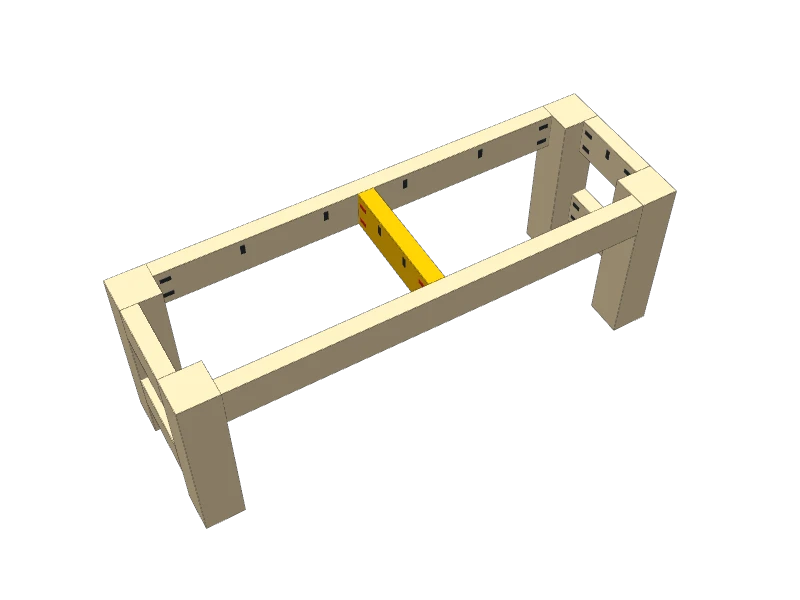
Stand both ends up. Fit the long aprons (B) between them at the top, flush with the tops and outside faces, pocket holes facing in. Glue and screw.
Measure the base corner to corner both ways. When the two diagonals match, it's square. Push on the long corners to adjust before the glue sets.
 05
Add the center brace
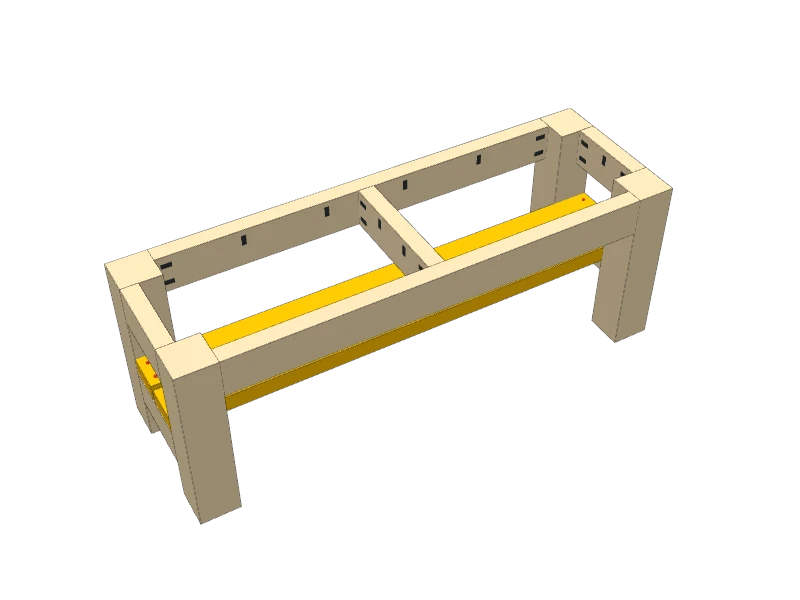
Mark the middle of each long apron, 19″ from either end. Fit the center brace (G) between the aprons on those marks, flush with their top edges, pocket holes facing the same way. Glue and drive 2½″ pocket screws.
The brace holds up the middle of the seat, right where people sit.
 06
Add the shelf boards
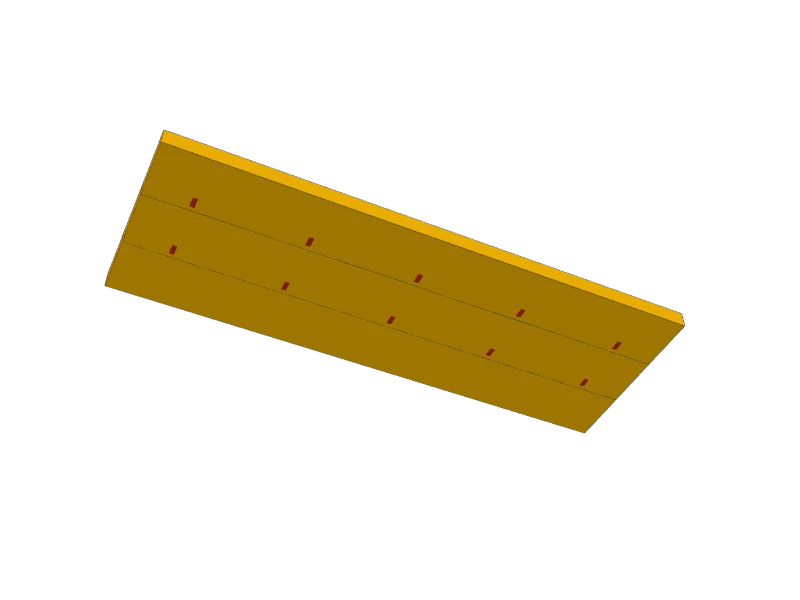
Lay the two shelf boards (F) on the shelf rails, between the legs, with a ½″ gap between them. Keep the ends flush with the outside of the rails.
Pre-drill and drive two 2½″ wood screws through each end of each board into the rails.
 07
Join the seat boards
Lay the three seat boards (E) face down with the pocket holes along the joints. Line up the ends, clamp the boards flat, glue the edges and drive the screws. Work from the middle out.
Watch outClamp across each joint right at the screw you're driving so the faces stay flush. A step between boards means a lot of extra sanding.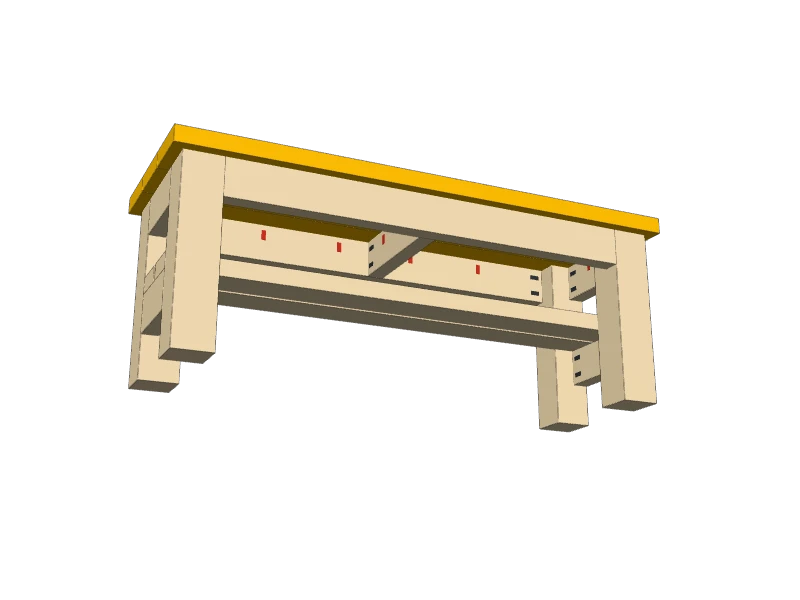 08
Attach the seat
Lay the seat (E) face down on a blanket. Center the base upside down on it, with 1″ of overhang on every side. Drive 2½″ pocket screws through the apron and brace holes into the seat.
TipDon't glue the seat to the base. Solid wood moves a little with the seasons, and screws alone let it.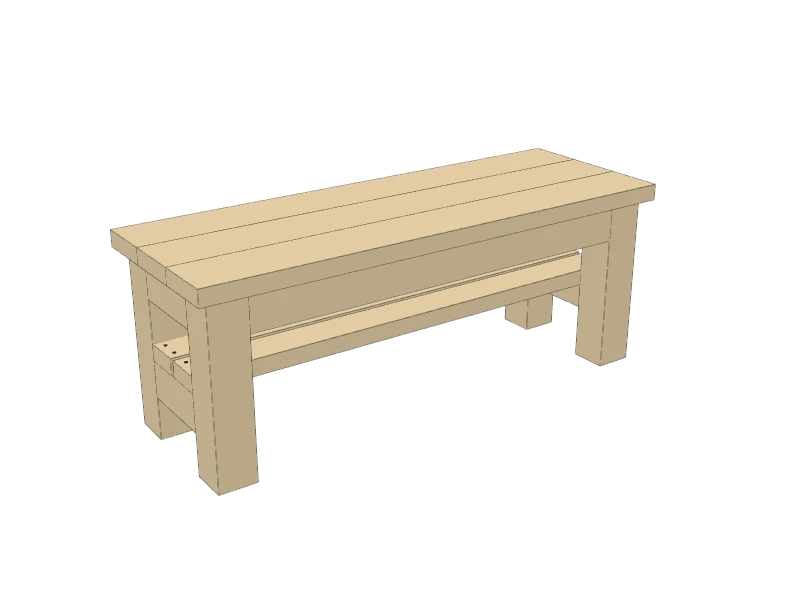 09
Sand and finish
Sand with 80 grit to flatten the seat joints, then 120, then 180. Soften the sharp edges with a few passes of sandpaper.
Wipe off the dust. Stain if you want color, then brush or wipe on two or three coats of a clear topcoat, sanding lightly with 220 between coats.
TipRound over the front edge of the seat a little more than the rest. That edge sits under the backs of people's legs.
Build at your own risk. Check every measurement against your own lumber before you cut, test-fit before you glue, and wear eye and ear protection.