









Farmhouse Dining Table
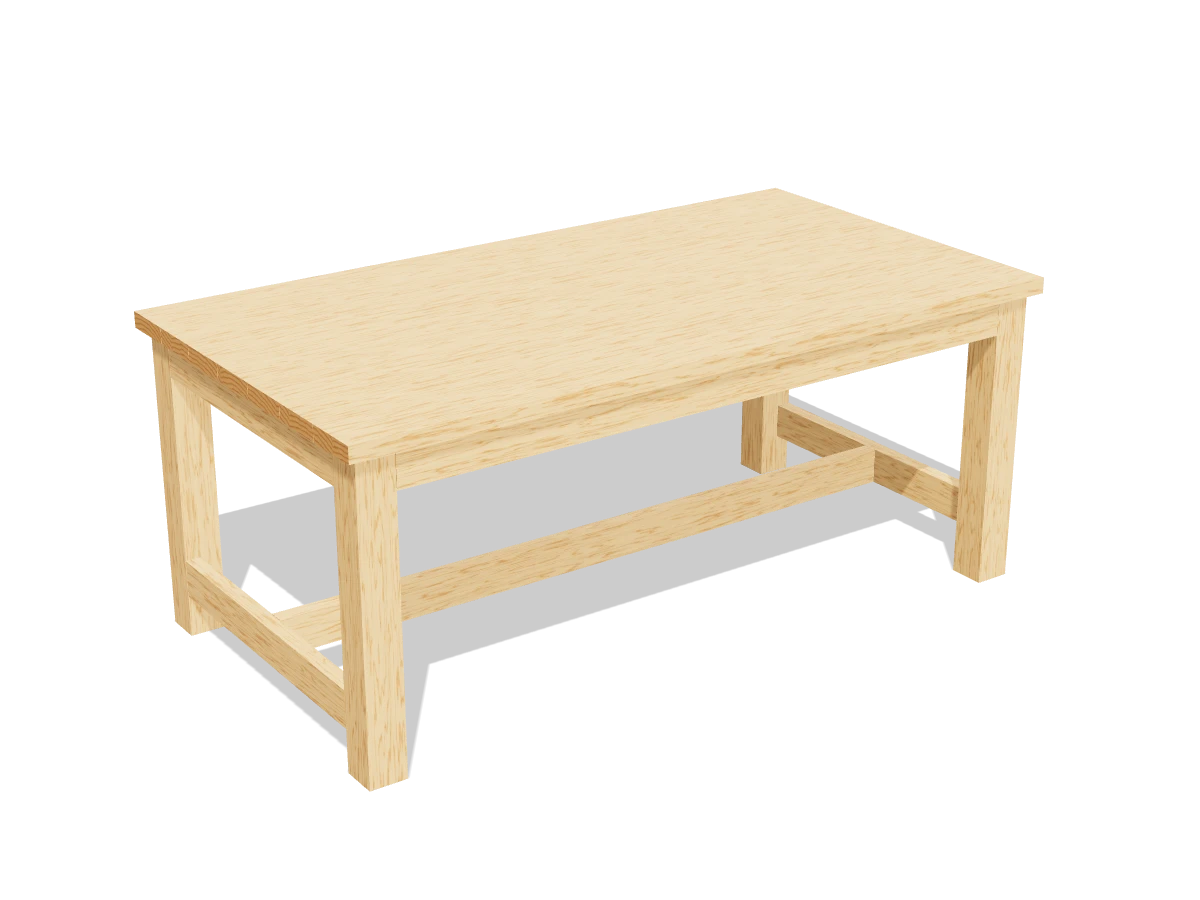
Draft · not yet checked by a carpenterA 6 ft table that seats six: chunky 4x4 legs, a seven-plank top and a low H base that stays out of the way of feet.
- Skill
- Intermediate
- Build time
- 8 to 12 hours, plus finish
- Lumber
- 1 4x4, 5 2x4s and 7 2x6s
- Joinery
- Pocket holes and tabletop clips
- Finished size
- 72″ L × 38½″ W × 30″ H
A 4x4 is actually 3½″ × 3½″, a 2x4 is 1½″ × 3½″ and a 2x6 is 1½″ × 5½″. Every measurement in this plan uses the real size.
Shopping list
- 14x4, 10 ftFor the legs. Two 8 ft 4x4s work too.
- 52x4, 8 ftAprons, rails, the stretcher and the braces.
- 72x6, 8 ftTop. Pick the straightest boards in the pile.
- ~1102½″ coarse-thread pocket-hole screwsA box of 100 covers it.
- 8Tabletop fasteners (figure-8 clips)Each comes with two ⅝″ screws.
- 1Wood glue
- —Sandpaper, 80, 120, 180 and 220 grit
- opt.Stain and a clear topcoat
Tools
- Miter saw or circular sawThe 4x4 legs may take two passes.
- Pocket-hole jigSet for 1½″ material.
- Drill/driver
- ClampsAt least two that open 42″ or more, for the top.
- ¾″ Forstner bitFor the tabletop clip recesses.
- Speed square, tape measure, pencil
- Random orbit sander
Cut list
| Part | Qty | Size, inches | From |
|---|---|---|---|
| ALegs | 4 | 3½ × 3½ × 28½ | 4x4 |
| BLong aprons | 2 | 1½ × 3½ × 63 | 2x4 |
| CShort aprons | 2 | 1½ × 3½ × 29½ | 2x4 |
| DEnd rails | 2 | 1½ × 3½ × 29½ | 2x4 |
| ETop boards | 7 | 1½ × 5½ × 72 | 2x6 |
| FCenter stretcher | 1 | 1½ × 3½ × 67 | 2x4 |
| GCross braces | 2 | 1½ × 3½ × 33½ | 2x4 |
Board layout. Each row is one board, cut left to right, with the remainder hatched. Dark lines are saw cuts, about ⅛″ wide.
Build it
 01
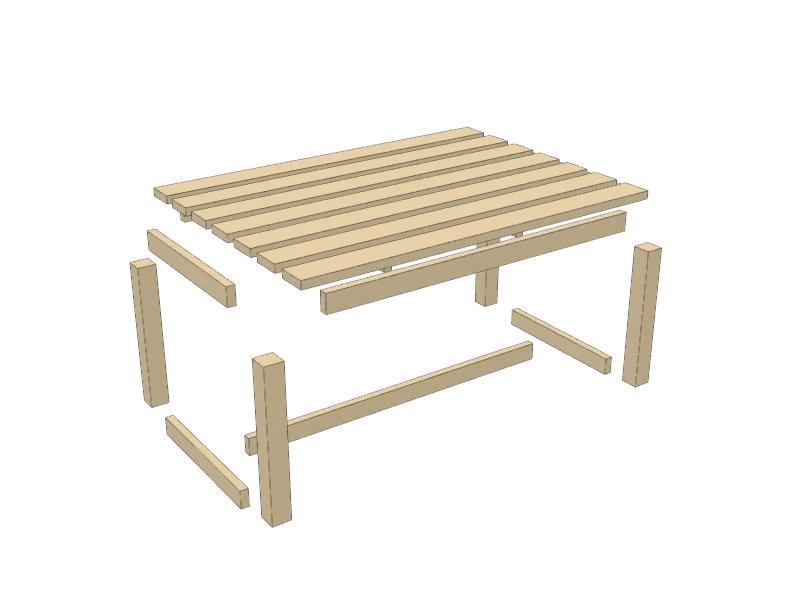
Cut all the pieces
Cut every piece on the cut list. Sight down each 2x6 first and save the straightest ones for the top.
- A Legs, four at 28½″ from the 4x4
- B Long aprons, two at 63″
- C Short aprons, two at 29½″
- D End rails, two at 29½″
- E Top boards, seven at 72″
- F Center stretcher, one at 67″
- G Cross braces, two at 33½″
Watch outAll four legs must be exactly the same length or the table will rock. Clamp them side by side and check that the ends line up.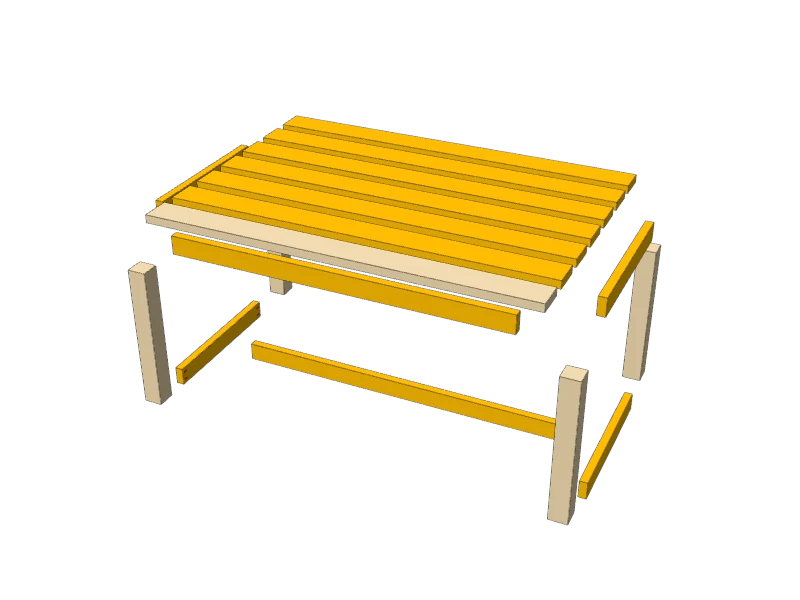 02
Drill the pocket holes
Set your jig for 1½″ material. Drill on the inside faces only, so no holes show on the finished table:
- B long aprons: 2 at each end
- C short aprons: 2 at each end
- D end rails: 2 at each end
- F center stretcher: 2 at each end, on the same face
- G cross braces: 2 at each end, plus 2 on the top edge near the middle, all on the same face
- E top boards: eight along one edge of six boards, starting about 4″ from each end. The last board needs none.
TipMark the inside face of every piece with a big pencil X before you drill. It's easy to drill a show face by mistake.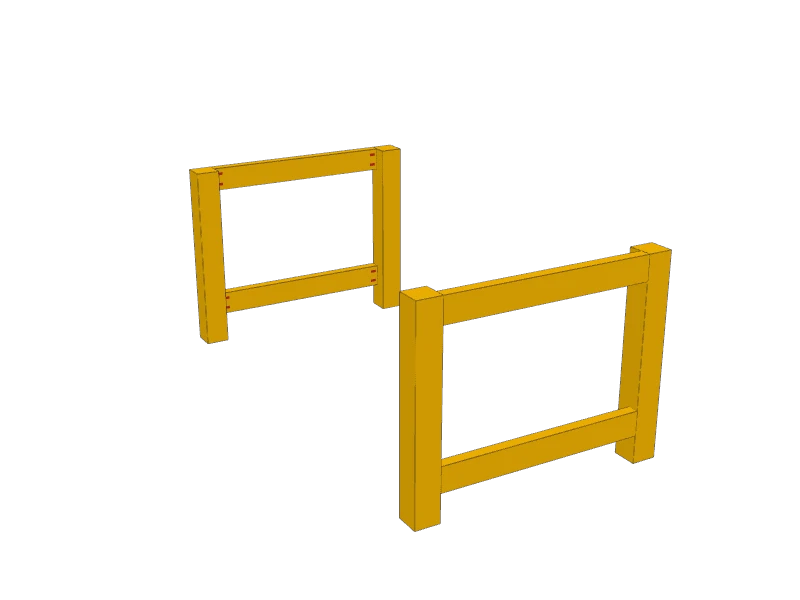 03
Build the two leg ends
Lay two legs (A) on the bench. Fit a short apron (C) between them at the top, flush with the tops and the outside faces of the legs, pocket holes facing in. Glue and drive 2½″ pocket screws.
Fit an end rail (D) between the same legs with its bottom edge 4″ up from the floor ends, flush with the outside faces. Then build the second end to match.
TipCut a 4″ scrap block and stand the rail on it while you screw. Both ends come out identical.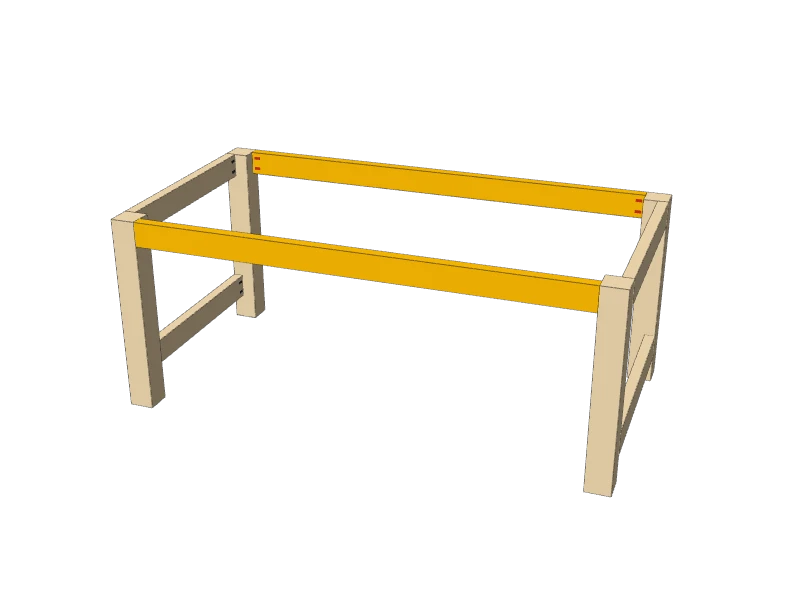 04
Connect the ends with the long aprons
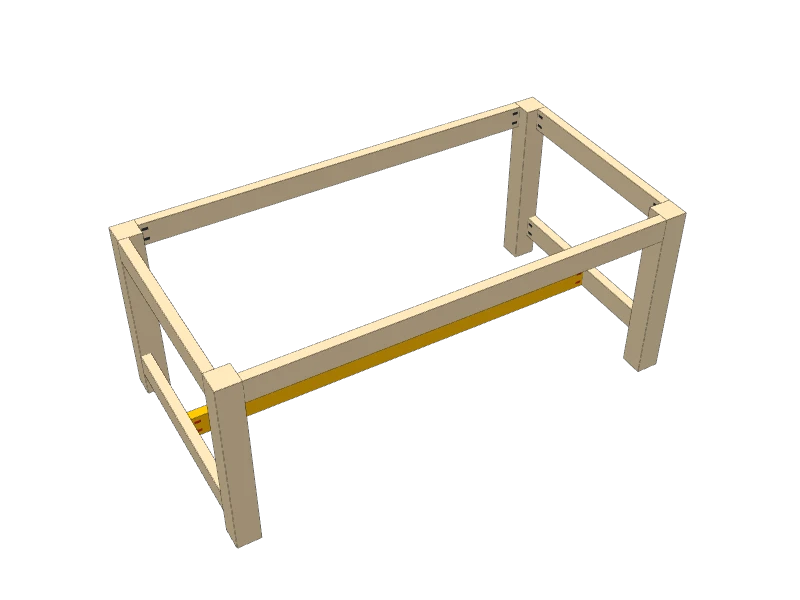
Stand both ends up. Fit the long aprons (B) between them at the top, flush with the tops and outside faces, pocket holes facing in. Glue and screw.
Measure the base corner to corner both ways. When the two diagonals match, it's square.
 05
Add the center stretcher
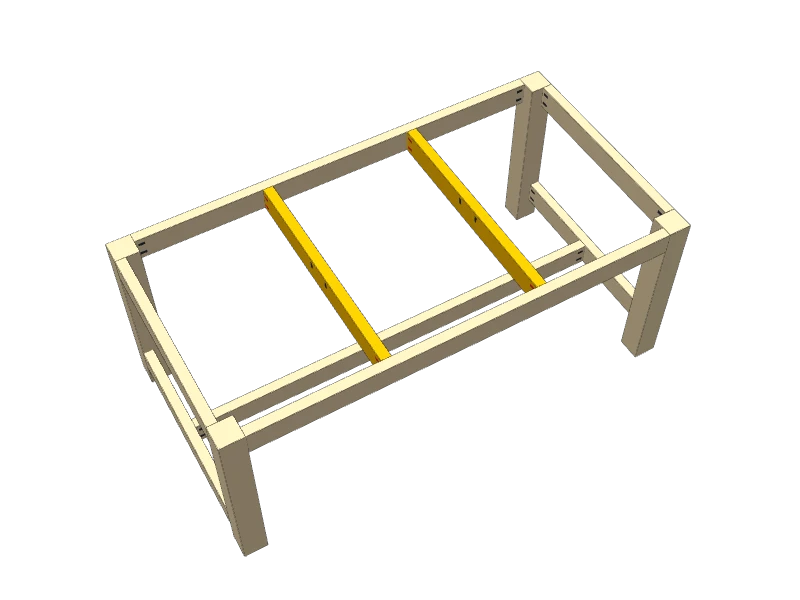
Mark the middle of each end rail, 14¾″ from either side. Fit the center stretcher (F) between the end rails on those marks, flush with the rails top and bottom, pocket holes on the side. Glue and drive 2½″ pocket screws.
The rails and stretcher make an H low down. It keeps the legs from racking, and it sits in the middle where it stays clear of feet.
 06
Add the cross braces
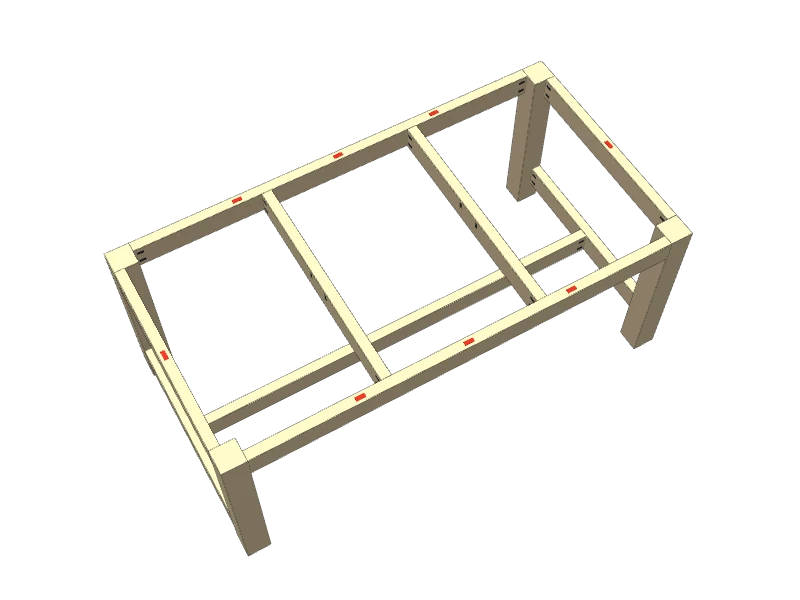
Measure 22⅝″ in from the outside of each end leg and draw a line across the top of both long aprons. Set a cross brace (G) just inside each line, between the long aprons, flush with their top edges and with the top pocket holes facing up. Glue and drive 2½″ pocket screws through the end holes.
The braces hold up the middle of the long top boards, and they are the only place the top is screwed down tight.
 07
Fit the tabletop fasteners
Set eight tabletop fasteners (figure-8 clips) on the top edges of the aprons: three along each long apron and one in the middle of each short apron.
For each one, drill a ⅛″ deep recess with a ¾″ Forstner bit in the top edge, centered about ½″ in from the inside face, so the clip sits flush. Screw one end of the clip into the recess with a ⅝″ screw, and turn the free end so it points in, past the inside of the apron.
TipA solid top this wide grows and shrinks almost ⅜″ across its width between summer and winter. The clips let it move. Screws through the side aprons would hold it tight, and it could crack.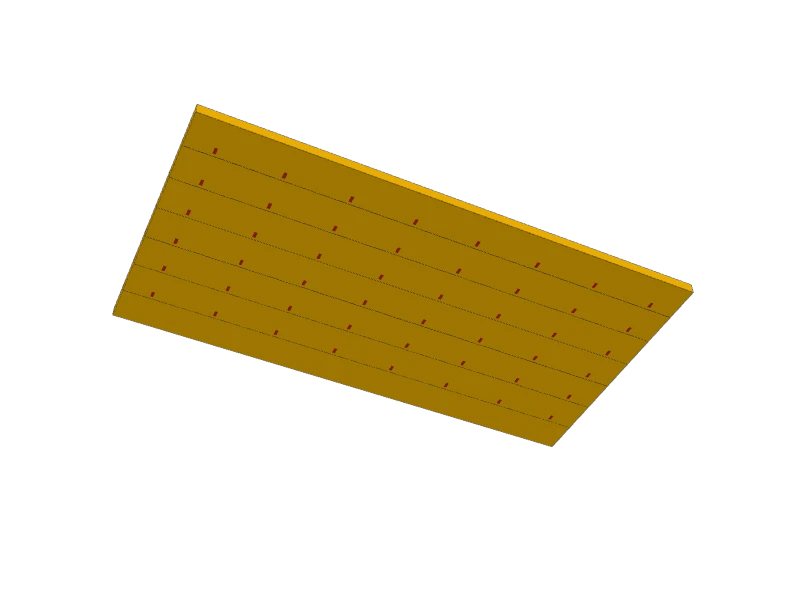 08
Join the top boards
Lay the seven top boards (E) face down with the pocket holes along the joints. Line up the ends, clamp the boards flat, glue the edges and drive the screws. Work from the middle out.
Watch outClamp across each joint right at the screw you're driving so the faces stay flush. A step between boards means a lot of extra sanding.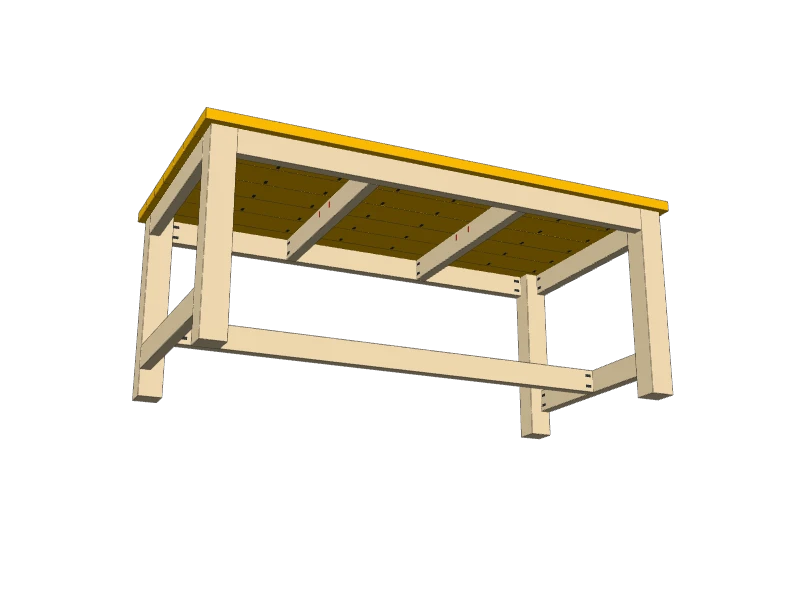 09
Attach the top
Lay the top (E) face down on a blanket. Center the base upside down on it, with 1″ of overhang on every side. Drive 2½″ pocket screws through the holes on top of the cross braces. Then screw the free end of each tabletop clip to the top with a ⅝″ screw.
Watch outNo glue between the top and the base, and no screws through the aprons. The braces fix the middle, and the clips let the edges move.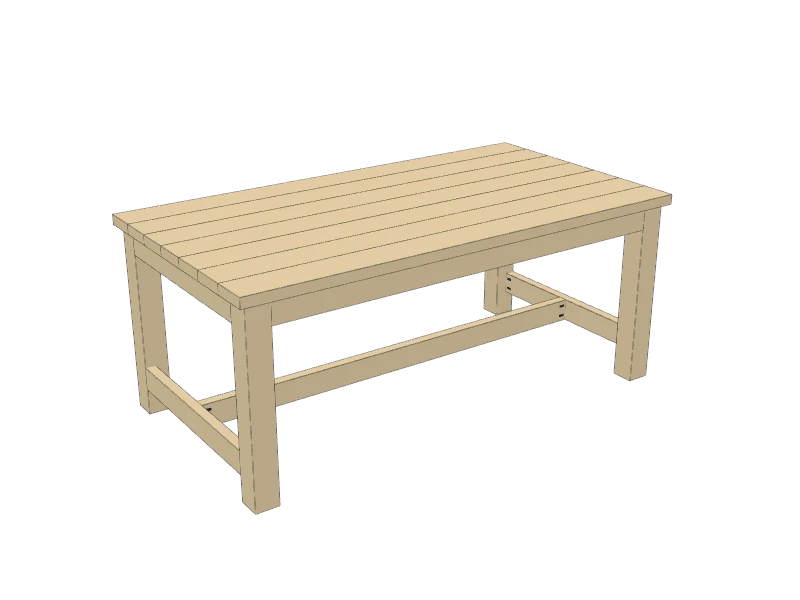 10
Sand and finish
Sand with 80 grit to flatten the top joints, then 120, then 180. Round over every edge people touch.
Wipe off the dust. Stain if you want color, then brush on three coats of a durable clear topcoat, sanding lightly with 220 between coats. A dining table gets spills and hot dishes, so pick a polyurethane or a hardwax oil made for tabletops.
TipTest your stain on an offcut from the same boards first. Pine soaks it up unevenly, and a pre-stain conditioner helps.
Build at your own risk. Check every measurement against your own lumber before you cut, test-fit before you glue, and wear eye and ear protection.