









Farmhouse Nightstand
Draft · not yet checked by a carpenterA bedside table with one drawer on smooth metal slides and an open shelf below. 2x2 legs, a two-plank top and a plywood case.
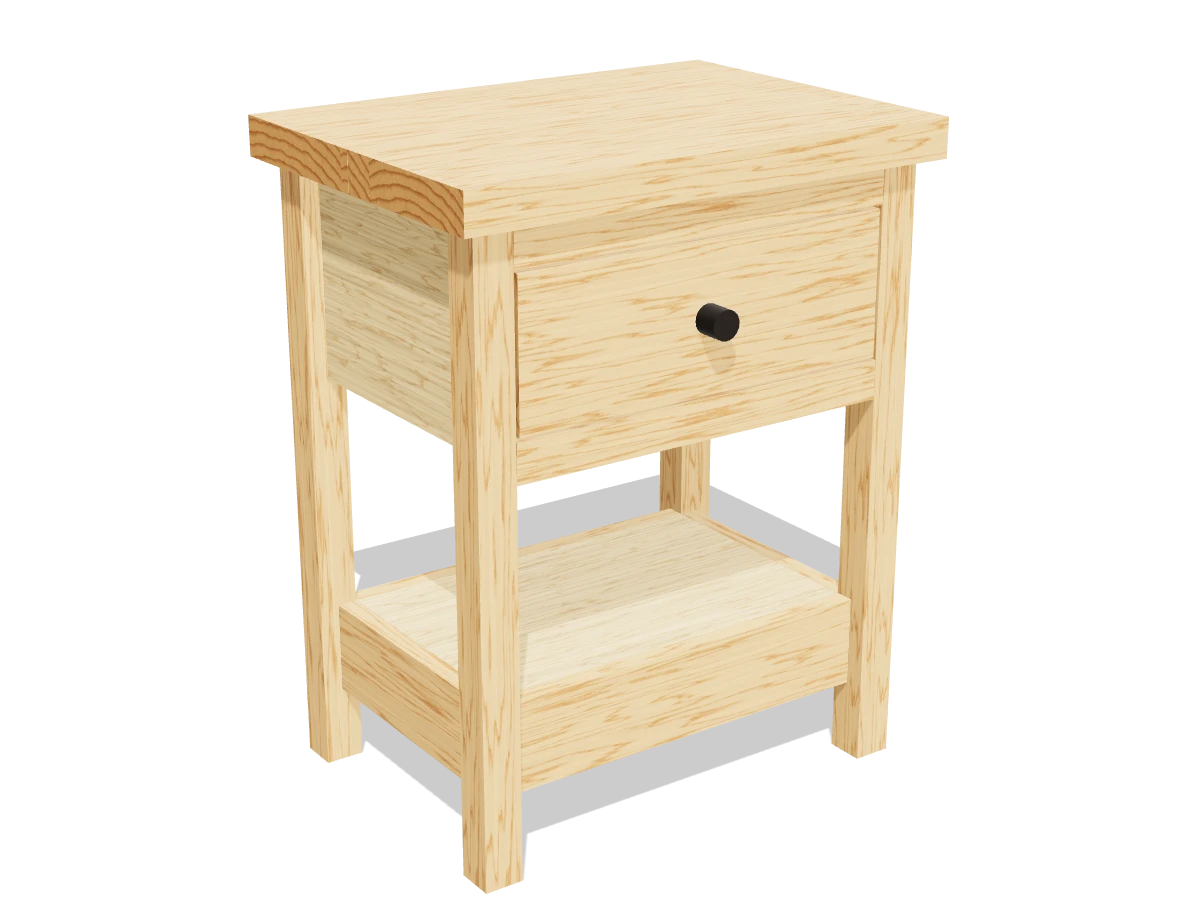
- Skill
- Intermediate
- Build time
- 6 to 9 hours, plus finish
- Lumber
- 1 2x2, 1 1x4, 1 1x2, 1 2x8, 1 1x6, 1 panel of ¾″ plywood and 1 panel of ¼″ plywood
- Joinery
- Pocket holes, brads and drawer slides
- Finished size
- 20″ L × 14½″ W × 25″ H
A 2x2 is actually 1½″ × 1½″, a 1x4 is ¾″ × 3½″, a 1x2 is ¾″ × 1½″, a 2x8 is 1½″ × 7¼″ and a 1x6 is ¾″ × 5½″. Every measurement in this plan uses the real size. ¾″ plywood and ¼″ plywood are drawn at full thickness, but plywood sold that way is often a hair thinner, so measure yours and cut the pieces that fit between panels to match.
Shopping list
- 12x2, 8 ftFor the legs. Sight down it and pick a straight one.
- 11x4, 6 ftLow rails.
- 11x2, 6 ftFace rails.
- 12x8, 8 ftFor the top.
- 11x6, 6 ftDrawer front. Pick a clear, flat piece.
- 1¾″ plywood, 2 × 4 ft panelCase panels, shelves and the drawer box.
- 1¼″ plywood, 2 × 4 ft panelDrawer bottom.
- 1 pair10″ side-mount ball-bearing drawer slidesThey need ½″ on each side of the drawer. Screws come with them.
- ~601¼″ coarse-thread pocket-hole screws
- 82½″ coarse-thread pocket-hole screwsFor joining the top boards.
- ~101¼″ brad nails or wood screwsFor the drawer box corners.
- ~20¾″ brad nailsFor the drawer bottom.
- 41¼″ wood screwsDrawer front to box.
- 1Drawer knobWith a 1¾″ screw.
- 1Wood glue
- 1Double-sided tapeFor placing the drawer front.
- —Sandpaper, 120 and 180 grit
- opt.Paint, stain and a clear topcoat
Tools
- Circular sawWith a straight board clamped on as a guide, for the plywood.
- Miter sawOr the circular saw, for the boards.
- Pocket-hole jigSet for ¾″ material, and 1½″ for the top boards.
- Drill/driver
- Brad nailerOptional: a hammer and pilot holes work too.
- ClampsTwo that open 24″ or more.
- Speed square, tape measure, pencil
- Random orbit sander
Cut list
| Part | Qty | Size, inches | From |
|---|---|---|---|
| ALegs | 4 | 1½ × 1½ × 23½ | 2x2 |
| BFront and back low rails | 2 | ¾ × 3½ × 15½ | 1x4 |
| CSide low rails | 2 | ¾ × 3½ × 10 | 1x4 |
| DFace rails | 2 | ¾ × 1½ × 15½ | 1x2 |
| ETop boards | 2 | 1½ × 7¼ × 20 | 2x8 |
| FDrawer front | 1 | ¾ × 5½ × 15¼ | 1x6 |
| GSide panels | 2 | ¾ × 8 × 10 | ¾″ plywood |
| HBack panel | 1 | ¾ × 8 × 15½ | ¾″ plywood |
| JDrawer shelf | 1 | ¾ × 10¾ × 15½ | ¾″ plywood |
| KBottom shelf | 1 | ¾ × 10 × 15½ | ¾″ plywood |
| LDrawer box sides | 2 | ¾ × 4¼ × 10 | ¾″ plywood |
| MDrawer box front and back | 2 | ¾ × 4¼ × 13 | ¾″ plywood |
| NDrawer bottom | 1 | ¼ × 10 × 14½ | ¼″ plywood |
Board layout. Each row is one board, cut left to right, with the remainder hatched. Dark lines are saw cuts, about ⅛″ wide.
Build it
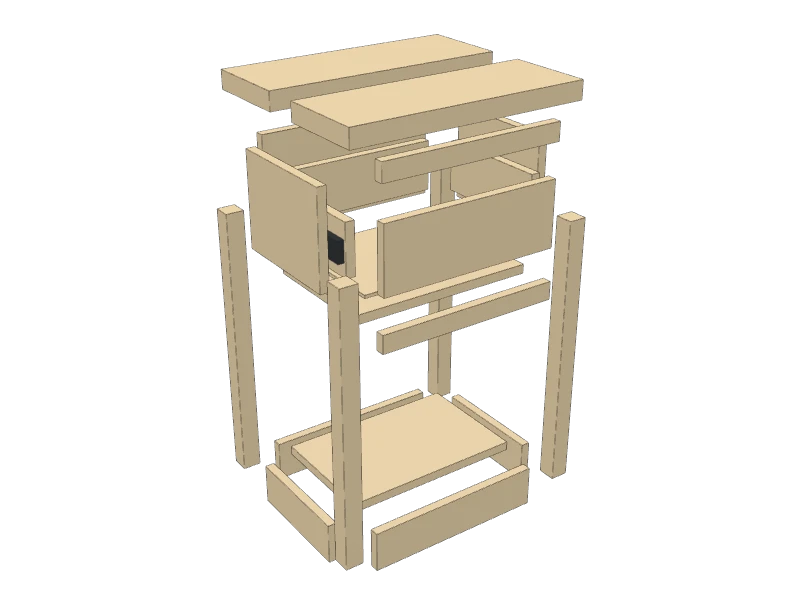 01
Cut the pieces
Cut every piece on the cut list. The plywood pieces come from one panel of ¾″ plywood and a small piece of ¼″ plywood:
- A Legs, four at 23½″
- B Front and back low rails, two at 15½″
- C Side low rails, two at 10″
- D Face rails, two at 15½″
- E Top boards, two at 20″
- F Drawer front, one at 15¼″
- G Side panels, two at 8″ × 10″
- H Back panel, one at 8″ × 15½″
- J Drawer shelf, one at 10¾″ × 15½″
- K Bottom shelf, one at 10″ × 15½″
- L Drawer box sides, two at 4¼″ × 10″
- M Drawer box front and back, two at 4¼″ × 13″
- N Drawer bottom, one at 10″ × 14½″
TipMost stores will cut plywood for you. Show them the sheet layout below and ask for the long cuts, then cut the pieces to length at home. For clean edges with a circular saw, clamp a straight board to the panel as a guide.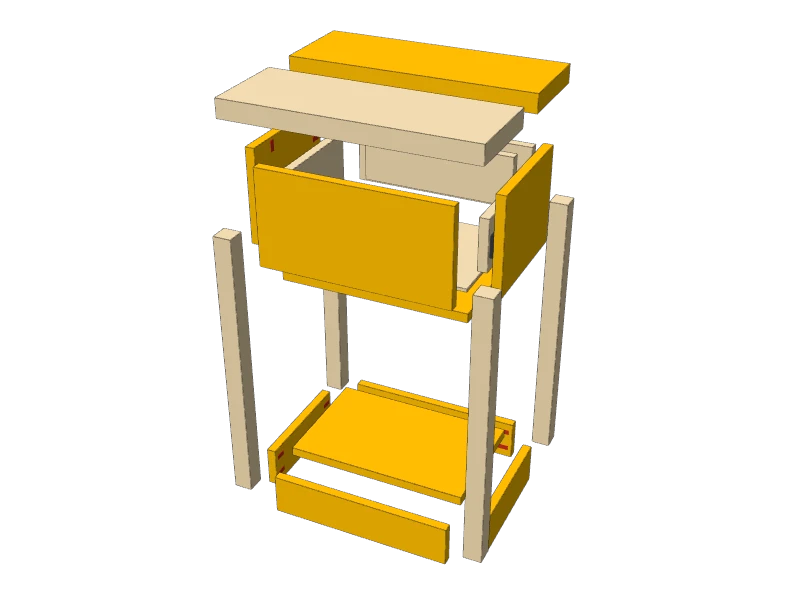 02
Drill the pocket holes
Set your jig for ¾″ material. Drill on the faces that go inside the case, so no holes show:
- G side panels and H back panel: 2 at each end, plus 2 along the top edge for the top
- B and C low rails: 2 at each end
- D face rails: 1 at each end, on the back face
- J drawer shelf: 2 along each side edge and 2 along the back edge, on the underside
- K bottom shelf: 2 along every edge, on the underside
- E top boards: reset the jig for 1½″ and drill 2 along one edge of one board
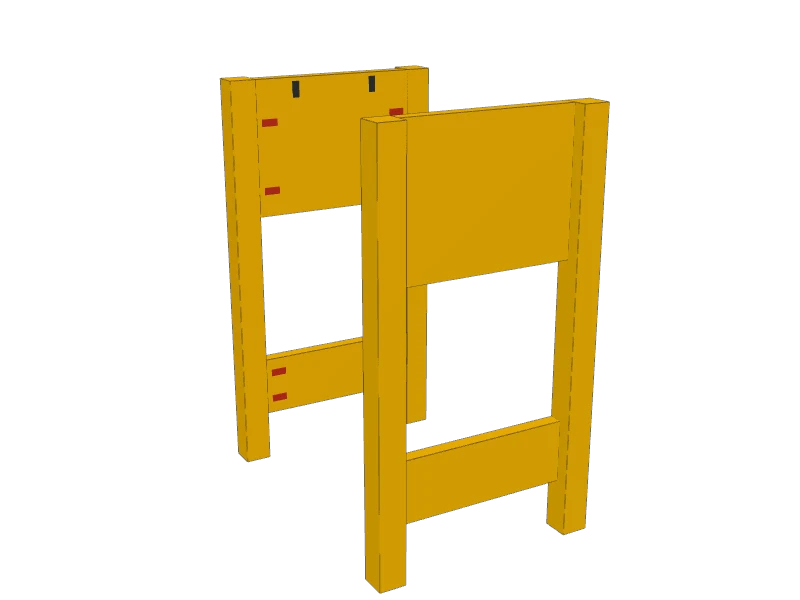 03
Build the two sides
Lay a front and a back leg (A) on the bench, inside faces up. Fit a side panel (G) between them at the top, with its top edge flush with the leg tops and its inside face flush with the inside faces of the legs. That leaves a ¾″ step on the outside. Glue and drive 1¼″ pocket screws.
Fit a side low rail (C) between the same legs with its bottom edge 3″ up from the floor ends, lined up with the panel. Build the second side to match.
TipLay a scrap of ¾″ plywood under each panel and rail while you screw. It holds them at the right step from the outside of the legs.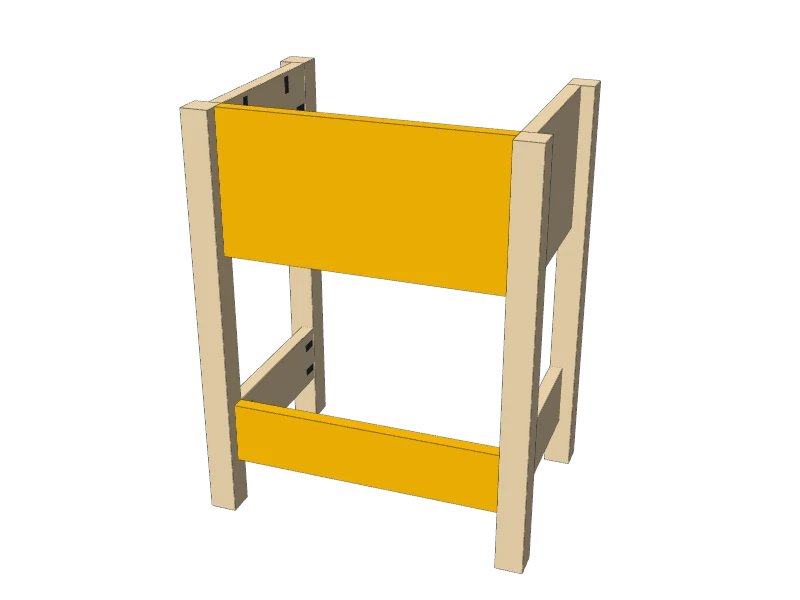 04
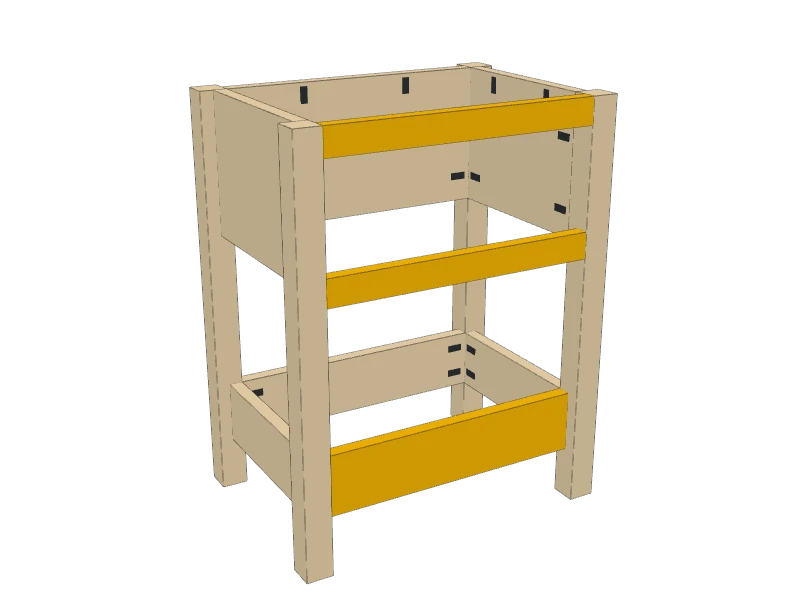
Join the sides at the back
Stand the sides up. Fit the back panel (H) between the back legs at the top and the back low rail (B) at the bottom, both set in ¾″ like the sides. Glue and screw.
Measure the case corner to corner across the top. When the diagonals match, it's square.
 05
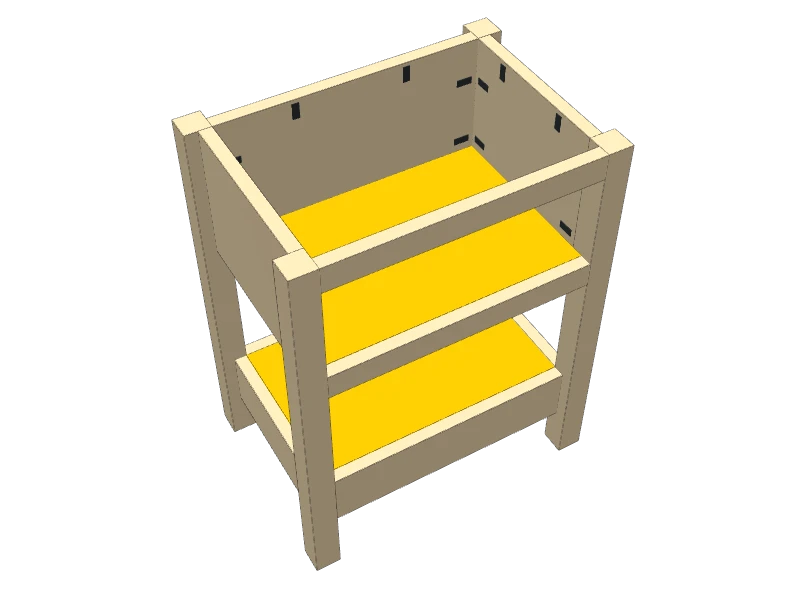
Add the front rails
Fit the top face rail (D) between the front legs, flush with the leg tops and the front faces. Fit the second face rail (D) with its top edge 7¼″ down from the leg tops. That leaves a 5¾″ opening for the drawer.
Fit the front low rail (B) between the front legs, set in ¾″ and lined up with the side low rails.
 06
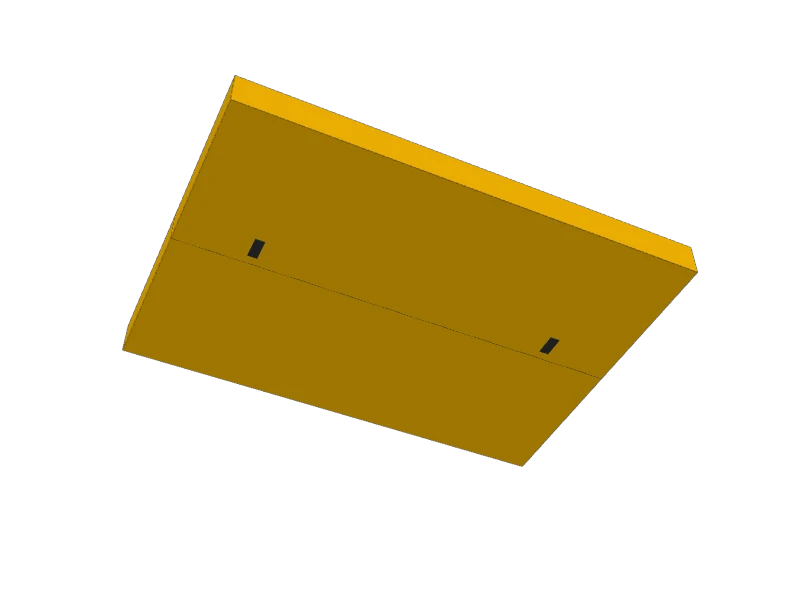
Add the drawer shelf and bottom shelf
Drop the drawer shelf (J) in between the side panels, resting on the back of the lower face rail and flush with its top edge. Drive 1¼″ pocket screws up into the side panels and the back panel.
Fit the bottom shelf (K) between the low rails, flush with their top edges, and screw it to all four rails from below.
 07
Join the top boards
Lay the two top boards (E) face down with the pocket holes along the joint. Line up the ends, clamp them flat, glue the edges and drive 2½″ pocket screws.
 08
Attach the top
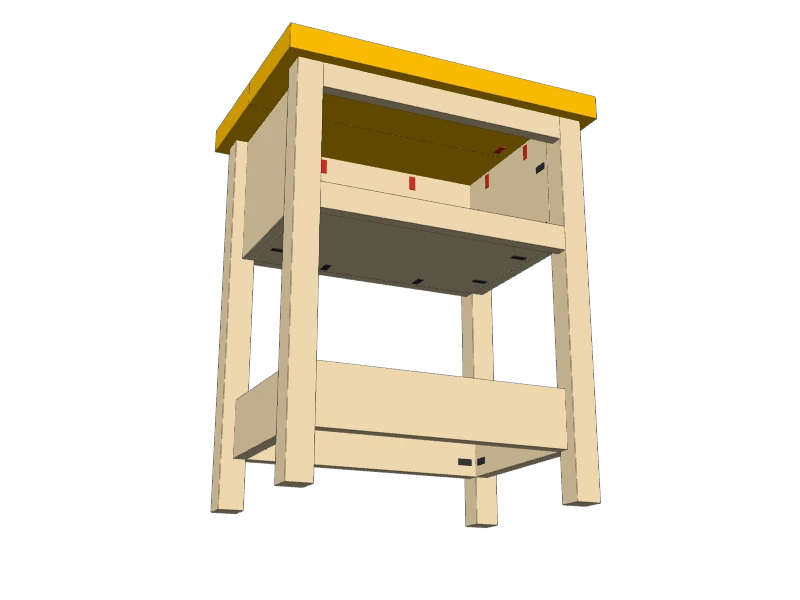
Lay the top (E) face down on a blanket. Set the case upside down on it, with ¾″ of overhang on every side. Drive 1¼″ pocket screws through the holes along the top edges of the side and back panels.
 09
Build the drawer box
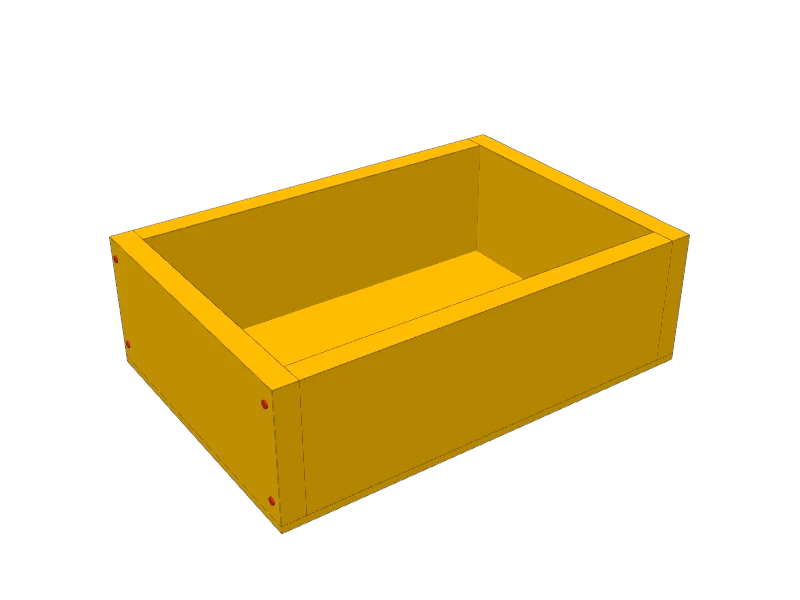
Glue the box front and back (M) between the drawer box sides (L), flush at the top and the ends. Drive two 1¼″ brad nails through the sides into each end, or pre-drill and use 1¼″ screws.
Check that the box is square, then glue and nail the drawer bottom (N) to the bottom edges with ¾″ brads. The bottom holds the box square while the glue dries.
Watch outThe box has to be exactly 14½″ wide outside. The slides need ½″ on each side, and they won't run if it's wider.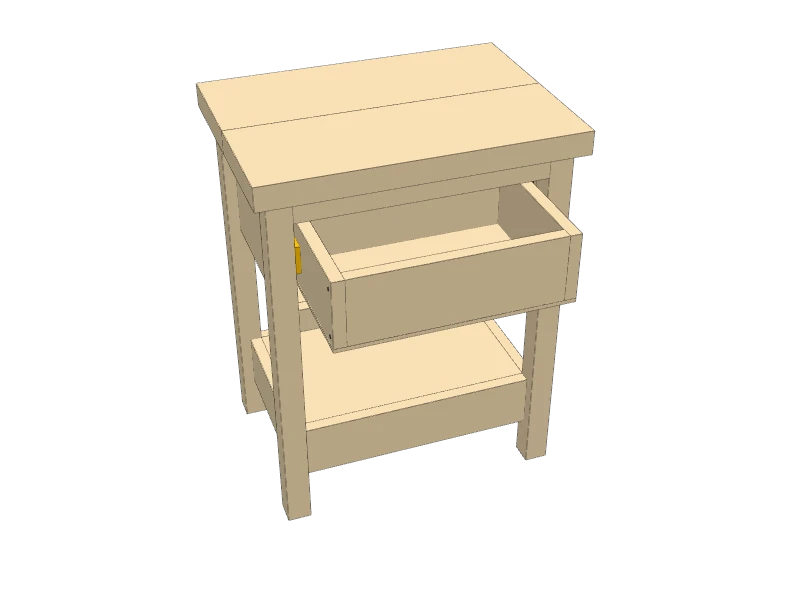 10
Mount the slides and the drawer
Pull each slide apart into its two halves. Screw the case half to the side panel with its bottom edge 2″ above the drawer shelf and its front end flush with the back of the face rails.
Screw the drawer half to the box side, 1¼″ up from the bottom edge of the side and flush with the box front. Slide the drawer in and check that it runs smoothly.
 11
Attach the drawer front
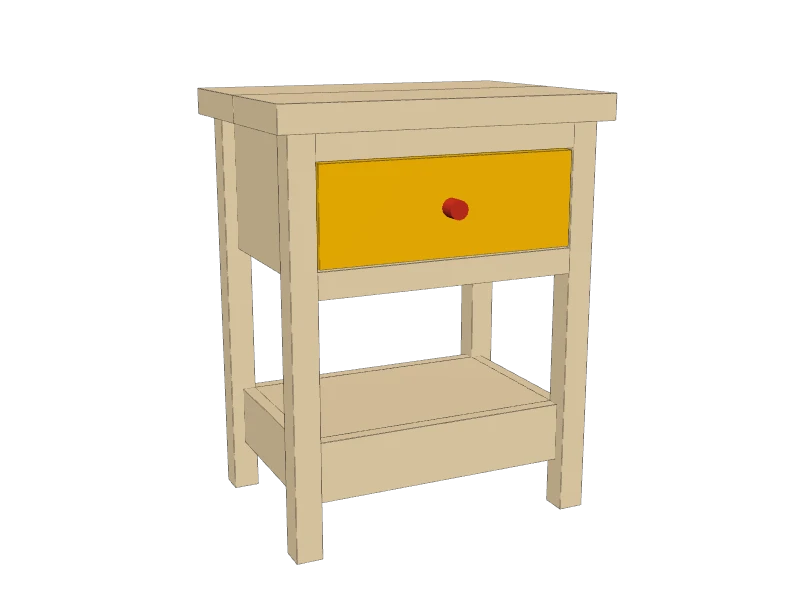
Set the drawer front (F) in the opening on two ⅛″ spacers, with an even gap at each side, and hold it in place with two strips of double-sided tape on the box front. Open the drawer carefully and drive four 1¼″ screws from inside the box into the drawer front.
Drill a hole for the knob in the center of the drawer front, through the box front too.
TipThe drawer front and box front together are 1½″ thick, so buy a knob with a 1¾″ screw, or a longer screw to fit the knob you like.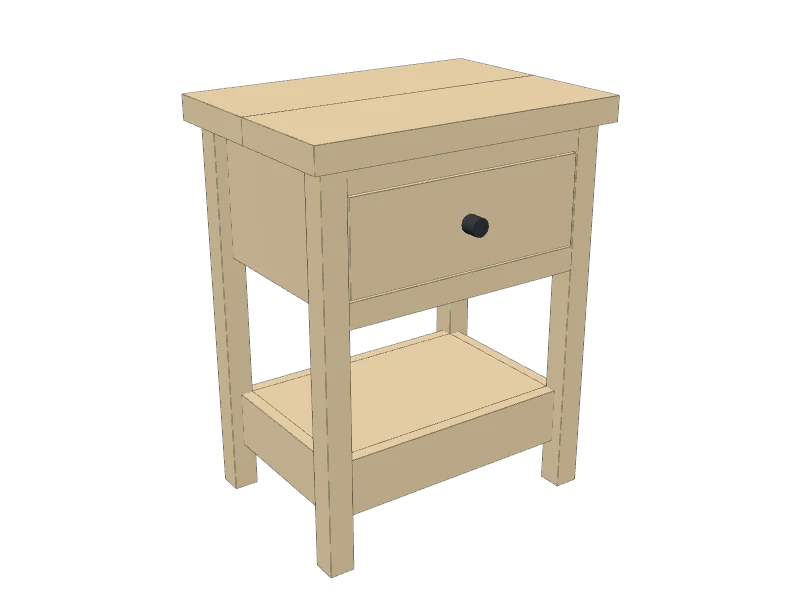 12
Sand and finish
Take the drawer out. Sand with 120 grit, then 180, and soften every edge. Fill any voids in the plywood edges with wood filler first.
Stain or paint the case and top, and give everything two coats of a clear topcoat. Put the drawer back once it's dry.
TipA two-tone look suits a farmhouse piece: paint the case and legs, and stain the top and drawer front.
Build at your own risk. Check every measurement against your own lumber before you cut, test-fit before you glue, and wear eye and ear protection.