









Electric Fireplace TV Stand
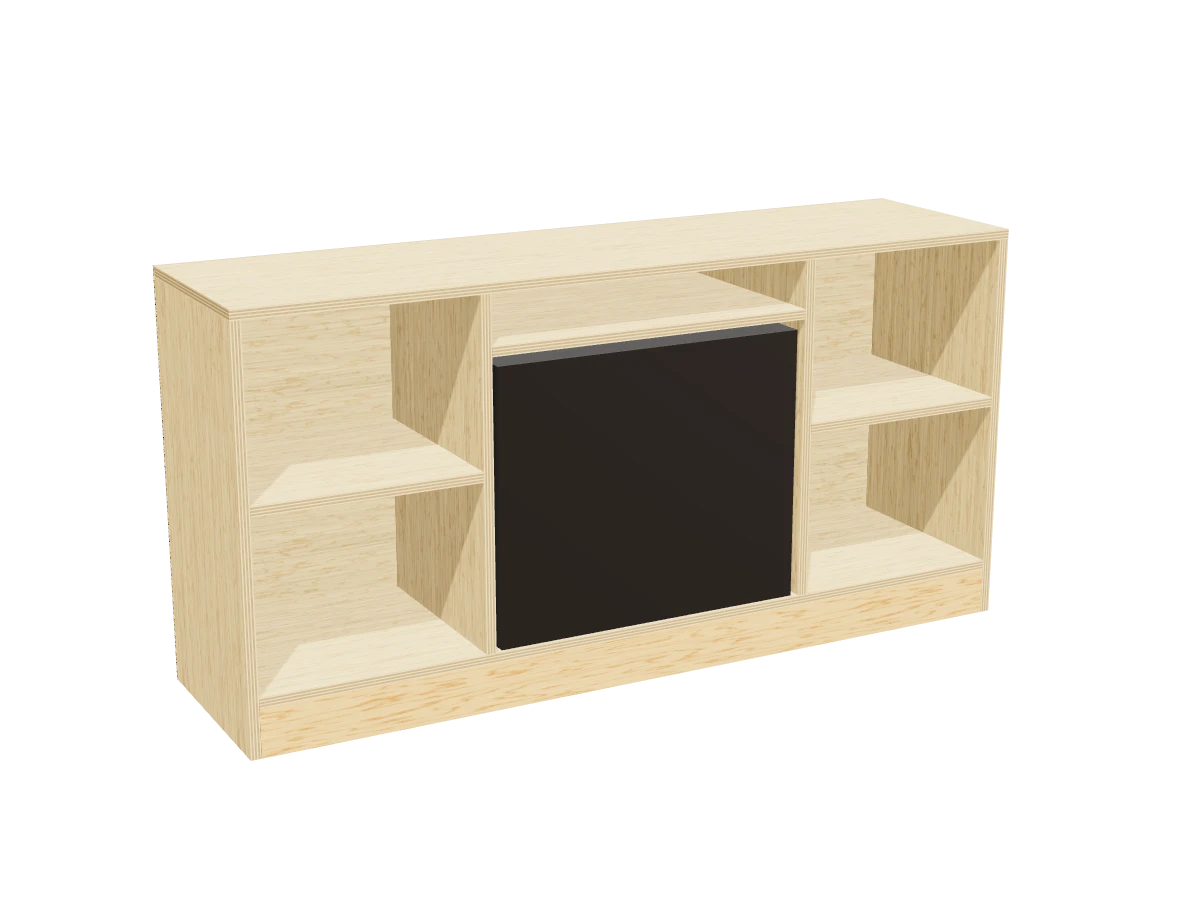
A 60″ TV stand with an electric fireplace in the middle, open shelves on each side and a slot above the fire for a soundbar.
- Skill
- Level 3 of 5 · Intermediate
- Build time
- 6 to 8 hours, plus finish
- Lumber
- 1 1x4, 2 sheets of ¾″ plywood and 1 sheet of ¼″ plywood
- Joinery
- Pocket holes, glue and brads
- Finished size
- 60″ W × 16″ D × 30″ H
A 1x4 is actually ¾″ × 3½″. Every measurement in this plan uses the real size. ¾″ plywood and ¼″ plywood are drawn at full thickness, but plywood sold that way is often a hair thinner, so measure yours and cut the pieces that fit between panels to match.
Shopping list
- 11x4, 6 ftThe kick.
- 2¾″ plywood, 4 × 8 ft sheetBirch or another smooth hardwood plywood.
- 1¼″ plywood, 4 × 8 ft sheetThe back.
- 1Electric fireplace insert, 23″No bigger than 24″ W × 20½″ H × 9″ D.
- 1Furniture anti-tip kitStrap or bracket with screws for a wall stud.
- ~501¼″ coarse-thread pocket-hole screws
- ~301″ brad nailsFor the back.
- 1Wood glue
- 1Iron-on edge banding, 25 ftFor the front edges.
- —Sandpaper, paint or stain and a clear coat
Tools
- Circular sawWith a straight board clamped on as a guide.
- Pocket-hole jigSet for ¾″.
- Drill/driver
- JigsawFor the opening in the back.
- Brad nailer or hammer
- Clamps
- Random orbit sander
- Stud finder
- Tape measure, speed square, pencil
Cut list
| Part | Qty | Size, inches | From |
|---|---|---|---|
| ASides | 2 | ¾ × 15¾ × 29¼ | ¾″ plywood |
| BTop | 1 | ¾ × 15¾ × 60 | ¾″ plywood |
| CBottom | 1 | ¾ × 15¾ × 58½ | ¾″ plywood |
| DDividers | 2 | ¾ × 15¾ × 25 | ¾″ plywood |
| EShelf over the fireplace | 1 | ¾ × 15¾ × 24½ | ¾″ plywood |
| FSide shelves | 2 | ¾ × 15¾ × 16¼ | ¾″ plywood |
| GKick | 1 | ¾ × 3½ × 58½ | 1x4 |
| HBackWith a 16″ × 12″ cutout behind the fireplace. | 1 | ¼ × 30 × 60 | ¼″ plywood |
Board layout. Each row is one board, cut left to right, with the remainder hatched. Dark lines are saw cuts, about ⅛″ wide.
Build it
 01
Cut the pieces
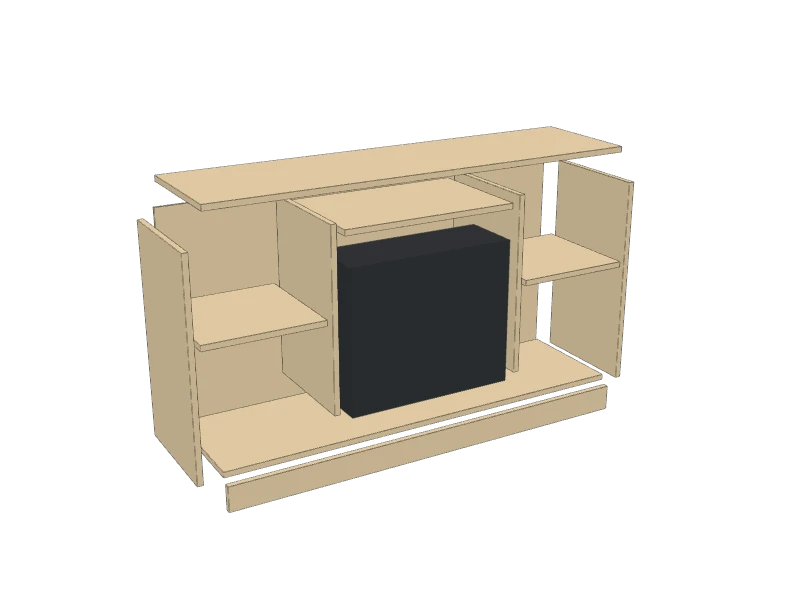
Cut the plywood pieces. Ask the store to rip the sheets into 15¾″ strips first:
- A Sides, two at 15¾″ × 29¼″
- B Top, one at 15¾″ × 60″
- C Bottom, one at 15¾″ × 58½″
- D Dividers, two at 15¾″ × 25″
- E Shelf over the fireplace, one at 15¾″ × 24½″
- F Side shelves, two at 15¾″ × 16¼″
- G Kick, one at 58½″
- H Back, one at 30″ × 60″
Check firstCheck your insert's instructions for its minimum opening and clearances before cutting. This bay is 24½″ wide, 20¾″ tall and 15¾″ deep, for a 23″ insert no bigger than 24″ × 20½″ × 9″. Inserts with a front frame that overlaps the opening want a smaller opening: if yours does, move the shelf over it down to suit.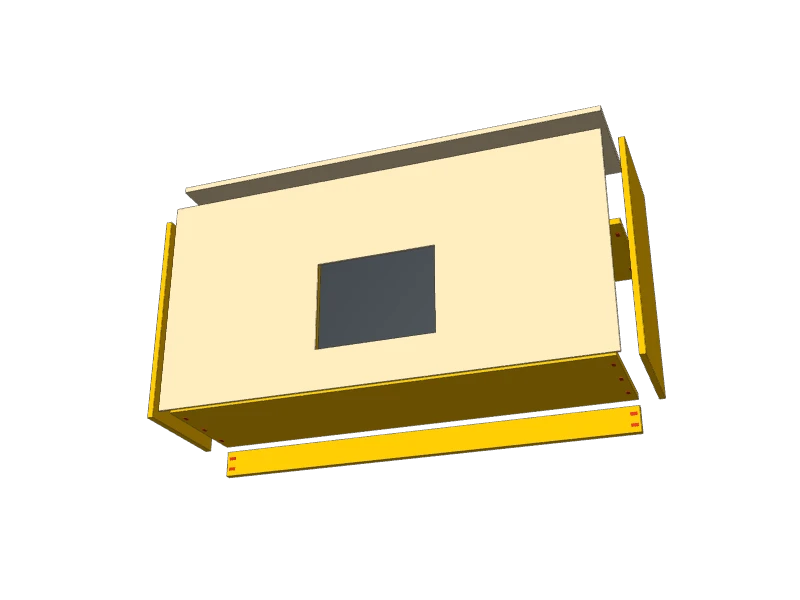 02
Drill the pocket holes
Set the jig for ¾″. Drill pocket holes on the underside of each end of the bottom (C), the shelf over the fireplace (E) and the side shelves (F), and on the back of each end of the kick (G). Drill two at the top and bottom of each divider (D) and three at the top of each side (A), on the faces that won't show.
 03
Build the fireplace bay
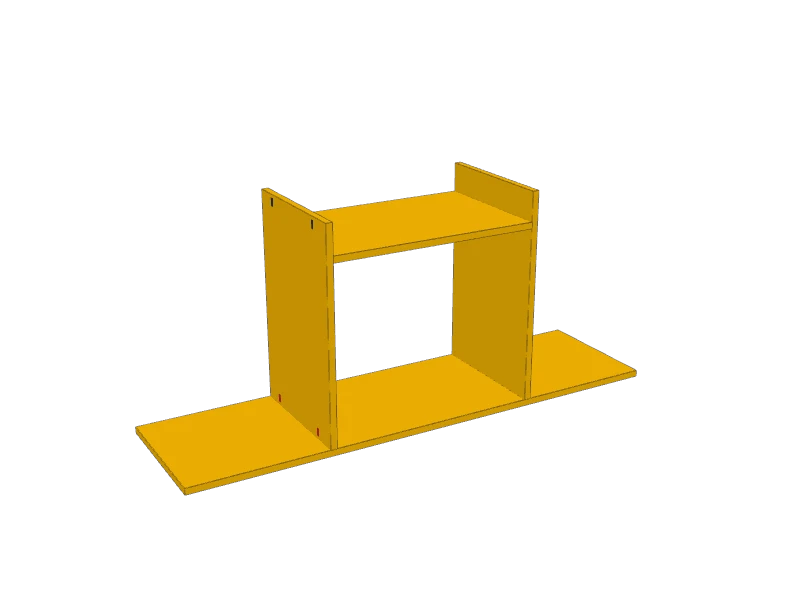
Stand the dividers (D) on the bottom (C), 24½″ apart inside, flush at the back and front. Glue and pocket-screw them. Fit the shelf over the fireplace (E) between them, its underside 20¾″ above the bottom, and screw it in.
 04
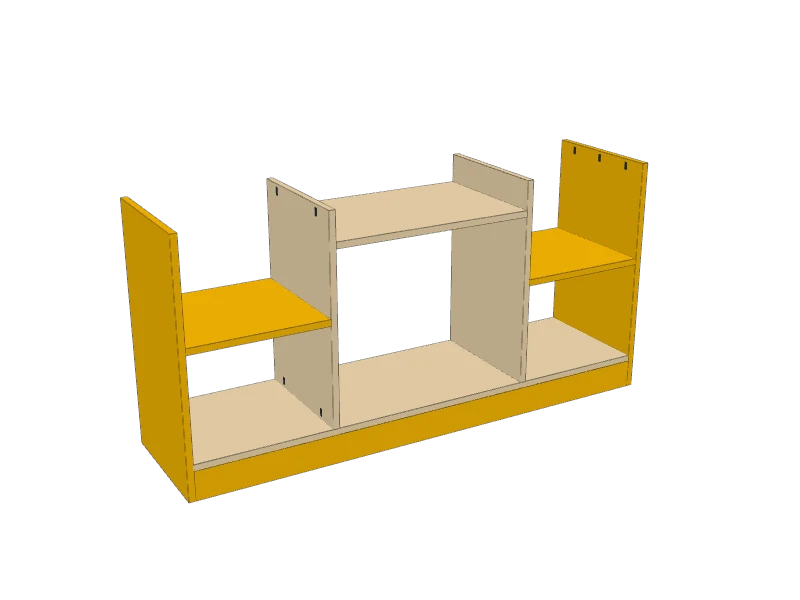
Add the sides and the kick
Pocket-screw the sides (A) to the ends of the bottom, its underside 3½″ up from the floor. Fit the kick (G) under the bottom at the front and screw it to the sides. Screw a side shelf (F) into each side bay, its underside 16½″ up.
 05
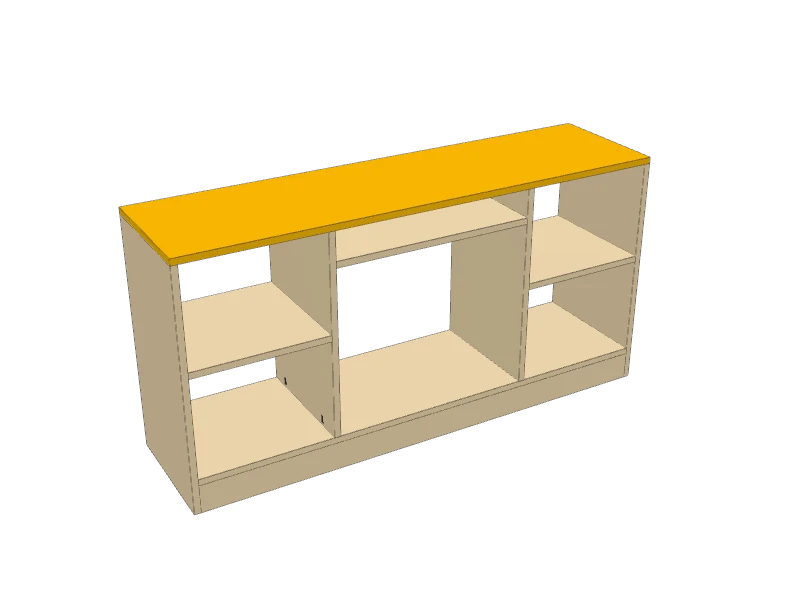
Screw on the top
Lay the top (B) on, flush at the ends, front and back, and drive the pocket screws up through the sides and dividers into it.
 06
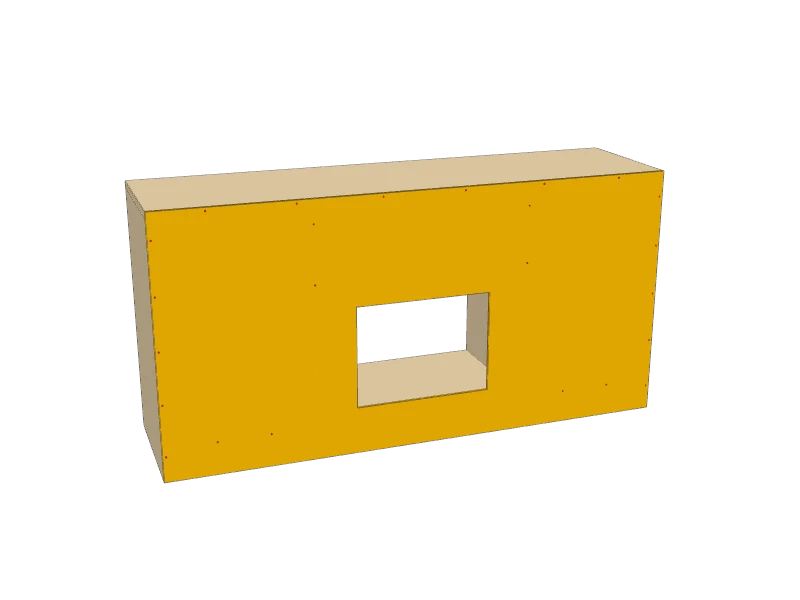
Nail on the back
Cut a 16″ × 12″ opening in the back (H), centered behind the fireplace bay and 5½″ up from the bottom of the back: the insert needs air behind it, and its plug goes through here. Lay the case face down, square it by its diagonals, and glue and nail the back on with 1″ brads.
 07
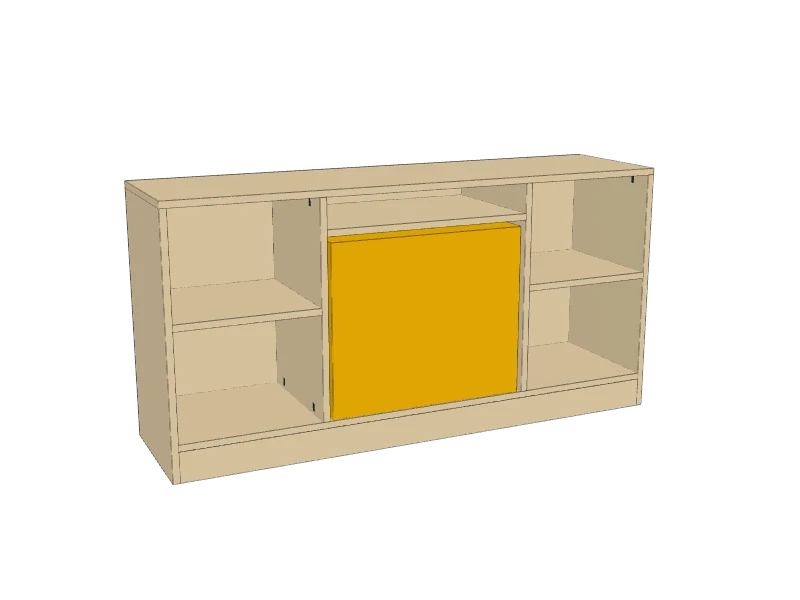
Set in the fireplace
Follow your insert's instructions. Feed its cord out through the opening in the back, slide it into the bay and fix it the way its manual says.
Plug it straight into a wall outlet, not a power bar or an extension cord: a 1500 W heater needs the outlet to itself. Leave the back opening clear so air can get in.
Watch outNever cover the front of the fireplace or block its air vents, and keep blankets, toys and paper away from the heater outlet.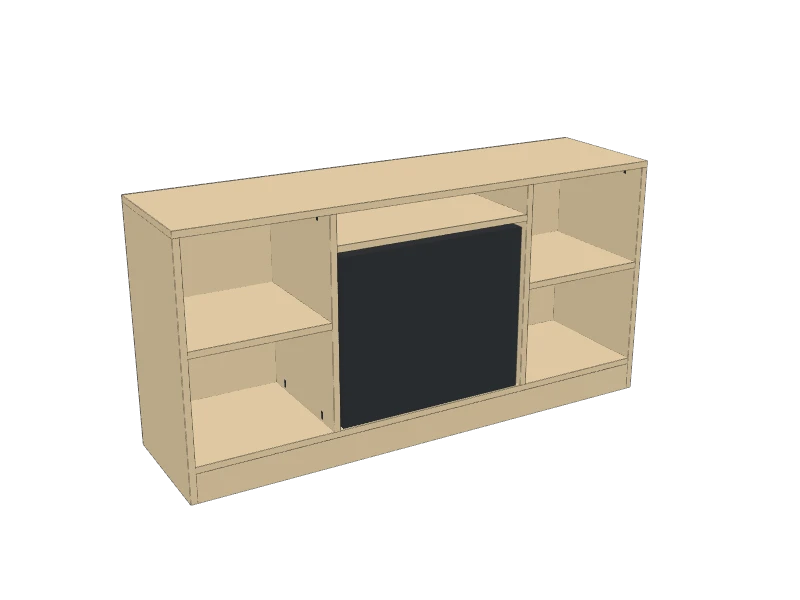 08
Finish and anchor it
Take the insert out before you finish. Sand with 120 then 180 grit, fill the plywood edges or cover them with edge banding, then paint or stain and seal.
Set the stand against the wall and anchor the top to a wall stud with a furniture anti-tip kit, following the kit's instructions. Then put the insert back.
Watch outA TV on a stand can pull it over onto a child. Always anchor the stand, and strap the TV to the wall too.
Build at your own risk. Check every measurement against your own lumber before you cut, test-fit before you glue, and wear eye and ear protection.