









2x4 Garage Shelving
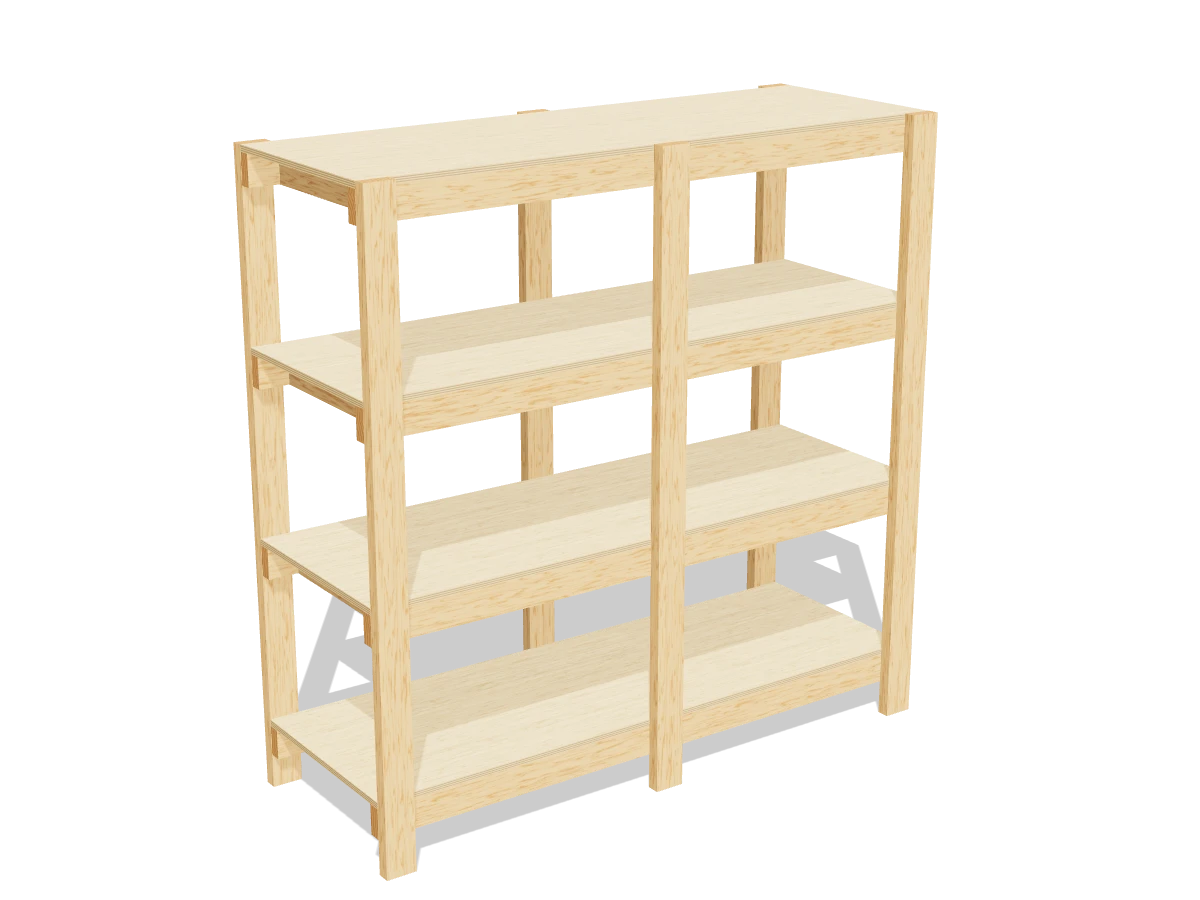
Draft · not yet checked by a carpenterA 6 ft wide, 6 ft tall shelving unit with four plywood shelves that hold heavy bins. Six 2x4 legs, four 2x4 frames and two sheets of plywood.
- Skill
- Beginner
- Build time
- 4 to 6 hours, plus finish
- Lumber
- 14 2x4s and 4 sheets of ¾″ plywood
- Joinery
- Structural screws
- Finished size
- 72″ W × 27″ D × 72″ H
A 2x4 is actually 1½″ × 3½″. Every measurement in this plan uses the real size. ¾″ plywood is drawn at full thickness, but plywood sold that way is often a hair thinner, so measure yours and cut the pieces that fit between panels to match.
Shopping list
- 142x4, 8 ftLegs, rails and cross pieces. Pick straight ones for the legs.
- 4¾″ plywood, 4 × 8 ft sheetFor the shelves. Sanded pine or spruce plywood is plenty.
- 483″ structural wood screwsRated for framing, such as GRK or Spax. For the legs.
- 483″ structural wood screwsFor the frames.
- ~601¼″ wood screwsFor the plywood.
- 2Steel L-brackets or anti-tip strapsWith screws long enough to reach the studs, for the wall anchor.
Tools
- Circular saw or miter saw
- Drill/driver
- Level
- Stud finder
- Tape measure, pencil
Cut list
| Part | Qty | Size, inches | From |
|---|---|---|---|
| ALegs | 6 | 1½ × 3½ × 72 | 2x4 |
| BFront and back rails | 8 | 1½ × 3½ × 72 | 2x4 |
| CCross pieces | 12 | 1½ × 3½ × 21 | 2x4 |
| DShelves | 4 | ¾ × 24 × 72 | ¾″ plywood |
Board layout. Each row is one board, cut left to right, with the remainder hatched. Dark lines are saw cuts, about ⅛″ wide.
Build it
 01
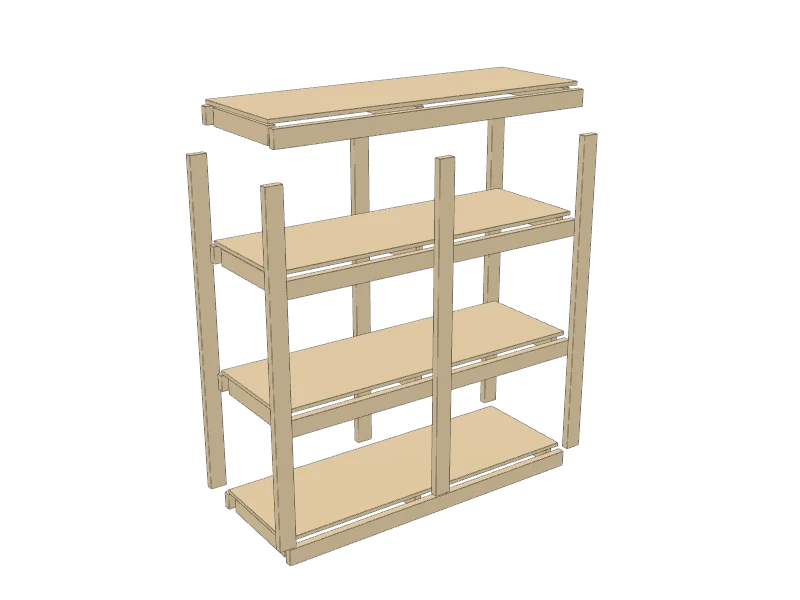
Cut the pieces
Cut every piece on the cut list. Cut the legs and rails first: each 8 ft 2x4 leaves a 24″ offcut, and that's exactly where the cross pieces come from.
- A Legs, six at 72″
- B Front and back rails, eight at 72″
- C Cross pieces, twelve at 21″
- D Shelves, four at 24″ × 72″
TipAsk the store to rip both plywood sheets into 24″ strips. Then all you have to do at home is cut each strip to 72″.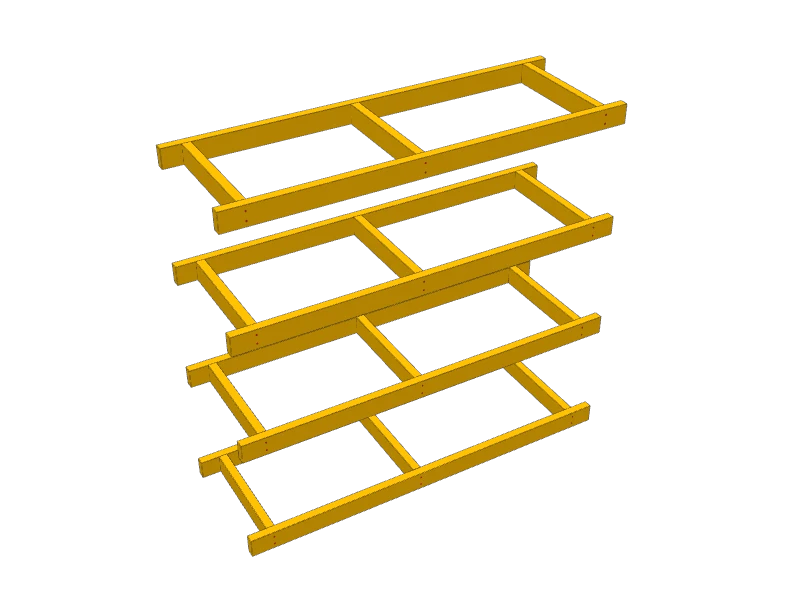 02
Build the four frames
For each frame, stand a front and a back rail (B) on edge 24″ apart at the outside. Fit three cross pieces (C) between them: one 3½″ in from each end and one just left of center, where the middle legs will go.
Drive two 3″ structural screws through each rail into the end of each cross piece.
TipBuild the frames on a flat floor and check each one for square corner to corner before the last screws go in.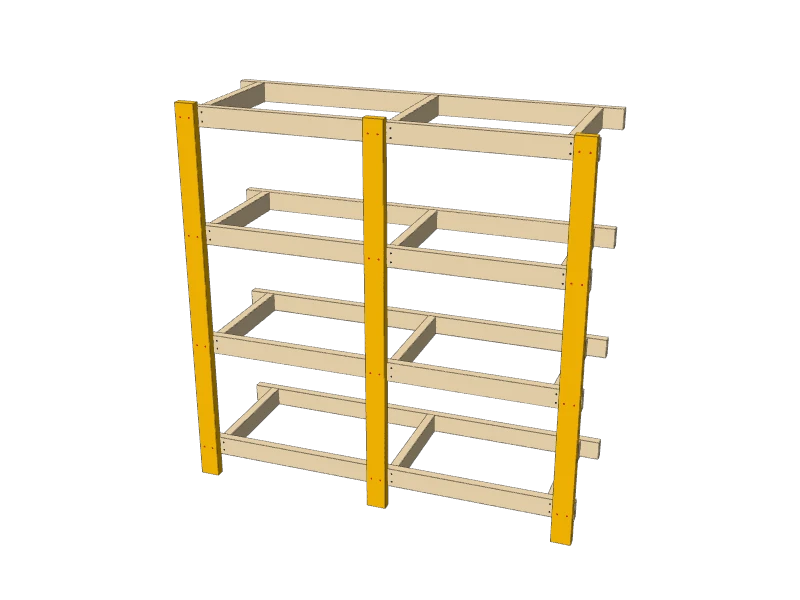 03
Screw the frames to the back legs
Lay the three back legs (A) on the floor, 72″ apart at the outside edges. Set the frames on them, back rail down, with the bottoms of the rails at 4″, 25¼″, 46½″ and 67¾″ from the floor end of the legs.
Drive two 3″ structural screws through each leg into each rail.
TipCut a scrap 2x4 to 17¾″ as a spacer. Stand it between the frames as you go and every shelf comes out the same height.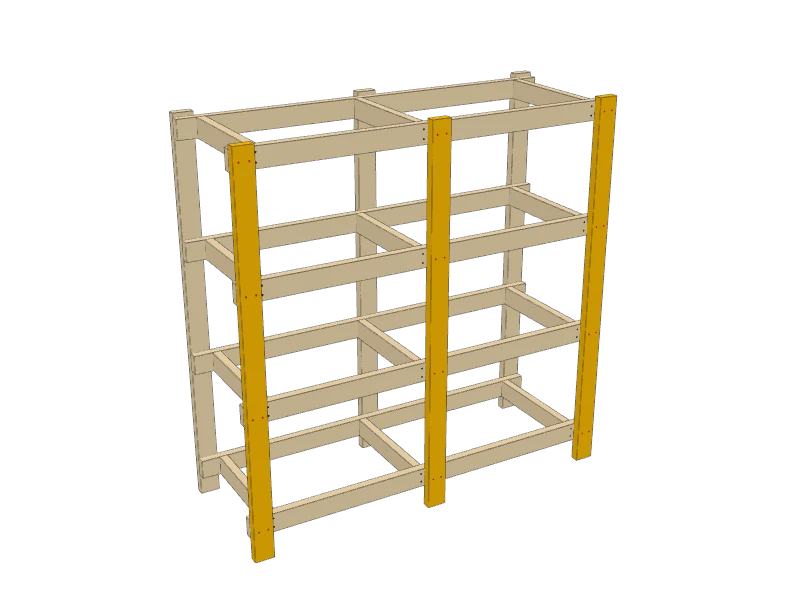 04
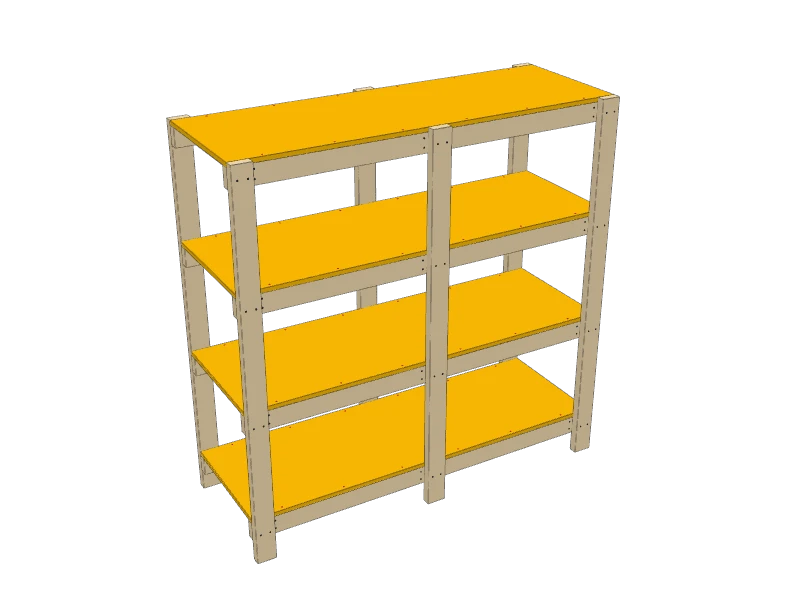
Add the front legs
With a helper, stand the unit up. Screw the three front legs (A) to the front rails the same way, lined up with the back legs.
Check that the legs are plumb with a level before you drive the last screws.
 05
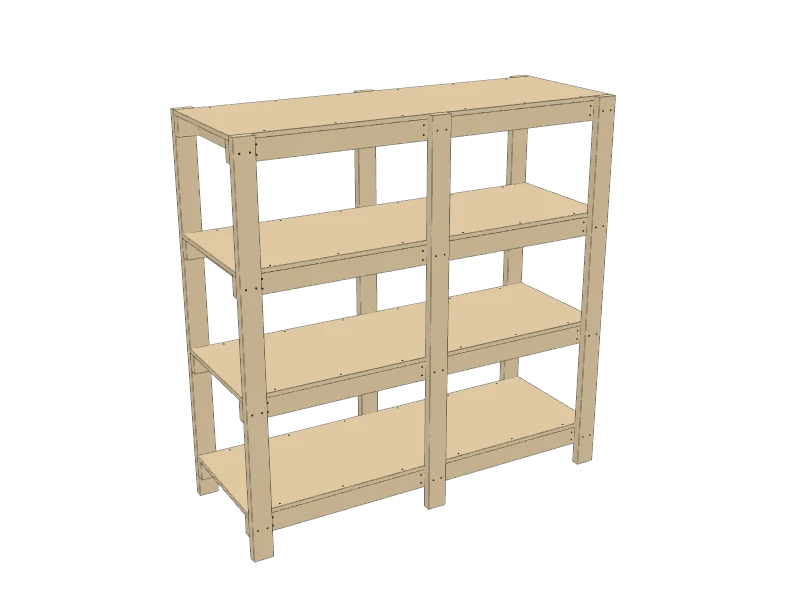
Add the shelves
Lay a plywood shelf (D) on each frame, flush with the rails all round. Drive 1¼″ screws every 12″ into the front and back rails.
 06
Anchor it to the wall
Push the unit against the wall and find two studs behind the top shelf. Screw a steel L-bracket or a furniture anti-tip strap from the top back rail into each stud.
Watch outAlways anchor it, even in a garage. A loaded shelf unit this tall can tip forward if someone climbs it or pulls on a top bin. Load the bottom shelves with the heaviest things.
Build at your own risk. Check every measurement against your own lumber before you cut, test-fit before you glue, and wear eye and ear protection.