









Garbage Can Enclosure
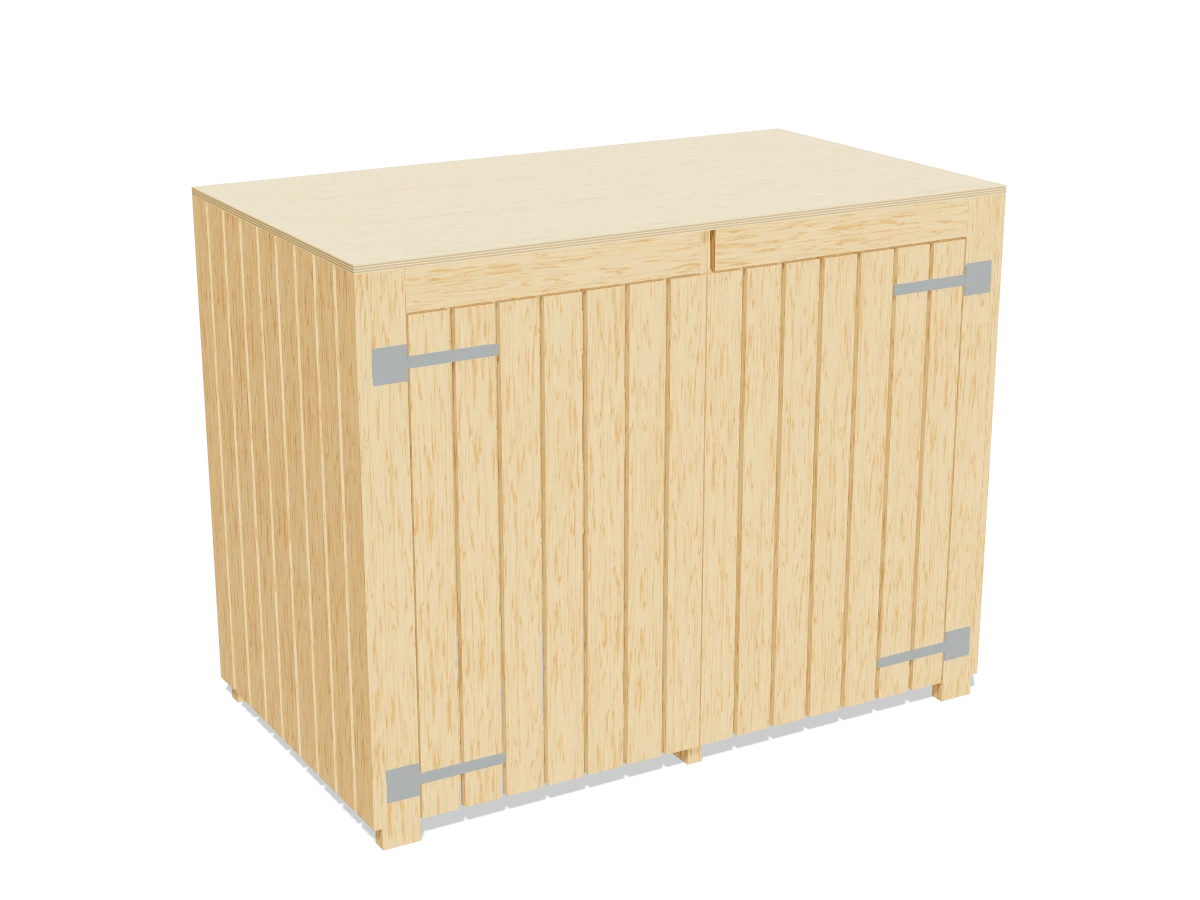
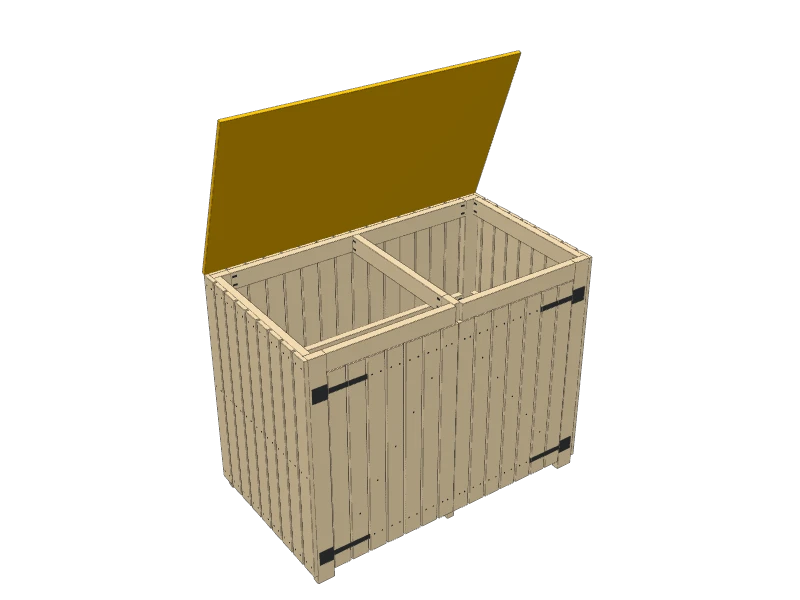
A slatted shed for two garbage or recycling carts, with two doors at the front and a lid that lifts so you can drop bags in without opening the doors.
- Skill
- Level 3 of 5 · Intermediate
- Build time
- 10 to 14 hours, plus finish
- Lumber
- 9 2x4s, 27 1x4s and 1 sheet of ¾″ plywood
- Joinery
- Pocket screws and exterior screws
- Finished size
- about 64″ W × 36″ D × 50″ H
A 2x4 is actually 1½″ × 3½″ and a 1x4 is ¾″ × 3½″. Every measurement in this plan uses the real size. ¾″ plywood is drawn at full thickness, but plywood sold that way is often a hair thinner, so measure yours and cut the pieces that fit between panels to match.
Shopping list
- 92x4, 8 ftPressure-treated, rated for ground contact. The frame.
- 261x4, 8 ftPressure-treated or cedar. Siding and doors.
- 11x4, 6 ftPressure-treated or cedar. Siding and doors.
- 1¾″ plywood, 4 × 8 ft sheetExterior grade. The lid.
- ~602½″ exterior pocket screws
- ~2401⅝″ exterior screws
- ~801¼″ exterior screws
- 46″ T-hingesGalvanized or black, with screws.
- 36″ strap hingesFor the lid.
- 2Lid staysRated for the lid weight, about 35 lb.
- 2Gate latches and handles
- 2Anchor bracketsWith screws for the wall, fence or ground.
- 1Exterior paint or stain
Tools
- Miter saw or circular saw
- Pocket-hole jigSet for 1½″ stock.
- Drill/driver
- Level
- Clamps
- Tape measure, speed square, pencil
Cut list
| Part | Qty | Size, inches | From |
|---|---|---|---|
| APosts | 5 | 1½ × 3½ × 49¼ | 2x4 |
| BBack rails | 3 | 1½ × 3½ × 55½ | 2x4 |
| CSide rails | 6 | 1½ × 3½ × 32¼ | 2x4 |
| DFront rails | 2 | 1½ × 3½ × 27 | 2x4 |
| ECenter lid support | 1 | 1½ × 3½ × 29½ | 2x4 |
| FSiding slats | 34 | ¾ × 3½ × 47¼ | 1x4 |
| GDoor slats | 14 | ¾ × 3½ × 43½ | 1x4 |
| HDoor battens | 4 | ¾ × 3½ × 26 | 1x4 |
| IDoor bracesEnds cut at 33¾°, parallel. | 2 | ¾ × 3½ × 41½ | 1x4 |
| JLidExterior grade. | 1 | ¾ × 36 × 64 | ¾″ plywood |
Board layout. Each row is one board, cut left to right, with the remainder hatched. Dark lines are saw cuts, about ⅛″ wide.
Build it
 01
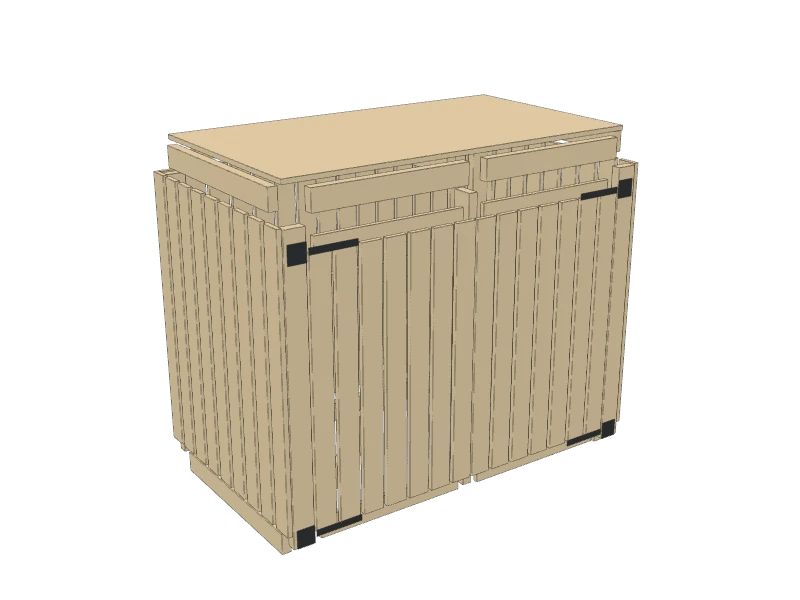
Cut the pieces
Measure your carts first. This enclosure fits two 64-gallon (240 L) carts, about 24″ wide, 29″ deep and 42″ tall with the lid shut. Each door opening is 27″ wide and 45¾″ tall. For bigger carts, make the rails, slats and lid longer by the same amount.
- A Posts, five at 49¼″
- B Back rails, three at 55½″
- C Side rails, six at 32¼″
- D Front rails, two at 27″
- E Center lid support, one at 29½″
- F Siding slats, 34 at 47¼″
- G Door slats, fourteen at 43½″
- H Door battens, four at 26″
- I Door braces, two at 41½″
- J Lid, one at 36″ × 64″
 02
Build the back frame
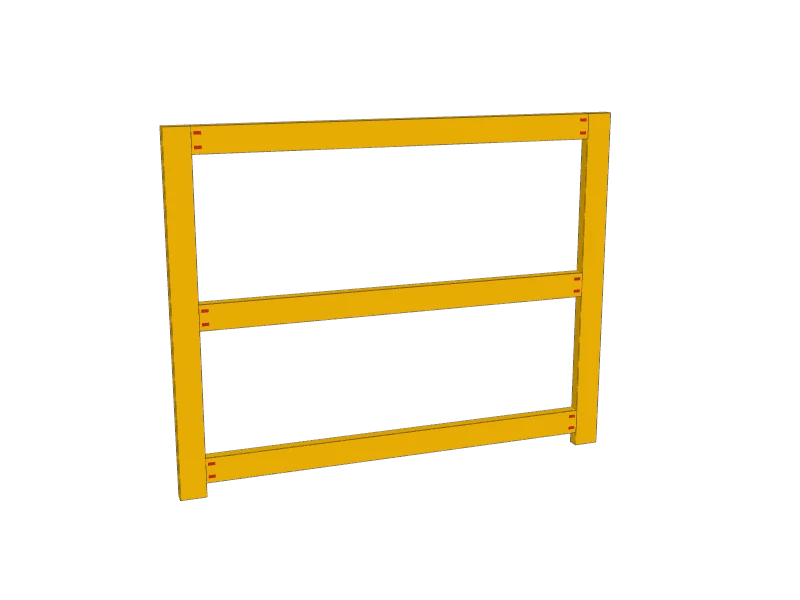
Lay the two back posts (A) on a flat surface, 62½″ apart at the outside. Fit the three back rails (B) between them: the bottom one 2″ up from the bottom of the posts, the middle one 23″ up, the top one flush with the tops. Join each rail end with two 2½″ pocket screws from the inside.
 03
Add the sides
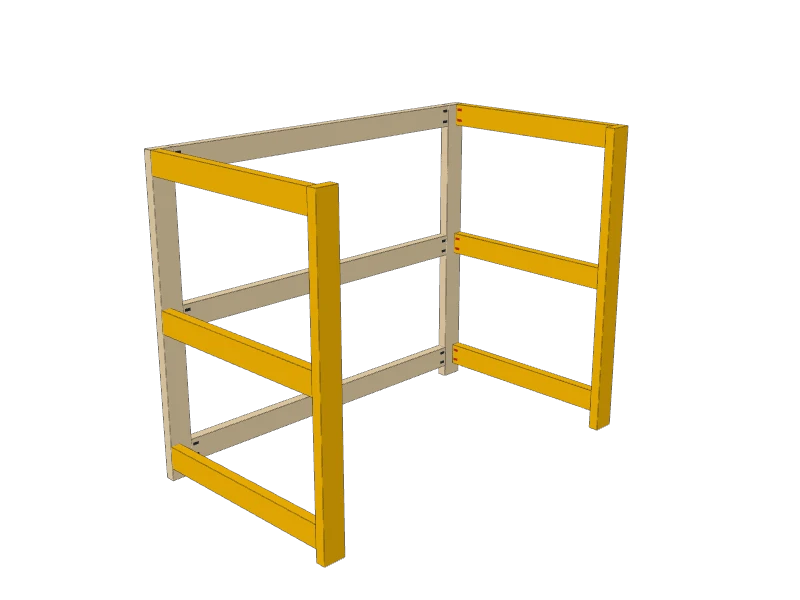
Stand the back frame up. Join three side rails (C) to the inside edge of each back post at the same heights as the back rails, and a front corner post (A) to their front ends, all with pocket screws. Check each side is square.
 04
Add the front rails and center post
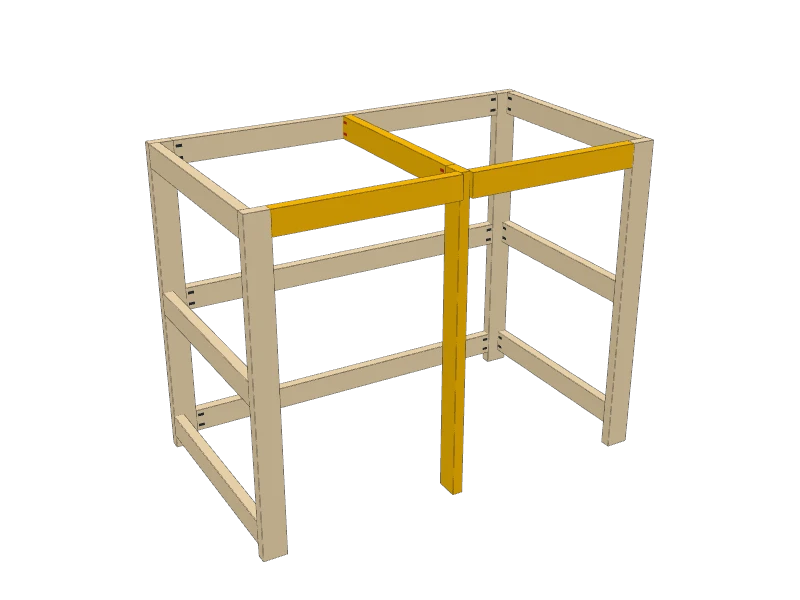
Pocket-screw the two front rails (D) between the front corner posts and the center post (A), flush with the tops. The center post sits ¾″ back from the front so the doors close against it.
Fit the center lid support (E) from the middle of the top back rail to the back of the center post, flush with the top. It holds up the middle of the lid.
 05
Screw on the siding
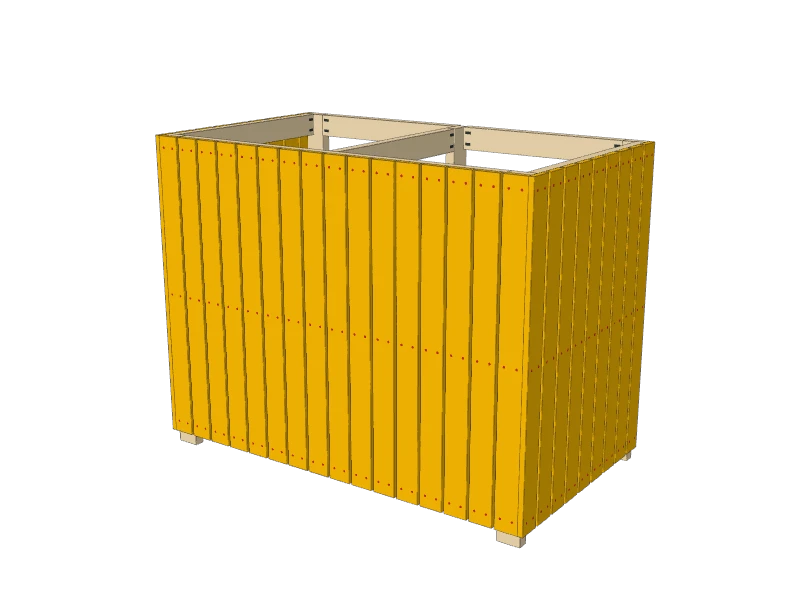
Screw the siding slats (F) to the outside of the sides and back, standing up, bottoms 2″ off the ground and tops flush with the frame. Nine slats on each side and sixteen across the back, spread evenly about ½″ apart. Two 1⅝″ screws into each rail.
 06
Build the doors
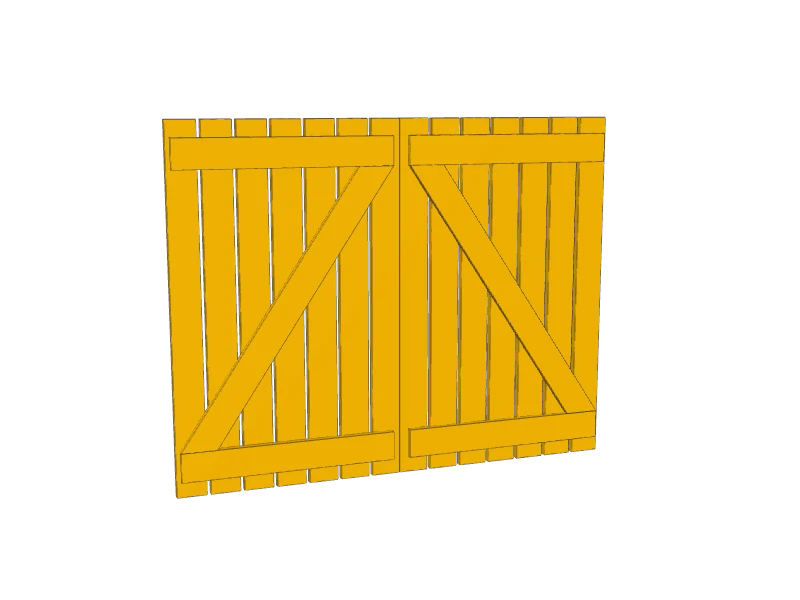
For each door, lay seven door slats (G) face down, ½″ apart, ends lined up. Screw two door battens (H) across them, 2″ in from the top and bottom ends and ½″ in from the edges.
Lay a door brace (I) between the battens, running from the bottom batten on the hinge side up to the top batten on the latch side. Mark its ends along the battens, cut them at 33¾°, and screw through the slats into the brace.
TipThe brace has to run up from the bottom hinge. Turned the other way, it lets the door sag.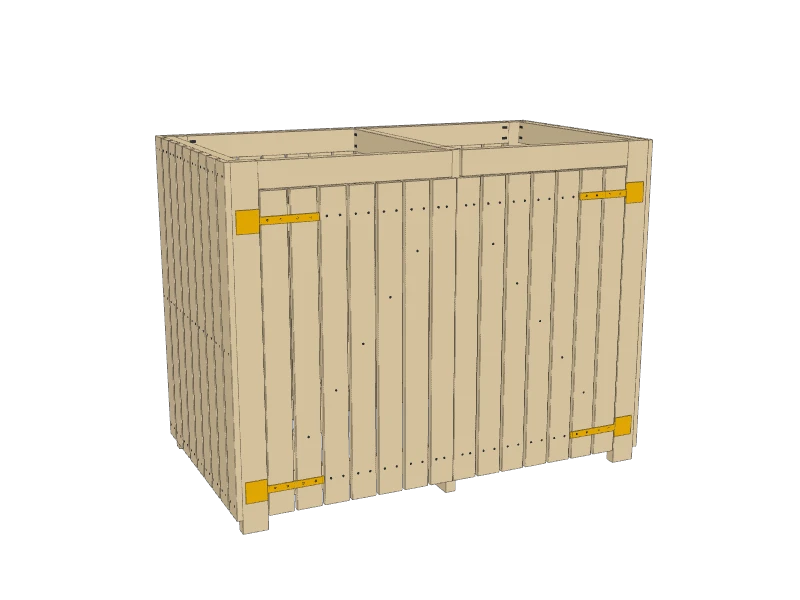 07
Hang the doors
Set each door in its opening on ¼″ spacers, so it closes against the center post with a small gap at the hinge side. Screw two T-hinges to the front of each corner post and across the door at the battens.
Add a handle and a gate latch to each door, or a barrel bolt at the top, so wind and animals can't open them.
 08
Hinge the lid
Seal all four edges of the lid (J). Lay it on the frame, flush at the back and sides, and join it to the top back rail with three strap hinges.
Add a lid stay at each end so the open lid can't fall on someone or blow shut.
Watch outWith the lid up, a gust can tip the whole enclosure. Anchor the back posts to the house wall, a fence post or the ground with metal brackets.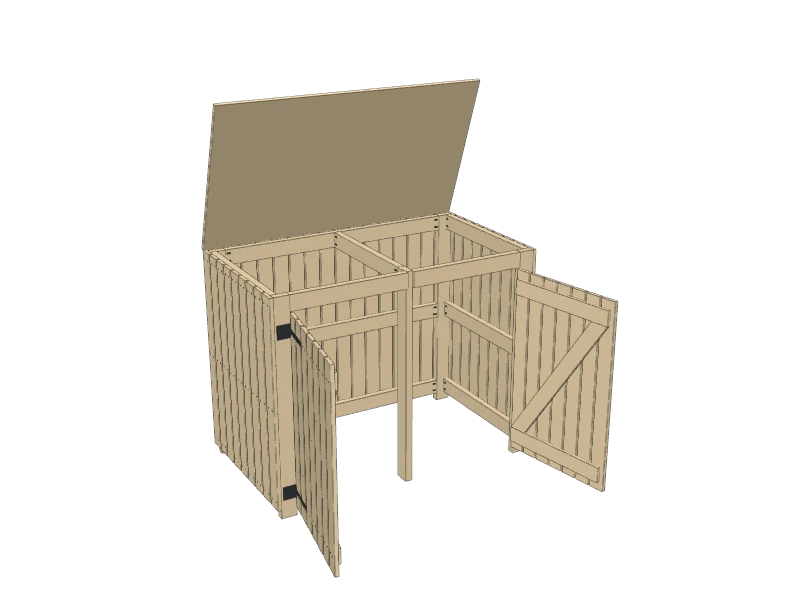 09
Finish
Ease the edges of the doors and the lid. Paint or stain everything with an exterior finish, the plywood lid especially, and recoat it every couple of years.
TipSet it on pavers or gravel so the posts stay dry and the carts roll in easily.
Build at your own risk. Check every measurement against your own lumber before you cut, test-fit before you glue, and wear eye and ear protection.