









2x4 Garden Bench
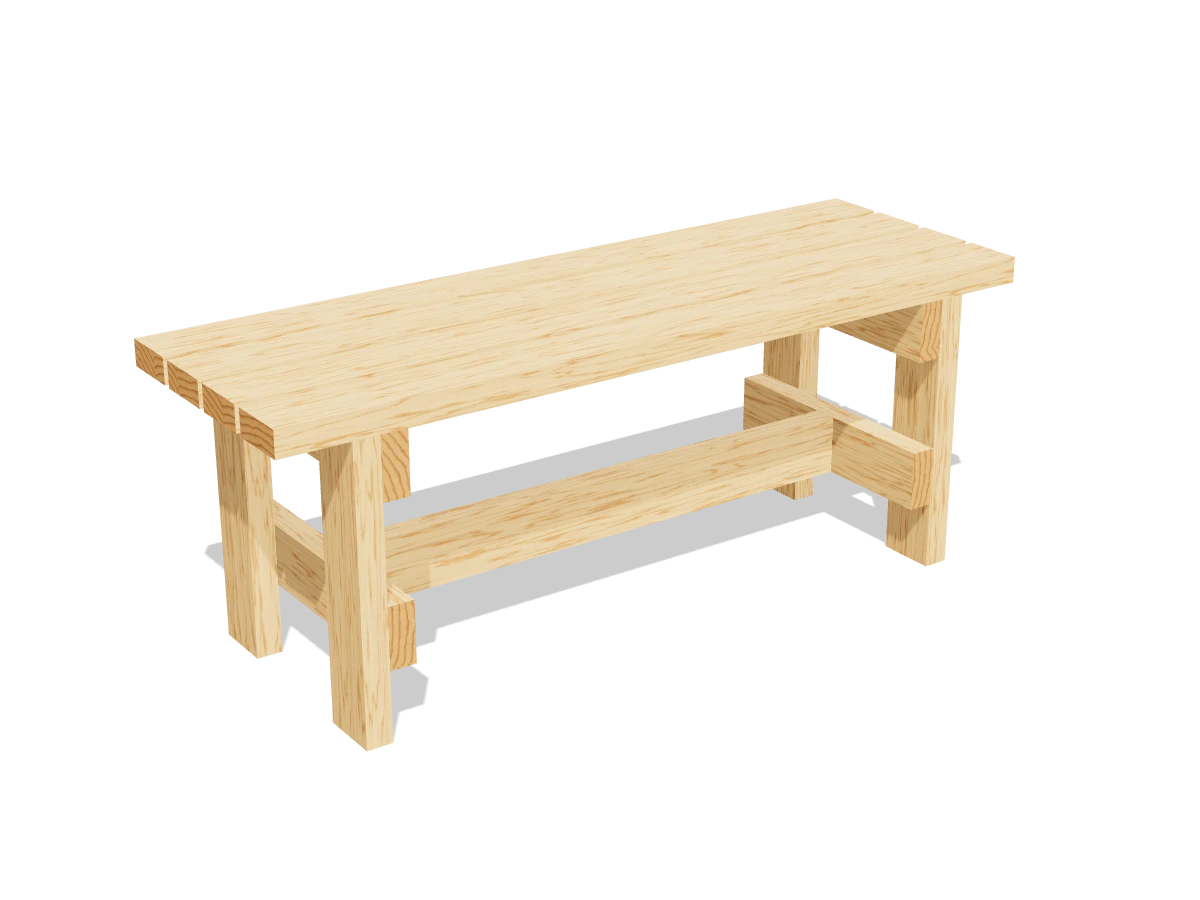
Draft · not yet checked by a carpenterA sturdy 4 ft outdoor bench made from nothing but 2x4s and deck screws. Straight cuts only, so it's a good first build.
- Skill
- Beginner
- Build time
- 2 to 3 hours, plus finish
- Lumber
- 4 2x4s
- Joinery
- Deck screws and glue
- Finished size
- 47″ L × 15½″ W × 18″ H
A 2x4 is actually 1½″ × 3½″. Every measurement in this plan uses the real size.
Shopping list
- 42x4, 8 ftPressure-treated or cedar, rated for outdoor use. Pick straight boards.
- ~502½″ exterior deck screwsCoated or stainless, so they don't stain the wood.
- 1Exterior wood glue
- —Sandpaper, 80 and 120 grit
- 1Exterior stain or deck sealer
Tools
- Miter saw or circular saw
- Drill/driverWith a ⅛″ bit for pilot holes.
- Speed square, tape measure, pencil
- ClampsHandy for holding the rails while you screw.
Cut list
| Part | Qty | Size, inches | From |
|---|---|---|---|
| ALegs | 4 | 1½ × 3½ × 16½ | 2x4 |
| BRails | 4 | 1½ × 3½ × 15½ | 2x4 |
| CStretcher | 1 | 1½ × 3½ × 33 | 2x4 |
| DSeat slats | 4 | 1½ × 3½ × 47 | 2x4 |
Board layout. Each row is one board, cut left to right, with the remainder hatched. Dark lines are saw cuts, about ⅛″ wide.
Build it
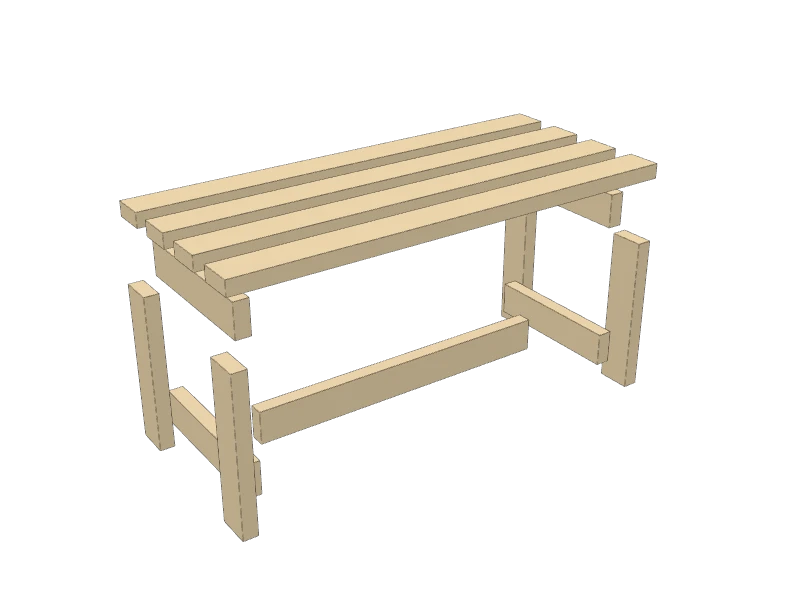 01
Cut the pieces
Cut every piece on the cut list. Every cut is a straight crosscut:
- A Legs, four at 16½″
- B Rails, four at 15½″
- C Stretcher, one at 33″
- D Seat slats, four at 47″
TipPick the four straightest, cleanest 2x4s for the seat slats. Rounded factory edges are fine on top: they're kinder to the backs of your legs.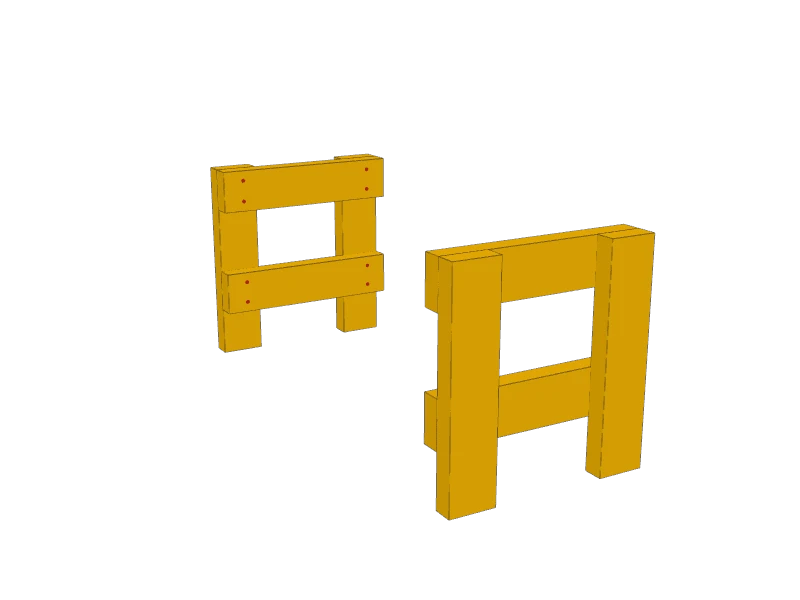 02
Build the two end frames
Lay two legs (A) flat on the bench, 15½″ apart at the outside edges. Lay a rail (B) across them, flush with the leg tops and both outside edges, and a second rail with its bottom edge 4″ up from the floor ends.
Check the frame is square, then pre-drill and drive two 2½″ deck screws through the rail into each leg, four per rail. Build the second frame as a mirror image, rails on the inside.
Watch outGlue every joint with exterior wood glue as well. People sit on this, and glue plus screws keeps the frames from loosening over the years.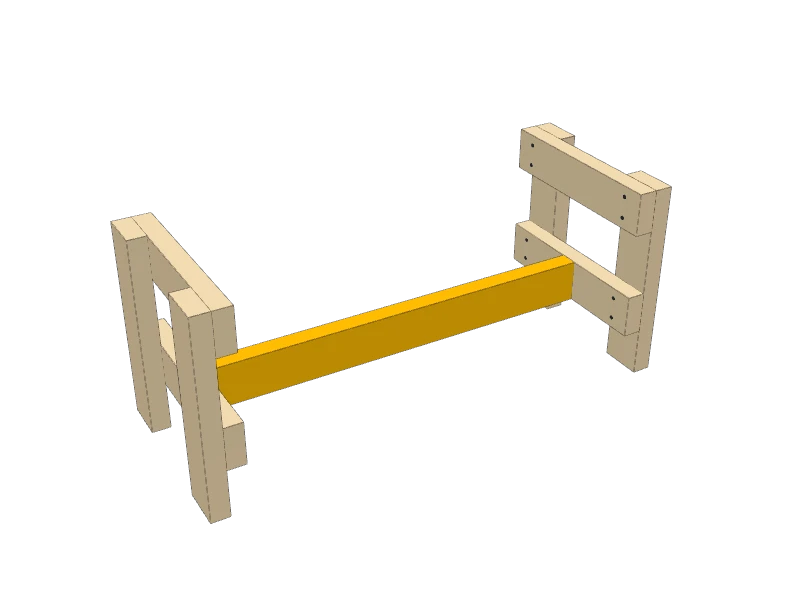 03
Add the stretcher
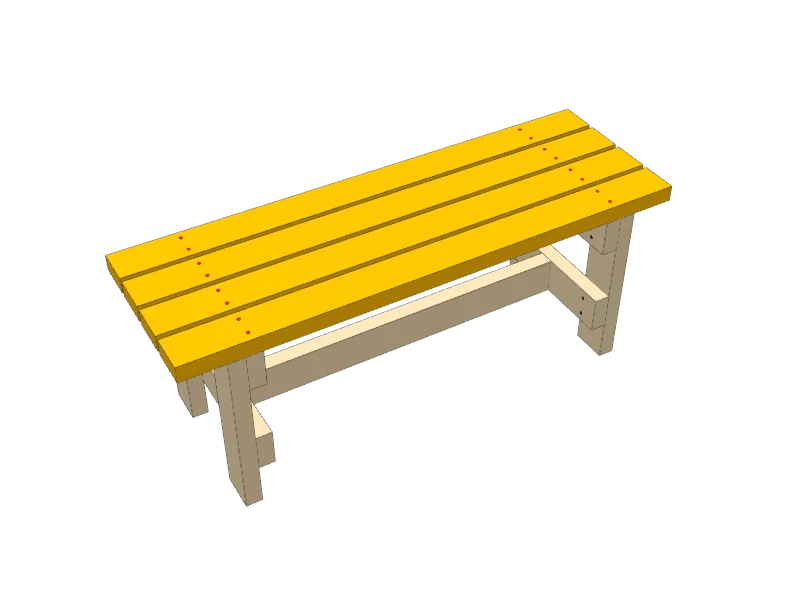
Stand the frames up, rails facing each other. Fit the stretcher (C) between the bottom rails, centered front to back and flush with the rail tops. Drive two 2½″ deck screws through each rail into the end of the stretcher.
Measure the base corner to corner across the top rails. When the diagonals match, it's square.
 04
Screw down the seat slats
Lay the four seat slats (D) across the top rails with ½″ gaps between them, so rain runs through. Line up the ends: the frames sit 4″ in from each end of the seat.
Pre-drill and drive two 2½″ deck screws through each slat into each top rail.
TipUse two scraps of ½″ plywood or a couple of carpenter's pencils as spacers between the slats while you screw.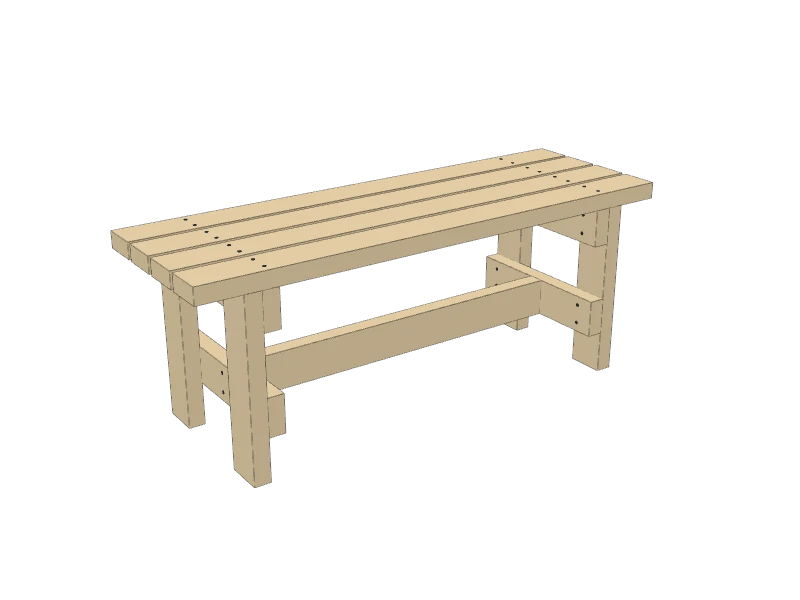 05
Sand and finish
Round over the seat edges and the ends of the slats with 80 grit, then sand with 120. Splinters on a garden bench find people fast.
Brush on an exterior stain or deck sealer, including the bottoms of the legs, and give it a fresh coat every year or two.
TipSet it on pavers or gravel rather than bare soil so the leg ends stay dry.
Build at your own risk. Check every measurement against your own lumber before you cut, test-fit before you glue, and wear eye and ear protection.