









Garden Obelisk
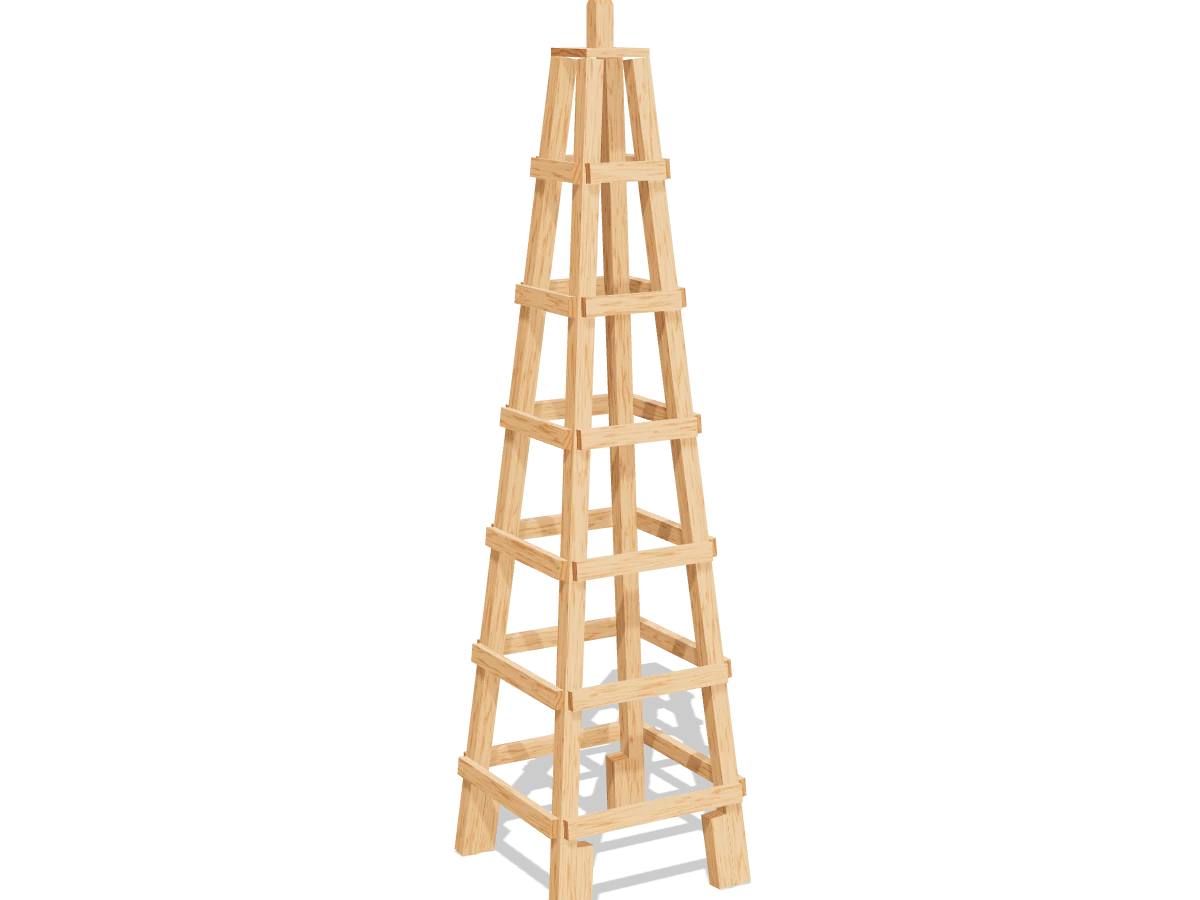
A 6 ft cedar trellis tower for climbing plants: four legs that lean in to a pointed cap, six rows of rungs, and a stake at each foot. One compound cut on the legs, worked out for you.
- Skill
- Level 3 of 5 · Intermediate
- Build time
- 4 to 6 hours, plus finish
- Lumber
- 4 2x2s, 3 1x2s and 1 picket
- Joinery
- Glue and exterior screws
- Angles
- Each face leans in 5½°; leg ends 5½° miter and 5½° bevel
- Finished size
- about 18⅛″ W × 18⅛″ D × 70⅝″ H
A 2x2 is actually 1½″ × 1½″, a 1x2 is ¾″ × 1½″ and a cedar fence picket is usually ⅝″ × 5½″. Every measurement in this plan uses the real size.
Shopping list
- 4Cedar 2x2, 8 ftCedar. Pick straight ones: the legs, finial and stakes.
- 3Cedar 1x2, 8 ftCedar. The rungs.
- 1Cedar fence picket, 6 ftCedar. Any 5½″ wide cedar offcut works for the cap.
- ~601⅝″ exterior screwsCoated or stainless.
- ~202½″ exterior screwsCap and stakes.
- 1Exterior wood glue
- opt.Anchor bracketsOnly if it stands in a raised bed: one per leg, screwed to the inside of the bed instead of the stakes.
- opt.Exterior oil
Tools
- Miter sawOne that miters and bevels, for the compound cuts.
- Drill/driverWith a ⅛″ bit for pilot holes.
- Band clampOr a helper, to hold the faces together.
- HammerOr a mallet, for the stakes.
- Speed square, tape measure, pencil
Cut list
| Part | Qty | Size, inches | From |
|---|---|---|---|
| ALegsBoth ends cut level: 5½° miter and 5½° bevel, parallel. | 4 | 1½ × 1½ × 66⅝ | 2x2 |
| BRungs, bottom row | 4 | ¾ × 1½ × 16 | 1x2 |
| CRungs, second row | 4 | ¾ × 1½ × 14⅛ | 1x2 |
| DRungs, third row | 4 | ¾ × 1½ × 12¼ | 1x2 |
| ERungs, fourth row | 4 | ¾ × 1½ × 10⅜ | 1x2 |
| FRungs, fifth row | 4 | ¾ × 1½ × 8½ | 1x2 |
| GRungs, top row | 4 | ¾ × 1½ × 6⅝ | 1x2 |
| HCap | 1 | ⅝ × 5½ × 5½ | fence picket |
| IFinialTop cut to a point with two 45° cuts. | 1 | 1½ × 1½ × 4 | 2x2 |
| JStakesOne end cut to a point. | 4 | 1½ × 1½ × 24 | 2x2 |
Board layout. Each row is one board, cut left to right, with the remainder hatched. Dark lines are saw cuts, about ⅛″ wide.
Build it
 01
Cut the pieces
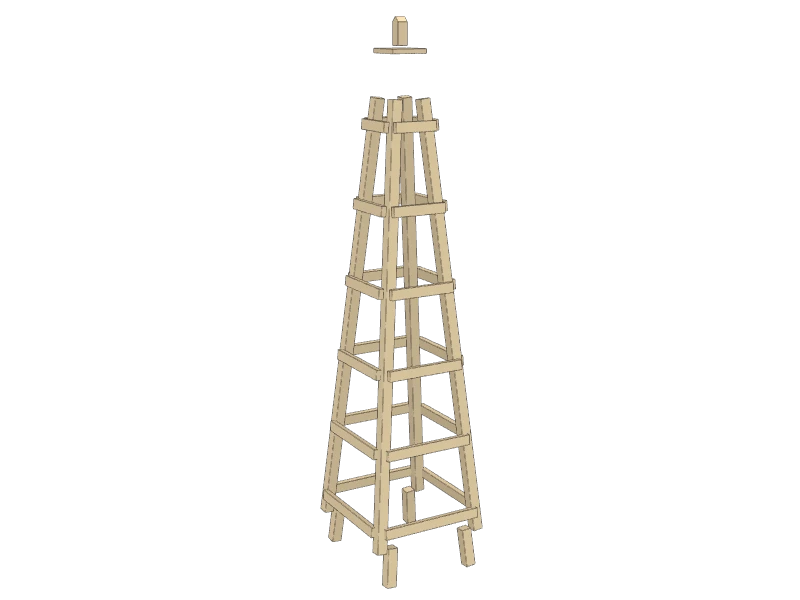
The legs (A) are the only tricky cut. Each face of the obelisk leans in 5½°, so each leg end gets a compound cut: set the miter saw to a 5½° miter and a 5½° bevel. Cut one end, measure 66⅝″ along the leg to the long point, slide the board along and cut again at the same settings. Both ends come out parallel and level, and all four legs are the same.
Cut a test piece from scrap first and check it stands up at the right lean: it should tilt toward its inside corner.
- A Legs, four at 66⅝″
- B Rungs, bottom row, four at 16″
- C Rungs, second row, four at 14⅛″
- D Rungs, third row, four at 12¼″
- E Rungs, fourth row, four at 10⅜″
- F Rungs, fifth row, four at 8½″
- G Rungs, top row, four at 6⅝″
- H Cap, one at 5½″
- I Finial, one at 4″
- J Stakes, four at 24″
TipMark the long point of each leg end. It's the outside corner, and it goes at the bottom outside and the top outside of the obelisk.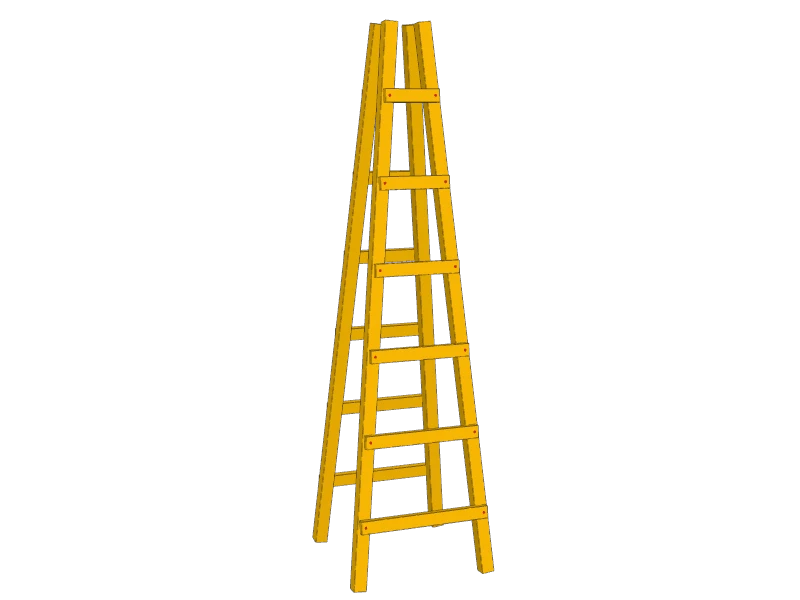 02
Build the front and back faces
Mark every leg (A) along its outside corner at 8″, 18″, 28″, 38″, 48″ and 58″ from the bottom. Those are the rung centers.
Lay two legs on a flat surface, long points out, with their outside corners 18″ apart at the bottom and 5½″ apart at the top. Lay one rung from each row across them, centered on the marks and centered side to side: the bottom row (B) first, then (C), (D), (E), (F) and the top row (G). Each rung stops just short of the outside corners. Pre-drill, add a dab of exterior glue and drive one 1⅝″ exterior screw through each rung end into the leg.
Build the second face the same way on the other two legs.
 03
Join the faces with the side rungs
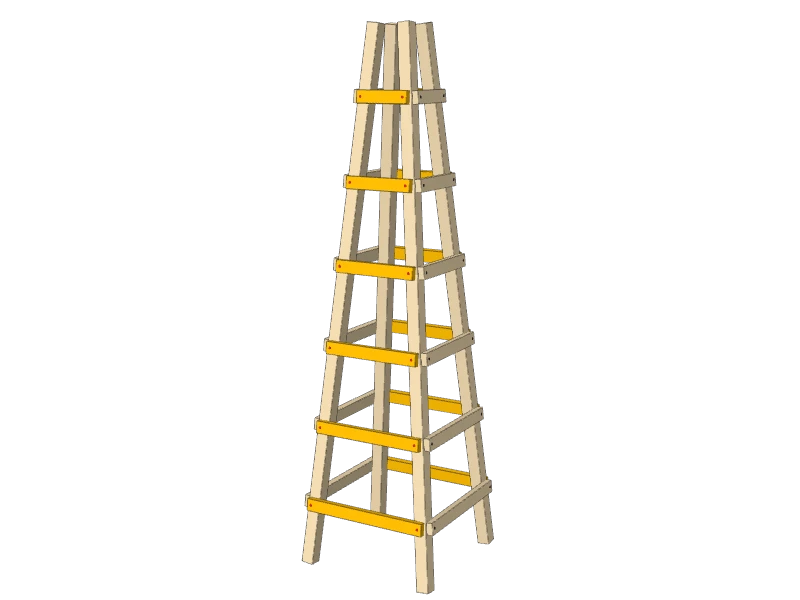
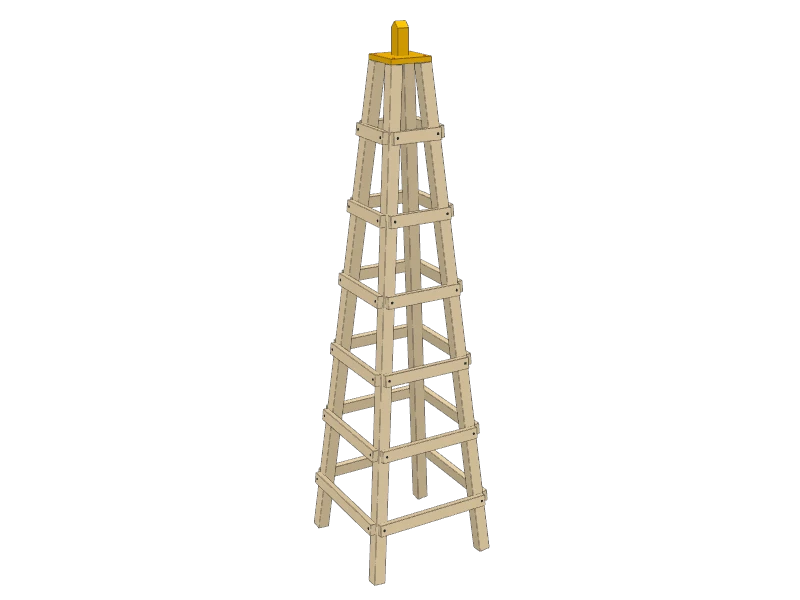
Stand the two faces up, leaning together so the tops of the legs (A) meet 5½″ apart. A helper or a strap clamp around the tops makes this easy. Screw a rung from each row (B), (C), (D), (E), (F) and (G) across each open side, on the same marks.
Check the obelisk stands straight from every side before the glue sets.
 04
Add the cap and finial
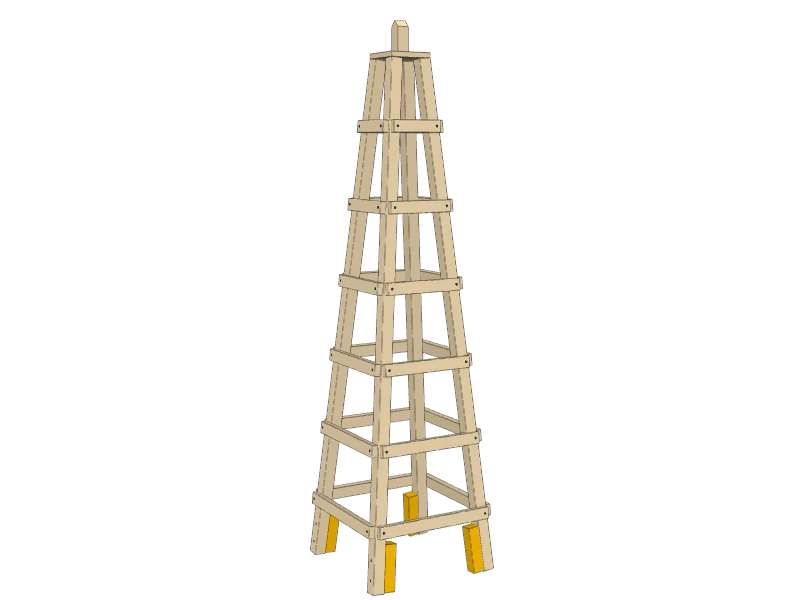
Cut the top of the finial (I) to a point with two 45° cuts. Screw it to the middle of the cap (H) with a 1⅝″ screw up from underneath.
Set the cap on top of the legs (A), centered, and drive a 2½″ exterior screw down through the cap into the top of each leg. Pre-drill: the cap is thin cedar and splits easily.
 05
Set it out and stake it
Set the obelisk where it will stand, on firm, level soil. Cut a point on one end of each stake (J) and drive one into the ground against the inside of each leg (A), leaning with the leg, until 6″ is left above the ground. Drive two 2½″ exterior screws through each leg into its stake.
Watch outA 71″ tower covered in vines catches a lot of wind. Always anchor it with the stakes. In a raised bed, screw each leg to the inside of the bed with an anchor bracket instead. It isn't a ladder: don't let kids climb it.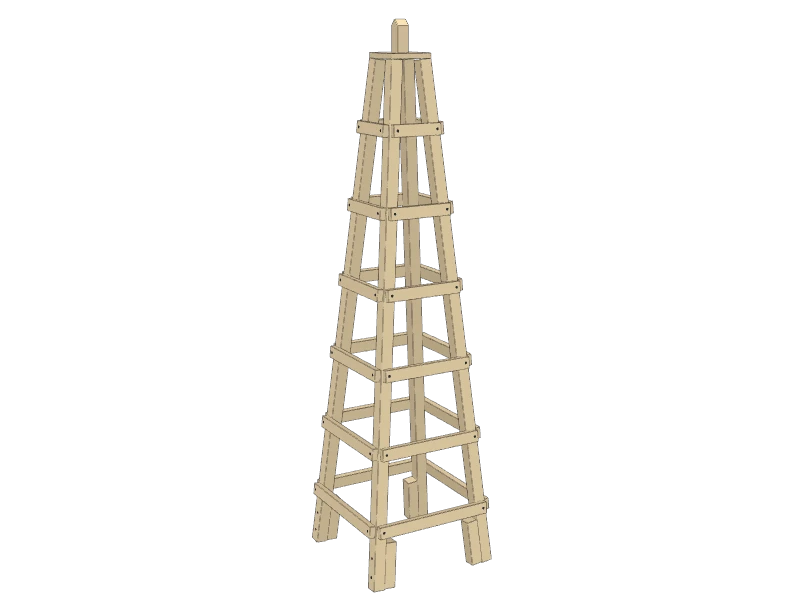 06
Finish and plant
Leave the cedar to weather silver, or oil it before you plant. Plant climbers like clematis, sweet peas or pole beans at the foot of each leg and tie the young shoots to the rungs until they grab on.
TipAt the end of the season, pull the stakes and store the obelisk in a shed. Out of the wet soil, the legs last for years.
Build at your own risk. Check every measurement against your own lumber before you cut, test-fit before you glue, and wear eye and ear protection.