









Entryway Hall Tree
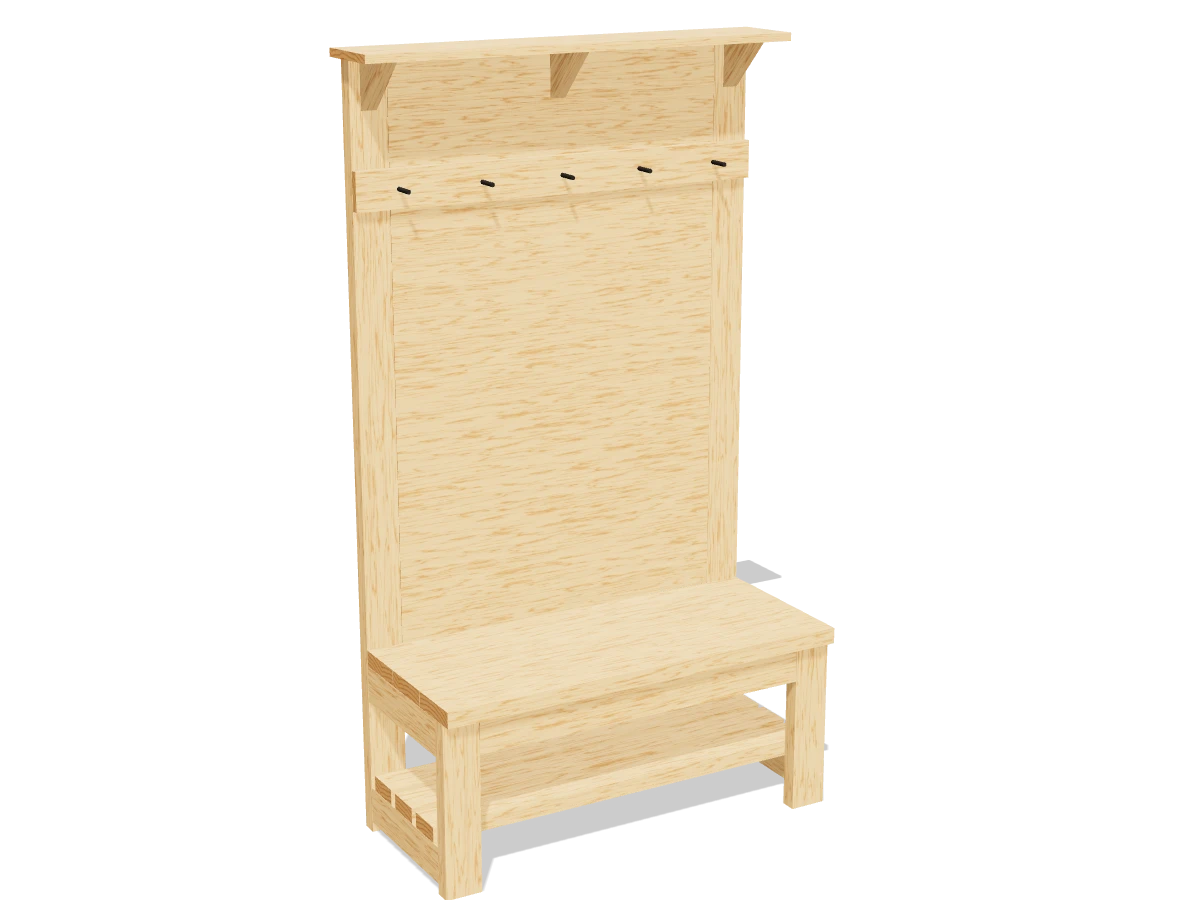
A bench and coat rack in one for the front door: an 18″ seat on a solid 2x4 frame, a shoe shelf below, and a planked back with five coat hooks and a top shelf for hats.
- Skill
- Level 3 of 5 · Intermediate
- Build time
- 8 to 10 hours, plus finish
- Lumber
- 5 2x4s, 2 2x6s, 5 1x6s, 1 1x4 and 1 1x8
- Joinery
- Pocket holes, glue and screws
- Finished size
- 42″ W × 18″ D × 71¾″ H
A 2x4 is actually 1½″ × 3½″, a 2x6 is 1½″ × 5½″, a 1x6 is ¾″ × 5½″, a 1x4 is ¾″ × 3½″ and a 1x8 is ¾″ × 7¼″. Every measurement in this plan uses the real size.
Shopping list
- 52x4, 8 ftPosts, legs, the seat frame, the shoe shelf and the brackets. Pick the straightest boards for the posts.
- 22x6, 8 ftThe seat.
- 51x6, 6 ftThe back planks. Select pine.
- 11x4, 8 ftThe header and the hook rail.
- 11x8, 6 ftThe top shelf.
- ~502½″ coarse-thread pocket-hole screwsFor the 2x4 frame and the seat.
- ~501¼″ coarse-thread pocket-hole screwsFor the planks and header.
- ~302½″ wood screws
- ~101⅝″ wood screwsFor the top shelf.
- ~201¼″ wood screwsFor the hook rail.
- 5Coat hooksWith their screws.
- 1Furniture anti-tip kitStrap or bracket with screws for a wall stud.
- 1Wood glue
- —Wood filler and sandpaper, 120 and 180 grit
- opt.Paint or stain and a clear topcoat
Tools
- Miter saw or circular saw
- Pocket-hole jigThat sets for ¾″ and 1½″ stock.
- Drill/driver
- Clamps
- Level
- Stud finder
- Sander
- Tape measure, speed square, pencil
Cut list
| Part | Qty | Size, inches | From |
|---|---|---|---|
| ABack posts | 2 | 1½ × 3½ × 71 | 2x4 |
| BFront legs | 2 | 1½ × 3½ × 16½ | 2x4 |
| CSide rails | 4 | 1½ × 3½ × 14 | 2x4 |
| DFront apron | 1 | 1½ × 3½ × 33 | 2x4 |
| EBack apron | 1 | 1½ × 3½ × 37 | 2x4 |
| FCenter brace | 1 | 1½ × 3½ × 12½ | 2x4 |
| GSeat boards | 3 | 1½ × 5½ × 40 | 2x6 |
| HShoe shelf boards | 3 | 1½ × 3½ × 40 | 2x4 |
| IBack planks | 9 | ¾ × 5½ × 33 | 1x6 |
| JHeader | 1 | ¾ × 3½ × 33 | 1x4 |
| KHook rail | 1 | ¾ × 3½ × 40 | 1x4 |
| LTop shelf | 1 | ¾ × 7¼ × 42 | 1x8 |
| MShelf bracketsBoth ends cut at 45°: a triangle with 4½″ sides. | 3 | 1½ × 3½ × 6⅜ | 2x4 |
Board layout. Each row is one board, cut left to right, with the remainder hatched. Dark lines are saw cuts, about ⅛″ wide.
Build it
 01
Cut the pieces
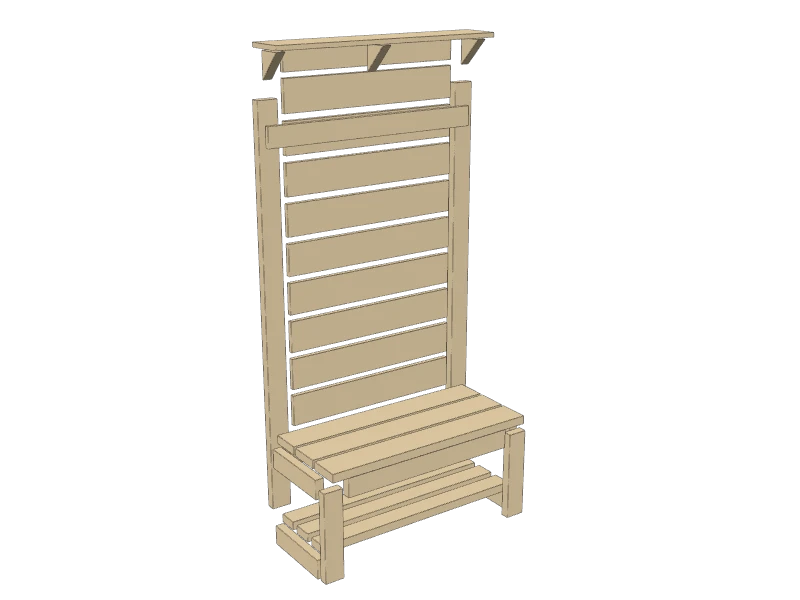
Sight down every 2x4 and save the two straightest for the back posts (A). Then cut every piece on the cut list:
- A Back posts, two at 71″
- B Front legs, two at 16½″
- C Side rails, four at 14″
- D Front apron, one at 33″
- E Back apron, one at 37″
- F Center brace, one at 12½″
- G Seat boards, three at 40″
- H Shoe shelf boards, three at 40″
- I Back planks, nine at 33″
- J Header, one at 33″
- K Hook rail, one at 40″
- L Top shelf, one at 42″
- M Shelf brackets, three at 6⅜″
For each shelf bracket (M), cut both ends of the blank at 45°, pointing toward each other, so you get a triangle with two 4½″ sides at a square corner.
 02
Drill the pocket holes
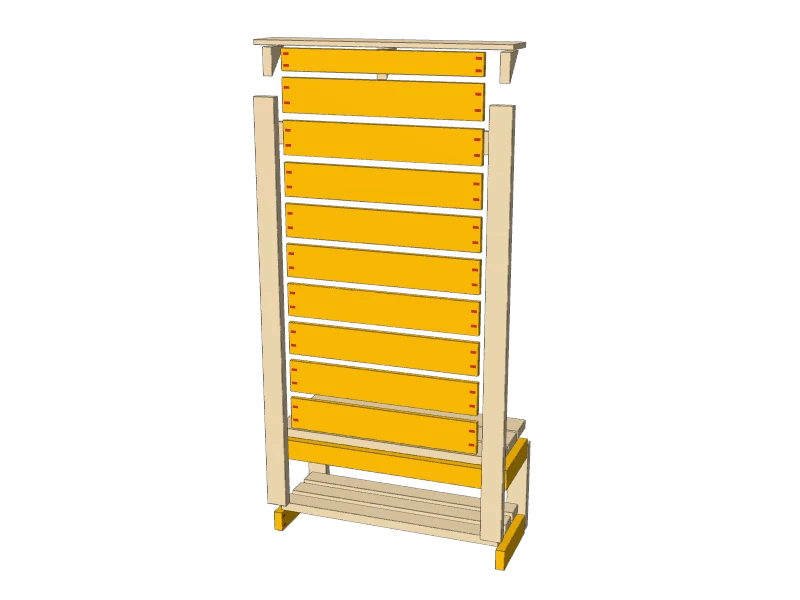
Drill every pocket hole on the faces that won't show. Set the jig for 1½″ stock first:
- two at each end of the four side rails (C), the front apron (D), the back apron (E) and the center brace (F)
- along the top edge, for the seat: two in each upper side rail (C), four in each apron (D, E) and three in the brace (F)
Then set it for ¾″ stock and drill two at each end of the nine back planks (I) and the header (J), on the back face.
 03
Build the two sides
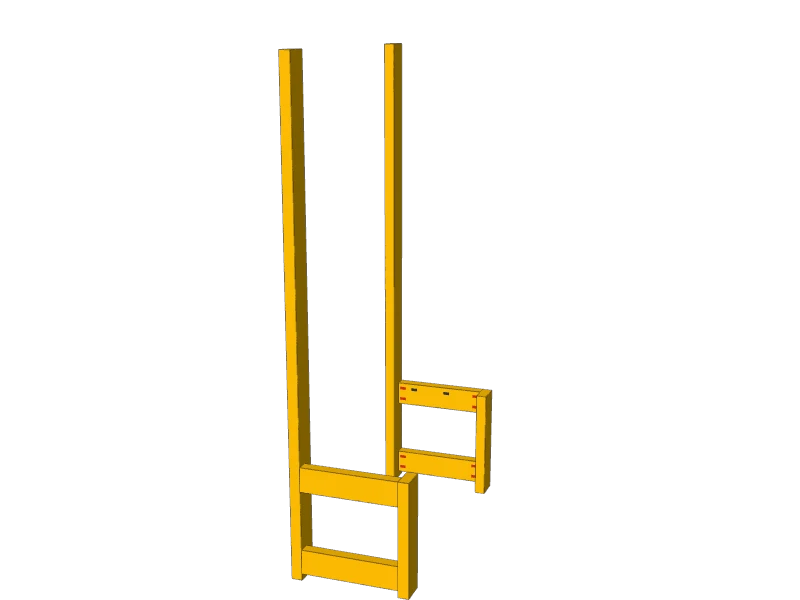
Lay a back post (A) and a front leg (B) on the floor, 17″ apart at the outside. Fit two side rails (C) between them, flush with the outside edge: one with its top flush with the top of the leg, the other 1″ up from the floor. Glue and drive 2½″ pocket screws. Build the other side as a mirror image.
TipStand the lower rail on a 1″ scrap while you screw. Both sides come out the same.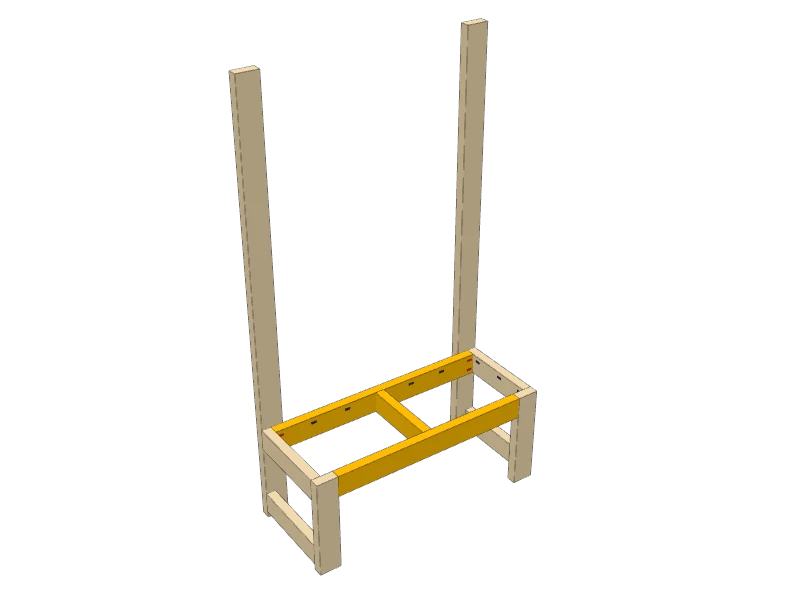 04
Join the sides
Stand the two sides up. Fit the front apron (D) between the front legs and the back apron (E) between the side rails, right in front of the posts, all flush with the tops of the rails. Glue and drive 2½″ pocket screws, then two 2½″ screws through the back of each post into the back apron.
Fit the center brace (F) between the aprons at the middle, 19¼″ from either end, and screw it in.
Measure the frame corner to corner across the top. When the diagonals match, it's square.
 05
Add the seat
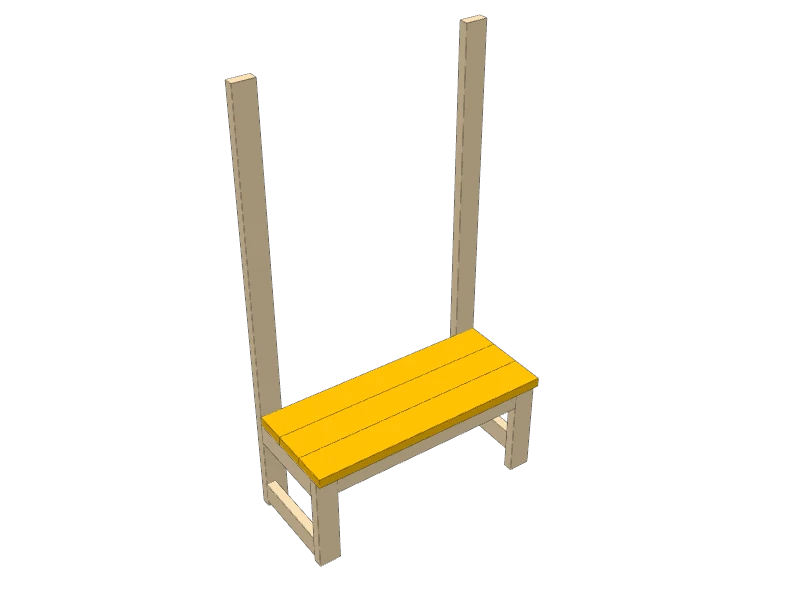
Lay the three seat boards (G) on the frame, edge to edge, the back one tight against the posts and the front one overhanging the front legs by 1″. Line up the ends with the outside of the legs. Drive 2½″ pocket screws up through the frame into each board.
TipRound over the front edge of the seat before it goes on. That edge sits under the backs of people's legs.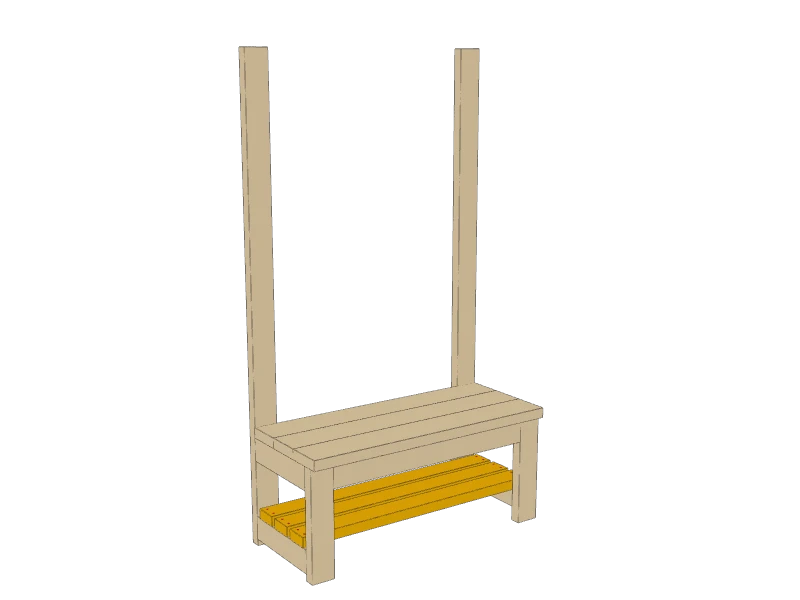 06
Add the shoe shelf
Lay the three shoe shelf boards (H) across the lower side rails, between the posts and the legs, about ⅞″ apart. Keep their ends flush with the outside. Pre-drill and drive two 2½″ screws through each end into the rail.
 07
Add the back planks
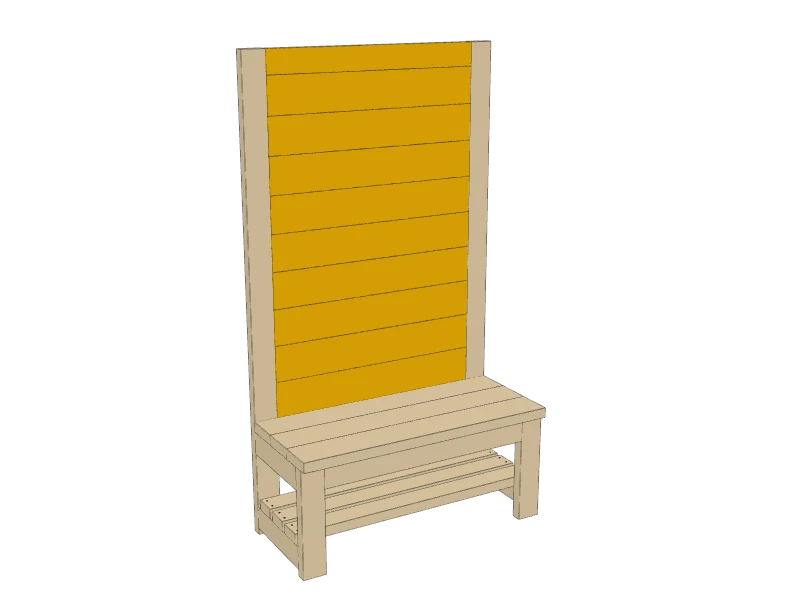
Fit the nine back planks (I) between the posts one at a time, starting on top of the seat, each one tight on the one below and flush with the front of the posts. Glue the ends and drive 1¼″ pocket screws into the posts. Finish with the header (J), flush with the tops of the posts.
TipCheck with a level every couple of planks. If the gap at one end grows, plane or sand that plank's edge.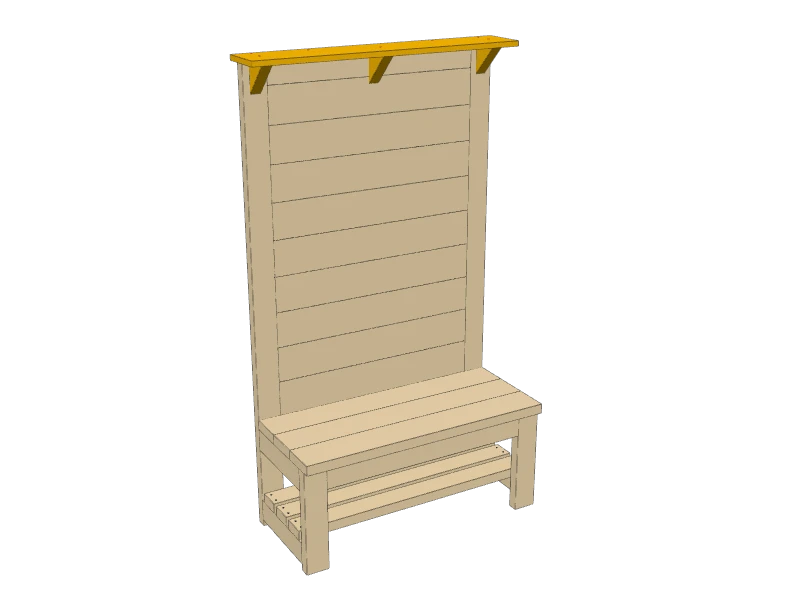 08
Add the top shelf
Screw the three shelf brackets (M) to the front of the posts and the middle of the header, their tops flush with the top of the posts: two 2½″ screws from behind into each.
Lay the top shelf (L) on the posts, the header and the brackets, flush at the back and overhanging 1″ at each end. Drive 1⅝″ screws down into the posts, the header and each bracket.
 09
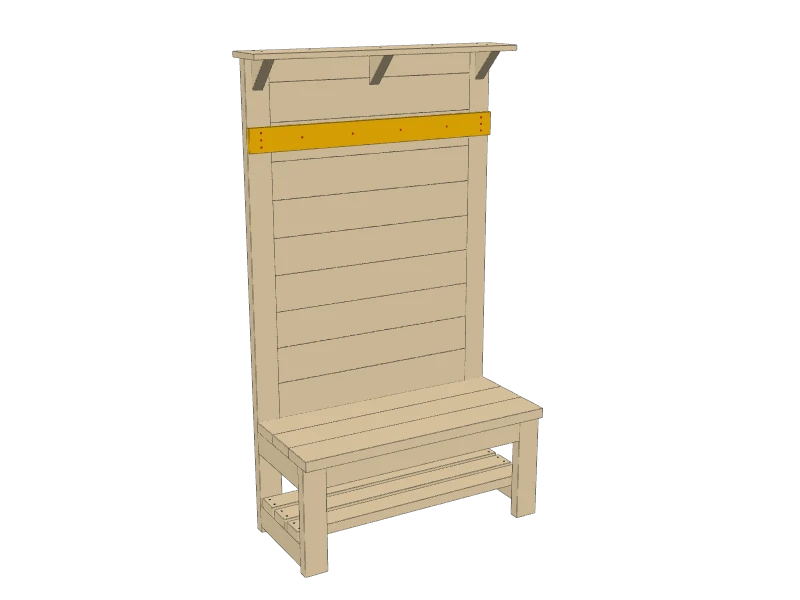
Add the hook rail
Glue the hook rail (K) across the front of the posts and planks, its top 61½″ up from the floor. Drive three 1¼″ screws into each post and four into the plank behind it, spaced between where the hooks will go.
 10
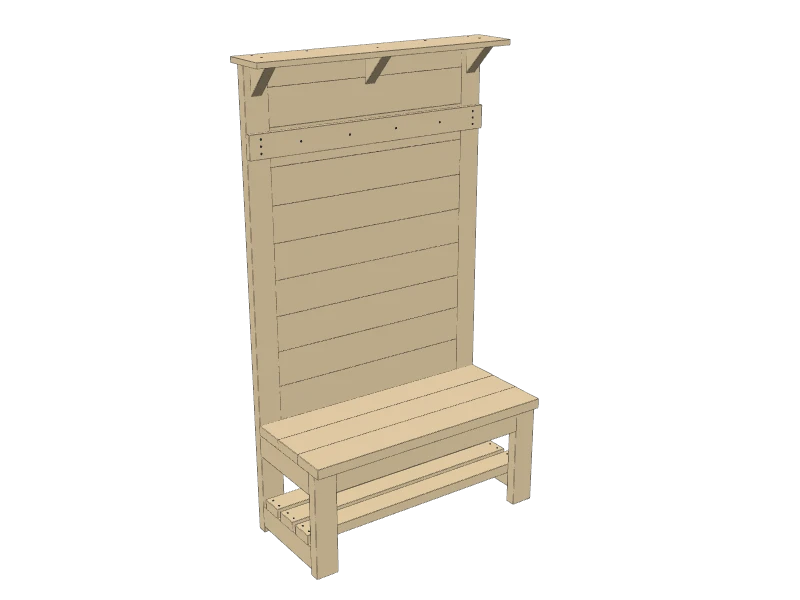
Sand and finish
Fill the screw holes on the shelf and the hook rail, sand with 120 then 180 grit, and round every edge and corner a little, the seat front most of all. Paint or stain, then seal the seat with two or three coats of clear topcoat: it gets the most wear.
 11
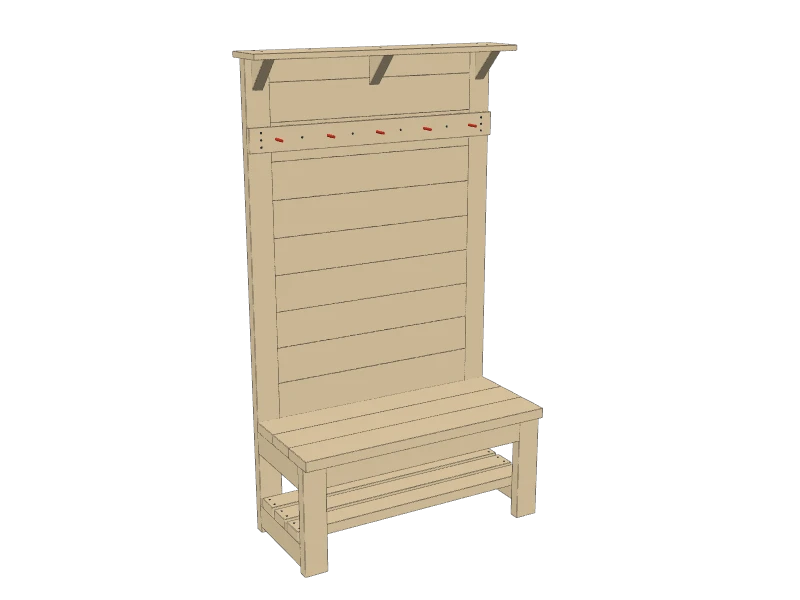
Add the hooks and anchor it
Mark five coat hooks across the hook rail (K), 8″ apart, centered on it. Pre-drill and screw them on.
Stand the hall tree in place, check that it sits flat, and anchor the header to a wall stud with the furniture anti-tip kit, following its instructions.
Watch outA hall tree with heavy coats on the hooks can tip if a child climbs it or swings on a hook. Always anchor it to a stud.
Build at your own risk. Check every measurement against your own lumber before you cut, test-fit before you glue, and wear eye and ear protection.