Jewelry Box with Lift-Out Tray
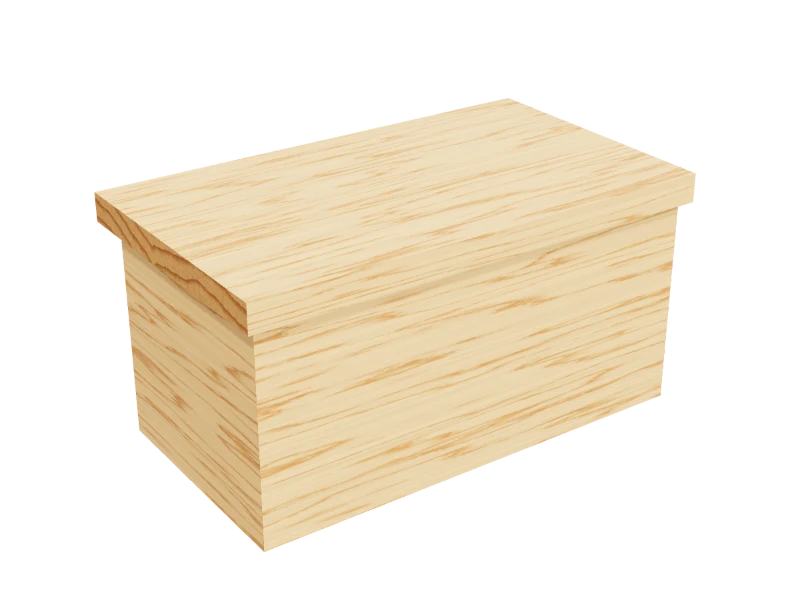
A hardwood jewelry box with mitered corners, a lid on small brass hinges and a lift-out tray with compartments for rings and earrings.
- Skill
- Level 3 of 5 · Intermediate
- Build time
- 5 to 7 hours, plus finish
- Lumber
- 1 1x6, 1 1x2, 1 1x8, 1 panel of ½″ plywood and 1 panel of ¼″ plywood
- Joinery
- Miters, glue and brads; brass hinges
- Finished size
- 12½″ W × 7¼″ D × 6¼″ H
What you need
A 1x6 is actually ¾″ × 5½″, a 1x2 is ¾″ × 1½″ and a 1x8 is ¾″ × 7¼″. Every measurement in this plan uses the real size. ½″ plywood and ¼″ plywood are drawn at full thickness, but plywood sold that way is often a hair thinner, so measure yours and cut the pieces that fit between panels to match.
Shopping list
- 11x6, 6 ftThe sides. Oak, walnut, cherry or maple. The box uses about 3 ft, so a shorter board will do.
- 11x2, 6 ftThe ledges and tray walls. The same wood again, or poplar. About 3 ft is used.
- 11x8, 6 ftThe lid, the same wood as the sides. It uses only 12½″: buy a short board if the store sells them.
- 1½″ plywood, 2 × 4 ft panelThe bottom.
- 1¼″ plywood, 2 × 4 ft panelThe tray bottom and dividers.
- 1 pair1½″ brass butt hinges, pairWith their brass screws.
- ~401¼″ brad nails
- 1Wood glue
- 4Felt padsFor under the box.
- —Sandpaper, 120 to 220 grit
- 1Wipe-on oil or polyurethane
Tools
- Miter sawSet dead on 45° for the corners.
- Band clampFor the mitered box.
- Brad nailerOr a hammer and nail set.
- Drill/driverWith a 1⁄16″ bit for the hinge screws.
- Random orbit sander
- Tape measure, speed square, pencilAnd packing tape.
Cut list
Fifteen pieces from three boards and two panels. Label each piece with its letter in pencil as you cut it.
| Part | Qty | Size, inches | From |
|---|---|---|---|
| AFront and backMitered 45° at both ends. | 2 | ¾ × 5½ × 12 | 1x6 |
| BEndsMitered 45° at both ends. | 2 | ¾ × 5½ × 6¼ | 1x6 |
| CBottom | 1 | ½ × 4¾ × 10½ | ½″ plywood |
| DTray ledges | 2 | ¾ × 1½ × 4¾ | 1x2 |
| ETray front and back | 2 | ¾ × 1½ × 10⅜ | 1x2 |
| FTray ends | 2 | ¾ × 1½ × 3⅛ | 1x2 |
| GTray bottom | 1 | ¼ × 4⅝ × 10⅜ | ¼″ plywood |
| HTray dividers | 2 | ¼ × 1½ × 3⅛ | ¼″ plywood |
| JLid | 1 | ¾ × 7¼ × 12½ | 1x8 |
Board layout. Each row is one board, cut left to right, with the remainder hatched. Dark lines are saw cuts, about ⅛″ wide.
Hardware & tools
Everything besides the lumber, with a link for each.
Links go to Amazon. Woodable earns a small commission at no cost to you.
Hardware
- 1½″ brass butt hinges, pairWith their brass screws.1 pairView on Amazon
- Felt padsFor under the box.4View on Amazon
Fasteners
- 1¼″ brad nails18 gauge, 1¼″ long.~40View on Amazon
Glue & finish
- Wood gluePVA wood glue for indoor projects.1View on Amazon
- Sandpaper, 120 to 220 grit5″ hook-and-loop discs for a random orbit sander, 80 to 220 grit.View on Amazon
- Clear polyurethaneWater-based polyurethane, satin, for a clear topcoat.View on Amazon
- Danish oilWipe-on oil finish for indoor wood.View on Amazon
Tools
- Miter sawSet dead on 45° for the corners.View on Amazon
- Band clampFor the mitered box.View on Amazon
- Brad nailerOr a hammer and nail set.View on Amazon
- Drill/driverWith a 1⁄16″ bit for the hinge screws.View on Amazon
- Random orbit sander5″ random orbit sander.View on Amazon
- Tape measure25 ft tape measure.View on Amazon
- Speed square7″ rafter square for marking and guiding cuts.View on Amazon
Build it
Eleven steps. The 3D view follows along as you scroll. The parts you're working on are yellow, and the brads for that step are red.
- 01
Cut the pieces
Cut every piece on the cut list. Cut the sides (A) and (B) with a 45° miter at both ends, measuring the long point:
- A Front and back, two at 12″
- B Ends, two at 6¼″
- C Bottom, one at 4¾″ × 10½″
- D Tray ledges, two at 4¾″
- E Tray front and back, two at 10⅜″
- F Tray ends, two at 3⅛″
- G Tray bottom, one at 4⅝″ × 10⅜″
- H Tray dividers, two at 1½″ × 3⅛″
- J Lid, one at 12½″
TipCut the four sides one after another from the same board, in order around the box: front, end, back, end. The grain then wraps around three corners. - 02
Dry fit the miters
Lay the four sides (A) and (B) outside face down in a row, miters touching, and run a strip of packing tape across each joint. Roll them up into a box around the bottom (C) and check that every corner closes with no gap.
If one corner gaps, trim a hair off the ends of the two short pieces (B), not the long ones, so the box stays square.
- 03
Glue up the box
Unroll the sides, brush glue on every miter and on the edges of the bottom (C), and roll the box up again around the bottom, flush with the bottom edges. Pull it tight with a band clamp.
Pin each corner with three 1¼″ brads across the miter: two through the front or back (A) into the end (B), one through the end into the front or back.
TipFor stronger corners and a nice look, cut a thin slot across each corner with a table saw jig when the glue is dry and glue in a contrasting wood spline. - 04
Pin the bottom
While the glue is wet, drive brads through the sides into the edges of the bottom (C), ¼″ up from the bottom edge: three through the front and back (A), one through each end (B). Check the box is square by measuring both diagonals across the top.
- 05
Add the tray ledges
Glue a ledge (D) to the inside of each end (B), its top edge 1⅞″ below the top of the box, and pin each with two brads. A 1⅝″ scrap block standing on the bottom (C) holds the ledge at the right height while you nail.
- 06
Build the tray
Glue the tray ends (F) between the tray front and back (E), flush at the top and bottom, and pin through (E) into each end. Glue the tray bottom (G) under the walls, flush all around, and pin it with six brads.
Glue the two dividers (H) in between the long walls, each 3″ from the inside of an end, so the tray has two square compartments and a narrow one in the middle for rings.
TipCut the dividers (H) a hair long and sand them to a snug push fit. A little glue on each end holds them. - 07
Set the tray in
Lower the tray (G) onto the ledges (D). It is ⅛″ smaller than the inside of the box each way, so it lifts straight out. If it binds, sand the outside of the tray walls (E) and (F).
- 08
Sand the box and the lid
Sand the outside of the box flush at the corners and the lid (J) with 120, 180 and 220 grit. Ease every edge and round the four corners of the lid a little.
- 09
Hinge the lid
Set the lid (J) on the box, overhanging ¾″ at the back, ¼″ at the front and ¼″ at each end. Clamp it there.
Hold each hinge folded at a right angle with its knuckle tucked into the corner under the back overhang, centered 2¼″ from an end. Screw one leaf to the back of the box (A) and the other to the underside of the overhang. Drill pilot holes first: small brass screws snap easily.
Check your hinges' own instructions and screw lengths first. The plan is drawn for 1½″ butt hinges with leaves about ⅝″ wide, and their screws must stay shorter than ¾″.
- 10
Test the lid
Open the lid (J). As it comes up, the hinges fold flat between the back overhang and the back of the box (A), so the lid stops standing straight up and leans back on them.
Watch outDon't let the lid fall open hard. The stop is the hinge itself, and a slam can pull the small screws out of the wood. - 11
Finish
Take the hinges off, then finish the box, the lid and the tray inside and out with a wipe-on oil or a clear coat. Screw the hinges back on when it's dry and stick felt pads under the corners.
TipLine the tray compartments and the bottom with felt or velvet for rings and chains.
Build at your own risk. Check every measurement against your own lumber before you cut, test-fit before you glue, and wear eye and ear protection. Full disclaimer.