









Kids' Chair
A sturdy little chair to go with the kids' table: an 11½″ seat with rounded corners, a two-slat back and low side stretchers, all from 2x2s and 1x4s.
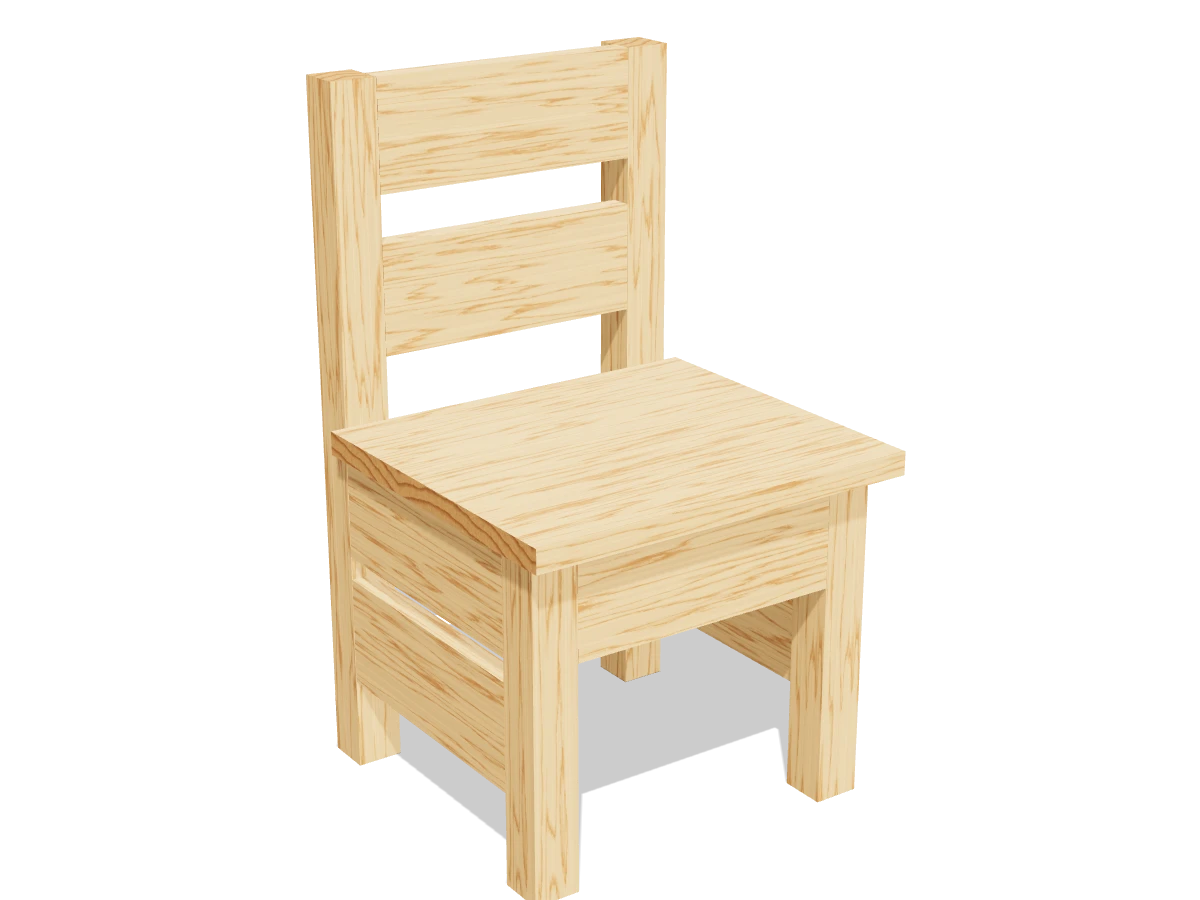
- Skill
- Level 2 of 5 · Beginner
- Build time
- 2 to 3 hours, plus finish
- Lumber
- 1 2x2, 1 1x4 and 1 1x12
- Joinery
- Pocket holes and glue
- Finished size
- 13″ W × 12¾″ D × 22″ H
A 2x2 is actually 1½″ × 1½″, a 1x4 is ¾″ × 3½″ and a 1x12 is ¾″ × 11¼″. Every measurement in this plan uses the real size.
Shopping list
- 12x2, 8 ftThe legs. Sight down it to make sure it's straight.
- 11x4, 8 ftAprons, stretchers and back slats.
- 11x12, 6 ftThe seat.
- ~501¼″ coarse-thread pocket-hole screws
- 1Wood glue
- —Toy-safe paint or finish, sandpaper
Tools
- Miter saw or circular saw
- JigsawFor the rounded seat corners.
- Pocket-hole jigSet for ¾″.
- Drill/driver
- Clamps
- Sander
Cut list
| Part | Qty | Size, inches | From |
|---|---|---|---|
| AFront legs | 2 | 1½ × 1½ × 10¾ | 2x2 |
| BBack legs | 2 | 1½ × 1½ × 22 | 2x2 |
| CFront and back aprons | 2 | ¾ × 3½ × 9 | 1x4 |
| DSide aprons and stretchers | 4 | ¾ × 3½ × 8¾ | 1x4 |
| ESeat | 1 | ¾ × 11¼ × 13 | 1x12 |
| FBack slats | 2 | ¾ × 3½ × 9 | 1x4 |
Board layout. Each row is one board, cut left to right, with the remainder hatched. Dark lines are saw cuts, about ⅛″ wide.
Build it
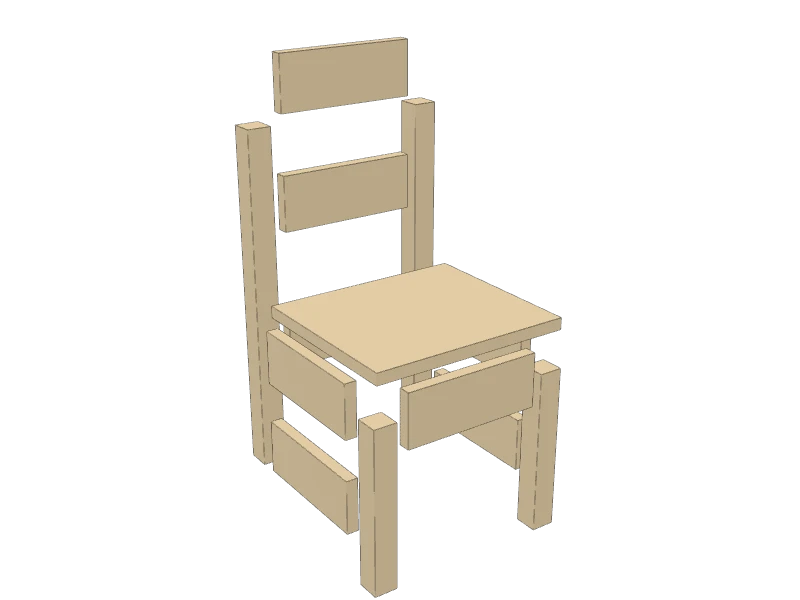 01
Cut the pieces
Cut every piece on the cut list:
- A Front legs, two at 10¾″
- B Back legs, two at 22″
- C Front and back aprons, two at 9″
- D Side aprons and stretchers, four at 8¾″
- E Seat, one at 13″
- F Back slats, two at 9″
Round all four corners of the seat (E) to a 1″ radius: trace a coin or a cup, cut with a jigsaw and sand smooth.
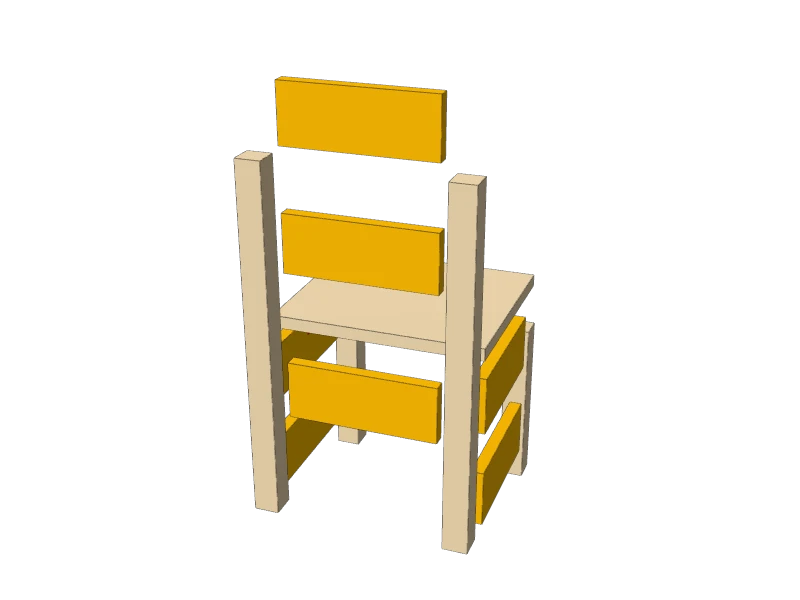 02
Drill the pocket holes
With the jig set for ¾″, drill two pocket holes at each end of every apron (C, D), stretcher (D) and back slat (F), on the inside faces so none show.
Add one more hole along the top edge of the front and back aprons (C) and the two upper side aprons (D). They hold the seat on.
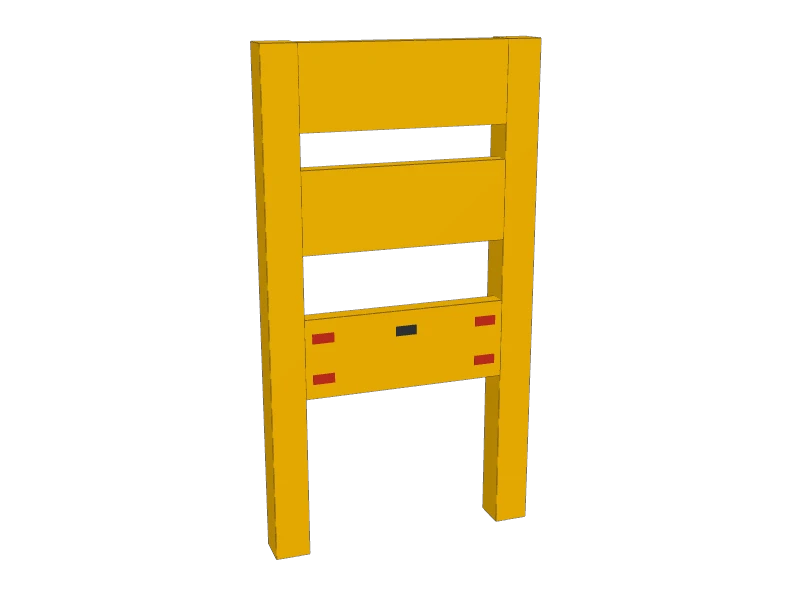 03
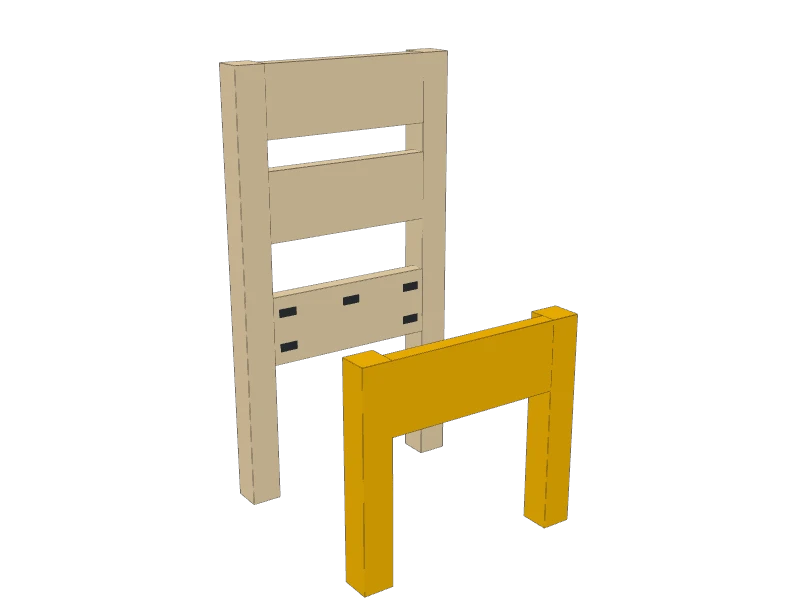
Build the back
Lay the two back legs (B) on the bench, 12″ apart at the outside. Fit the back apron (C) between them, its top 10¾″ up from the bottom of the legs, and the two back slats (F) with their bottoms at 13½″ and 18½″. Keep them flush with the front faces of the legs. Glue and drive 1¼″ pocket screws.
 04
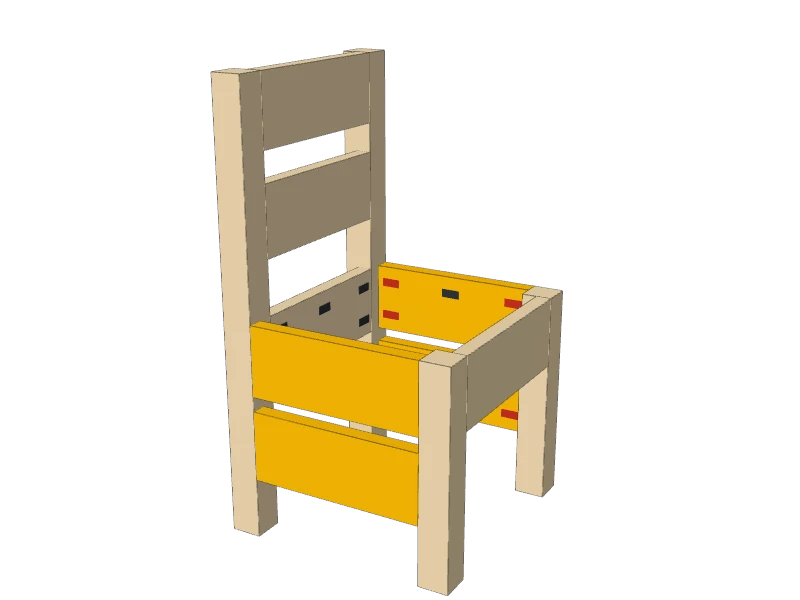
Build the front
Join the front apron (C) between the two front legs (A), flush with the leg tops and the outside faces. Glue and screw.
 05
Join the front to the back
Stand the back and front up and join them with the side aprons (D) at the top, flush with the outside, and the side stretchers (D) with their bottoms 3″ up from the floor. Glue and screw each joint. Check that the chair sits flat with no rock.
 06
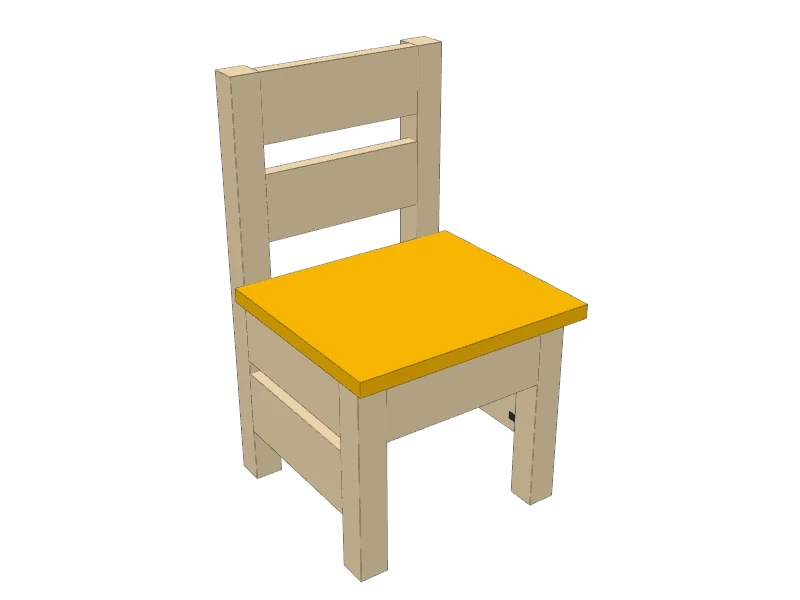
Attach the seat
Lay the seat (E) on the aprons, tight against the back legs, overhanging ½″ at each side. Drive 1¼″ pocket screws up through the aprons into the seat.
 07
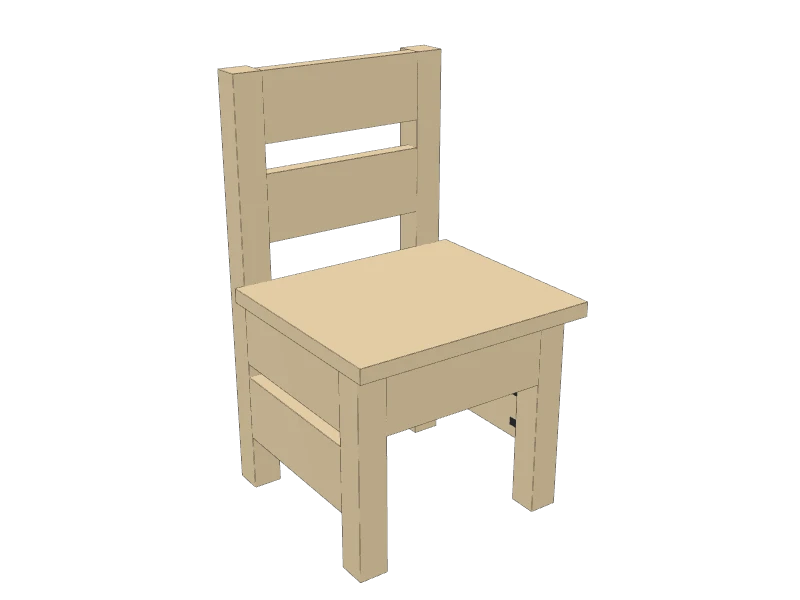
Round the edges and finish
Round over every edge and corner with sandpaper or a ¼″ roundover bit, especially the tops of the back legs and the front of the seat. Sand smooth with 120 then 180 grit.
Paint or seal it with a finish that's labeled safe for toys once it has cured, and let it cure fully before a child uses it.
Watch outThis is a chair, not a step stool. Teach kids not to stand on it or tip it back.
Build at your own risk. Check every measurement against your own lumber before you cut, test-fit before you glue, and wear eye and ear protection.