Kitchen Island Cart
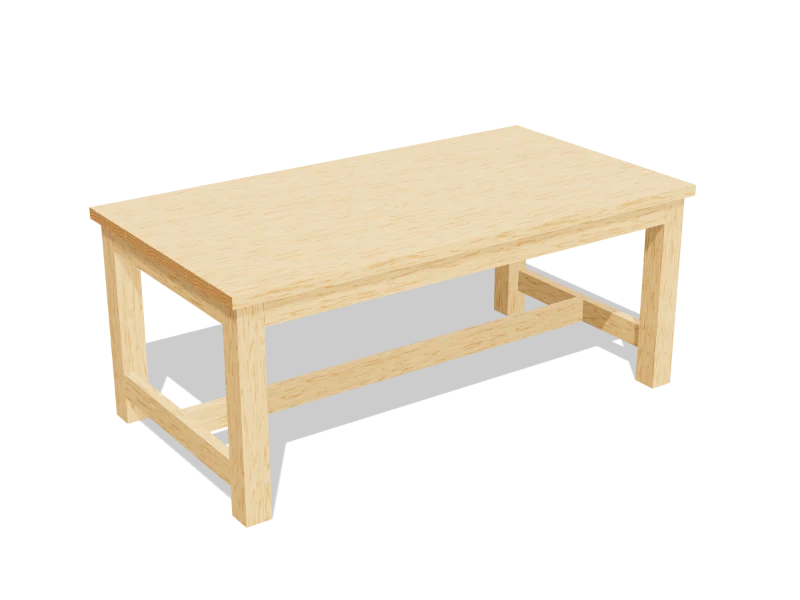
Draft · not yet checked by a carpenterA rolling kitchen island at counter height: a thick 2x6 top, two plywood shelves and locking casters so it parks where you need it.
- Skill
- Intermediate
- Build time
- 5 to 7 hours, plus finish
- Lumber
- 5 2x2s, 2 2x6s and 2 panels of ¾″ plywood
- Joinery
- Pocket holes
- Finished size
- 36″ L × 22″ W × 36″ H
What you need
A 2x2 is actually 1½″ × 1½″ and a 2x6 is 1½″ × 5½″. Every measurement in this plan uses the real size. ¾″ plywood is drawn at full thickness, but plywood sold that way is often a hair thinner, so measure yours and cut the pieces that fit between panels to match.
Shopping list
- 52x2, 8 ftLegs and rails.
- 22x6, 8 ftThe top. Pick the straightest boards in the pile.
- 2¾″ plywood, 2 × 4 ft panelShelves.
- 1 set3″ grip-ring stem casters, 4 (2 locking)Their overall height should be about 3½″. Check before you cut the legs.
- ~502½″ coarse-thread pocket-hole screws
- ~301¼″ coarse-thread pocket-hole screwsFor the shelves.
- 1Wood glue
- 1Butcher block oilFood-safe, for the top.
- opt.Paint for the base
Tools
- Miter saw or circular saw
- Pocket-hole jigSet for 1½″ and ¾″ material.
- Drill/driverWith a bit to suit the caster sockets.
- ClampsTwo that open 24″ or more.
- Random orbit sander
Cut list
Twenty-two pieces from seven boards and two panels. Label each piece with its letter in pencil as you cut it.
| Part | Qty | Size, inches | From |
|---|---|---|---|
| ALegs | 4 | 1½ × 1½ × 31 | 2x2 |
| BFront and back rails | 6 | 1½ × 1½ × 30 | 2x2 |
| CSide rails | 6 | 1½ × 1½ × 16 | 2x2 |
| DTop boards | 4 | 1½ × 5½ × 36 | 2x6 |
| EShelves | 2 | ¾ × 16 × 30 | ¾″ plywood |
Board layout. Each row is one board, cut left to right, with the remainder hatched. Dark lines are saw cuts, about ⅛″ wide.
Build it
Ten steps. The 3D view follows along as you scroll. The parts you're working on are yellow, and the pocket holes or screws for that step are red.
- 01
Cut the pieces
Cut every piece on the cut list:
- A Legs, four at 31″
- B Front and back rails, six at 30″
- C Side rails, six at 16″
- D Top boards, four at 36″
- E Shelves, two at 16″ × 30″
TipSight down every 2x2 in the store and leave the bowed ones. Straight legs and rails make a cart that rolls square. - 02
Drill the pocket holes
Set your jig for 1½″ material. Drill one pocket hole at each end of every rail (B) and (C), on the inside face. On the four top rails, add holes on the top edge for the top: 2 on each long rail and 1 on each side rail. Drill 3 along one edge of three top boards (D).
Reset the jig for ¾″ and drill pocket holes along every edge of both shelves (E), on the underside.
- 03
Build the two ends
Lay a front and a back leg (A) on the bench. Fit three side rails (C) between them: one flush with the leg bottoms, one with its bottom edge 14½″ up, and one flush with the leg tops. Glue and drive 2½″ pocket screws. Build the second end to match.
- 04
Join the ends
Stand the ends up and fit the front and back rails (B) at the same three levels. Glue and screw, and check the frame is square corner to corner.
- 05
Add the shelves
Drop each shelf (E) in between the legs, flush with the top of its rails, and drive 1¼″ pocket screws up into the rails.
- 06
Join the top boards
Lay the four top boards (D) face down in order, pocket holes along the joints. Glue the edges, clamp them flat and drive 2½″ pocket screws from the middle out.
- 07
Sand the top
Sand the top flat with 80 grit, then 120 and 180. It's a work surface, so take the time to get the joints smooth.
- 08
Attach the top
Lay the top (D) face down, center the base upside down on it with 1½″ of overhang all round, and screw through the top-edge holes of the top rails.
- 09
Add the casters
Turn the cart on its side. Drill a hole in the center of each leg bottom for the stem of the caster socket, tap in the socket, and push in the caster. Put the two locking casters at the front.
Watch outLock the casters before you chop on it or load it. A cart this tall rolls easily. - 10
Finish
Give the top several coats of food-safe butcher block oil, and the base paint or a clear finish.
Build at your own risk. Check every measurement against your own lumber before you cut, test-fit before you glue, and wear eye and ear protection. Full disclaimer.