









Miter Saw Station
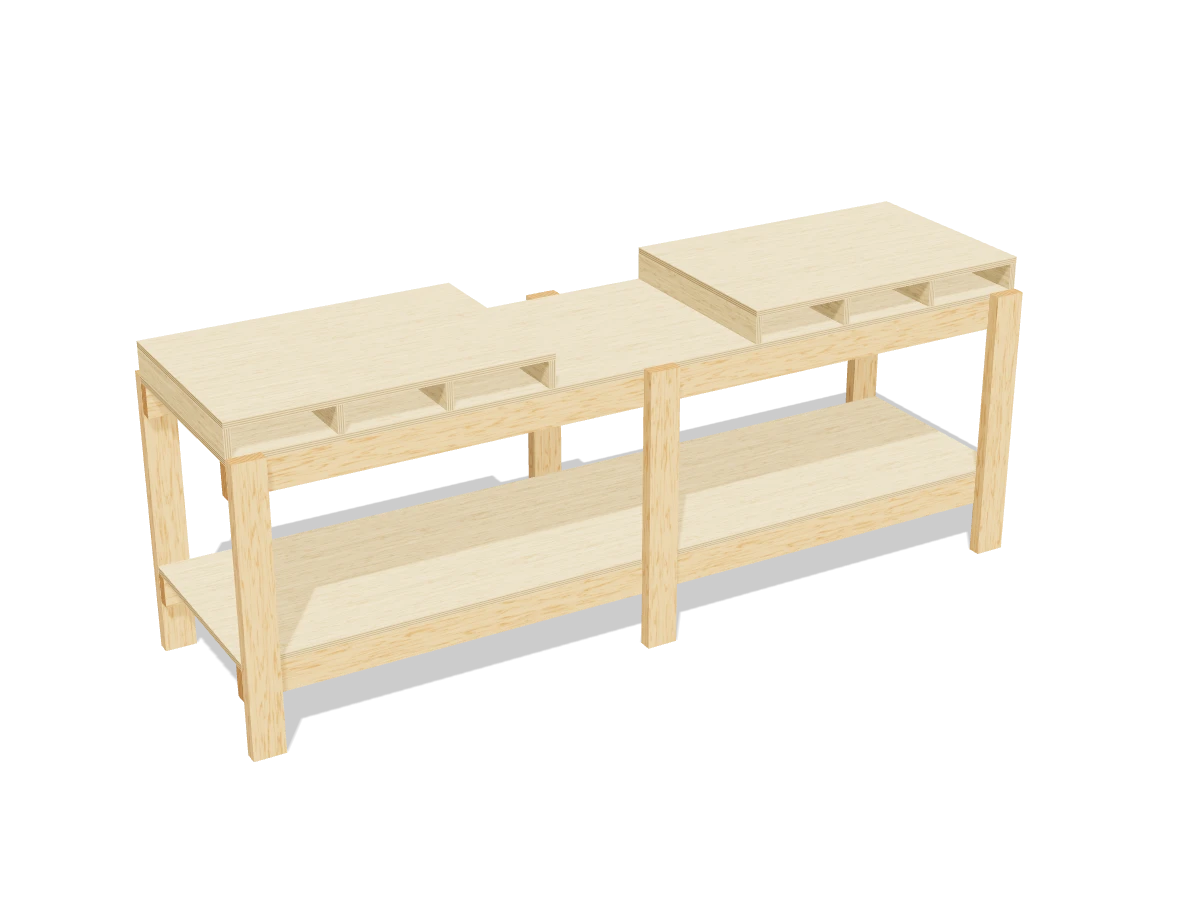
Draft · not yet checked by a carpenterA 94″ bench for your miter saw with long wings on both sides that sit flush with the saw's table, plus a full-length shelf underneath.
- Skill
- Intermediate
- Build time
- 5 to 7 hours, plus finish
- Lumber
- 8 2x4s and 3 sheets of ¾″ plywood
- Joinery
- Structural screws
- Finished size
- 94″ L × 27″ D × 35¾″ H
A 2x4 is actually 1½″ × 3½″. Every measurement in this plan uses the real size. ¾″ plywood is drawn at full thickness, but plywood sold that way is often a hair thinner, so measure yours and cut the pieces that fit between panels to match.
Shopping list
- 82x4, 8 ftLegs, rails and cross pieces.
- 3¾″ plywood, 4 × 8 ft sheetTop, shelf and wings.
- 483″ structural wood screwsSuch as GRK or Spax.
- ~601¼″ wood screws
- 4¼″ bolts with washers and nutsLong enough to bolt your saw through the top.
- opt.Paste wax
Tools
- Circular saw
- Drill/driver
- Level
- Straightedge4 ft.
- Tape measure, pencil
Cut list
| Part | Qty | Size, inches | From |
|---|---|---|---|
| ALegs | 6 | 1½ × 3½ × 32 | 2x4 |
| BLong rails | 4 | 1½ × 3½ × 94 | 2x4 |
| CCross pieces | 6 | 1½ × 3½ × 21 | 2x4 |
| DTop and shelf | 2 | ¾ × 24 × 94 | ¾″ plywood |
| EWing tops | 2 | ¾ × 24 × 35 | ¾″ plywood |
| FWing ribsRip them to your saw: see step 6. | 8 | ¾ × 3 × 24 | ¾″ plywood |
Board layout. Each row is one board, cut left to right, with the remainder hatched. Dark lines are saw cuts, about ⅛″ wide.
Build it
 01
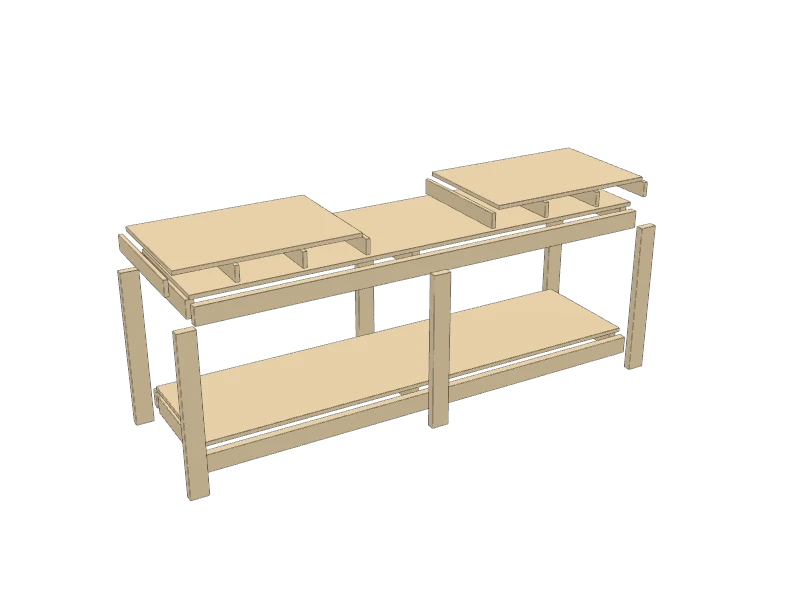
Cut the pieces
Measure your saw first: stand it on a flat surface and measure from the surface to the top of the saw's table. This plan uses 3¾″. If yours is different, the wing ribs (F) are that number minus ¾″ wide.
- A Legs, six at 32″
- B Long rails, four at 94″
- C Cross pieces, six at 21″
- D Top and shelf, two at 24″ × 94″
- E Wing tops, two at 24″ × 35″
- F Wing ribs, eight at 3″ × 24″
TipAsk the store to rip one plywood sheet into two 24″ strips for the top and shelf.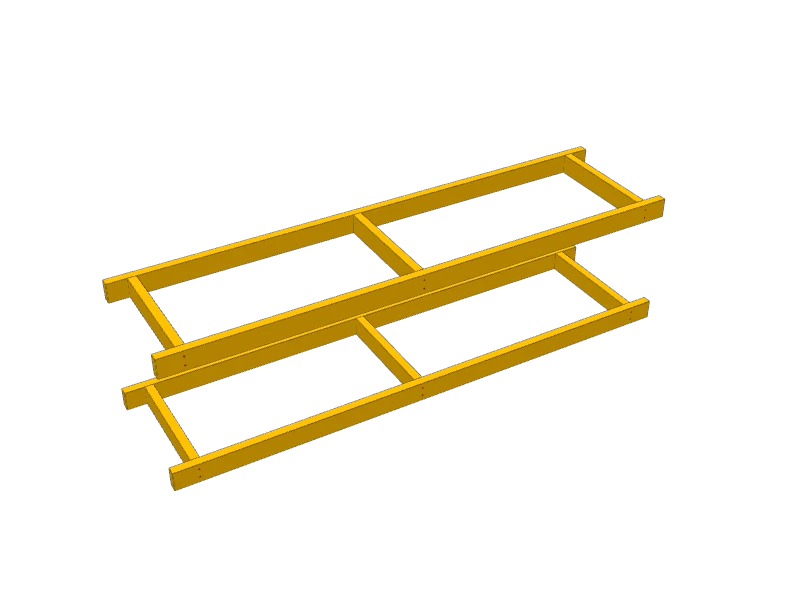 02
Build the two frames
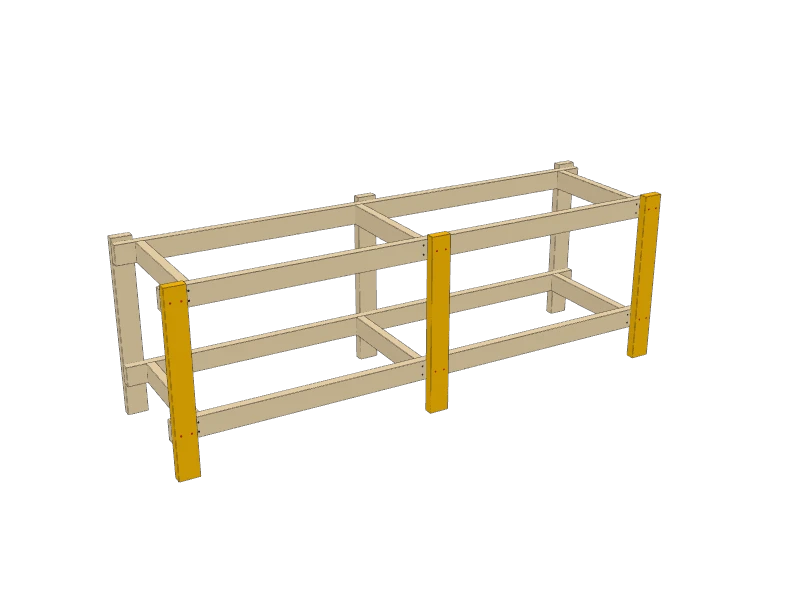
For each frame, stand two long rails (B) on edge 24″ apart at the outside and fit three cross pieces (C) between them: one 3½″ in from each end, and one just left of center where the middle legs go. Drive two 3″ structural screws through the rails into each cross piece.
 03
Screw the frames to the back legs
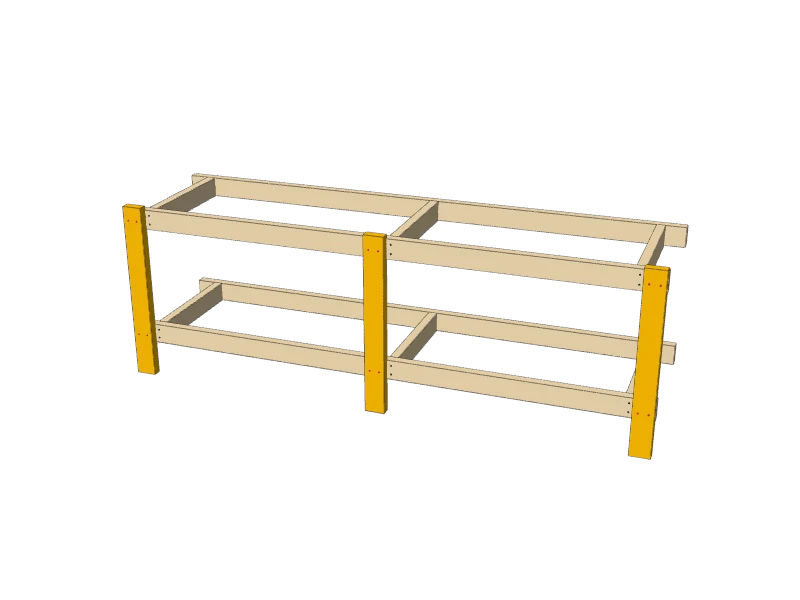
Lay the three back legs (A) on the floor and set the frames on them, back rail down, the lower frame with its bottom 6″ up and the upper frame flush with the leg tops minus ¾″ for the top. Two 3″ screws through each leg into each rail.
 04
Add the front legs
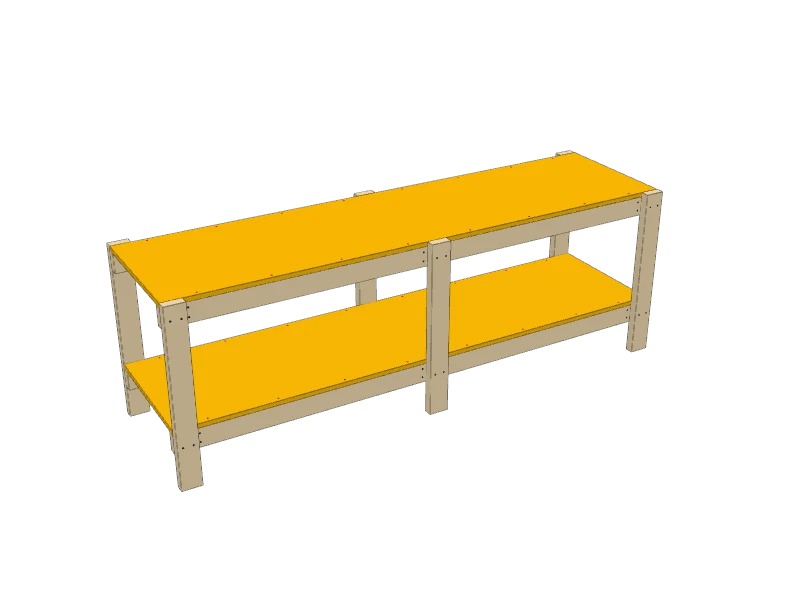
Stand the bench up and screw the three front legs (A) to the front rails the same way. Check the top frame is level and the legs are plumb.
 05
Add the top and shelf
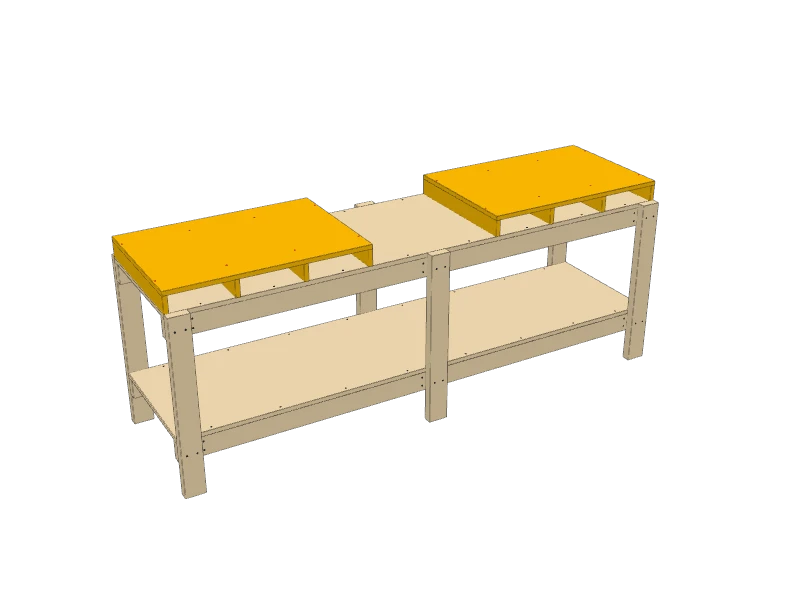
Screw the top and shelf (D) down onto the frames with 1¼″ screws every 12″ along the rails.
 06
Build the wings
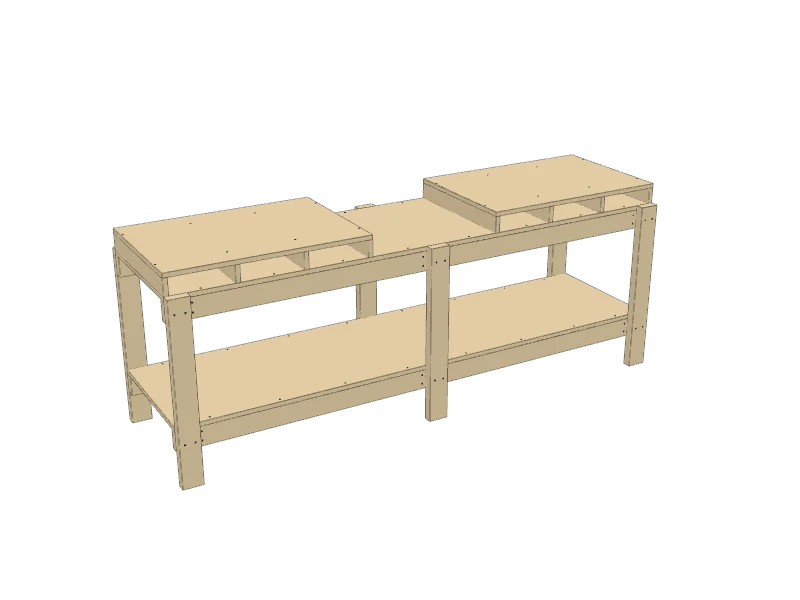
Stand four ribs (F) on edge on each end of the top, front to back, evenly spaced from the end to the edge of the saw bay. Screw a wing top (E) down onto each set of ribs. The two wings leave a 24″ bay in the middle for the saw.
Set the saw in the bay and lay a straightedge across it onto both wings. The wings should be flush with the saw's table: shim the saw or plane the ribs until they are, then bolt the saw down through its base.
 07
Finish
Ease the edges and give the tops a coat of paste wax so boards slide. Draw a measuring scale along the front of each wing if you like.
Watch outBolt the saw down before you cut, and keep the bay clear of offcuts.
Build at your own risk. Check every measurement against your own lumber before you cut, test-fit before you glue, and wear eye and ear protection.