









Modern Lift-Top Coffee Table
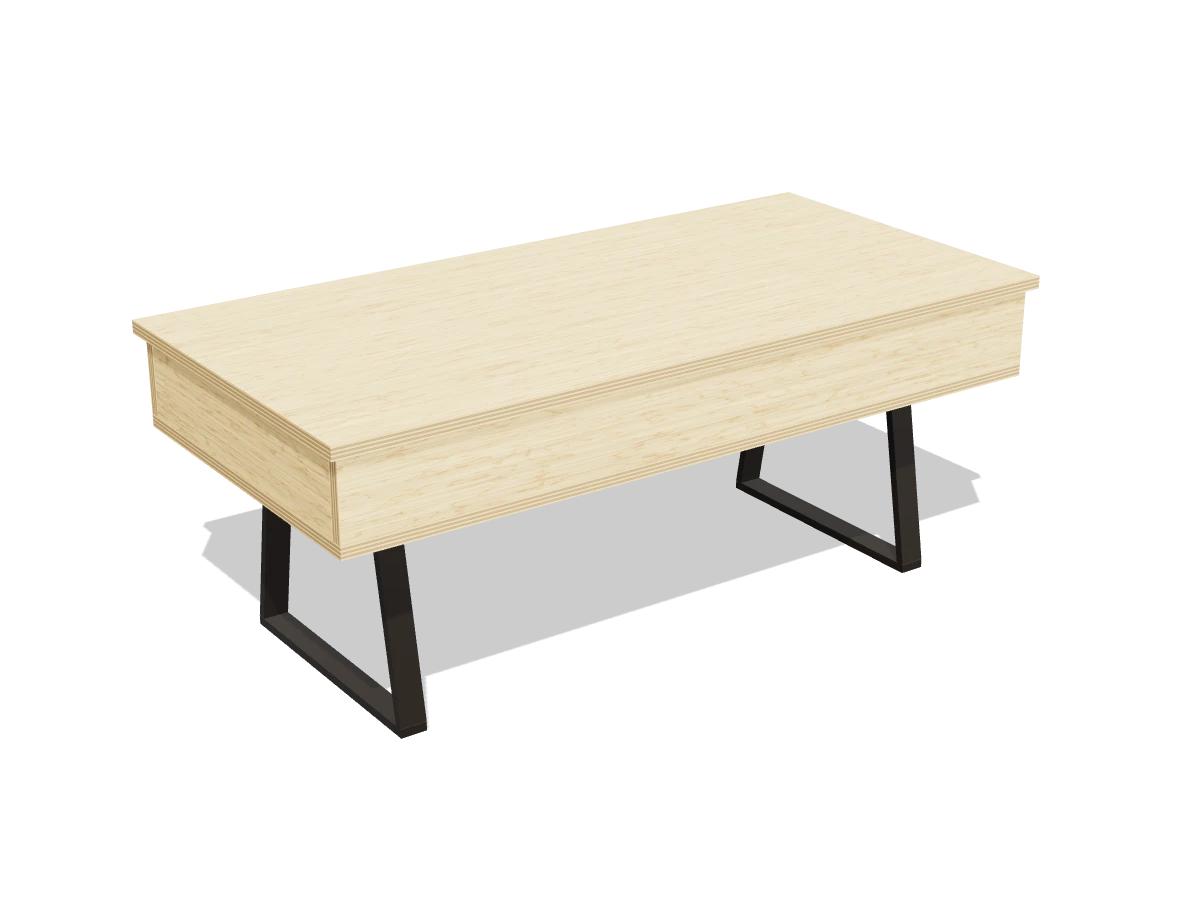
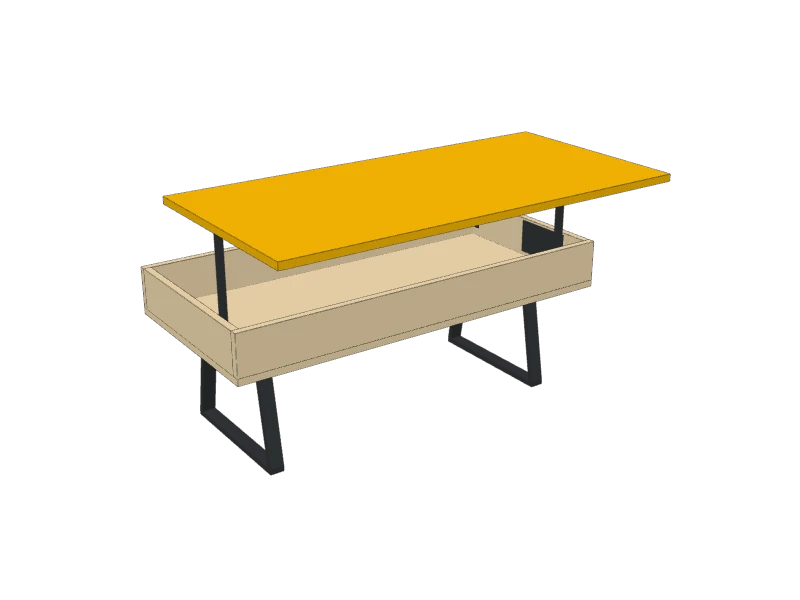
A slim plywood coffee table on black trapezoid legs. The top lifts up and comes toward you on spring-assisted hinges, with a shallow tray for remotes and laptops underneath.
- Skill
- Level 3 of 5 · Intermediate
- Build time
- 4 to 6 hours, plus finish
- Lumber
- 1 sheet of ¾″ plywood
- Joinery
- Pocket holes, glue and screws
- Finished size
- 45″ L × 22″ W × 18″ H
Every measurement in this plan uses the real size. ¾″ plywood is drawn at full thickness, but plywood sold that way is often a hair thinner, so measure yours and cut the pieces that fit between panels to match.
Shopping list
- 1¾″ plywood, 4 × 8 ft sheetBirch or another hardwood plywood, not particleboard: the hinges and legs screw into it.
- 1 pairLift-top coffee table hingesRated for a top of at least 25 lb. This top weighs about 16 lb.
- 1 pair12″ trapezoid metal legsAbout 11¾″ across the top bar.
- ~10Screws for the legsUsually included. No longer than the bar plus ¾″.
- ~20Screws for the hingesMost hinges come with them. If not, #8 × ⅝″ pan-head screws.
- ~101¼″ coarse-thread pocket-hole screws
- ~201¼″ wood screwsFor the bottom.
- 1Iron-on edge banding, 25 ftTo match the plywood.
- 1Wood glue
- —Sandpaper and a clear matte finish
Tools
- Circular sawWith a straight board clamped on as a guide.
- Pocket-hole jigSet for ¾″.
- Drill/driver
- Clamps
- Clothes ironFor the edge banding.
- Random orbit sander
- Tape measure, speed square, pencil
Cut list
| Part | Qty | Size, inches | From |
|---|---|---|---|
| ABottom | 1 | ¾ × 21 × 44 | ¾″ plywood |
| BFront and back | 2 | ¾ × 4½ × 44 | ¾″ plywood |
| CEnds | 2 | ¾ × 4½ × 19½ | ¾″ plywood |
| DTop | 1 | ¾ × 22 × 45 | ¾″ plywood |
Board layout. Each row is one board, cut left to right, with the remainder hatched. Dark lines are saw cuts, about ⅛″ wide.
Build it
 01
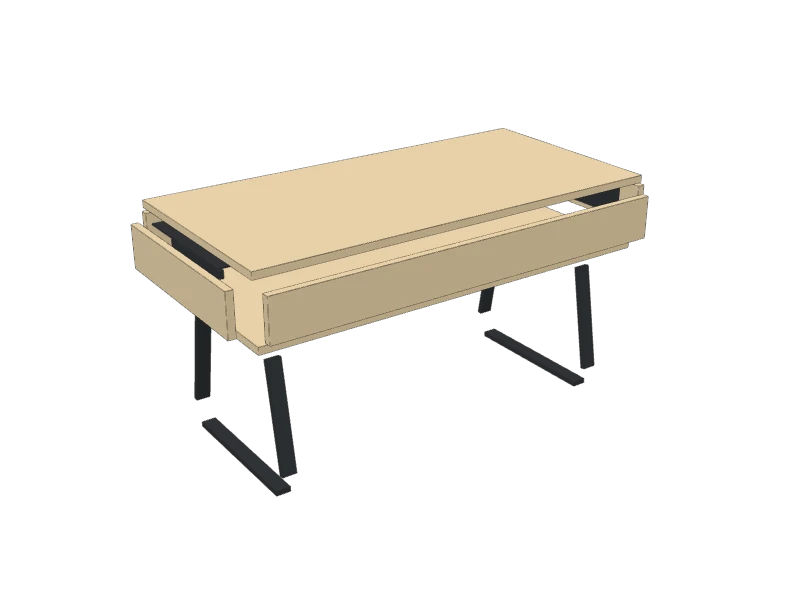
Cut the pieces
Cut every piece from one sheet of plywood. Ask the store to rip it into strips if it won't fit in your car:
- A Bottom, one at 21″ × 44″
- B Front and back, two at 4½″ × 44″
- C Ends, two at 4½″ × 19½″
- D Top, one at 22″ × 45″
Check firstCheck your hinges' instructions for exact mounting positions and minimum box size before cutting. This box has 19½″ inside from front to back and 4½″ of height under the top, for hinges about 13½″ long and 4″ tall when folded. Check your legs too: the plan is drawn for 12″ trapezoid legs with a top bar about 11¾″ long.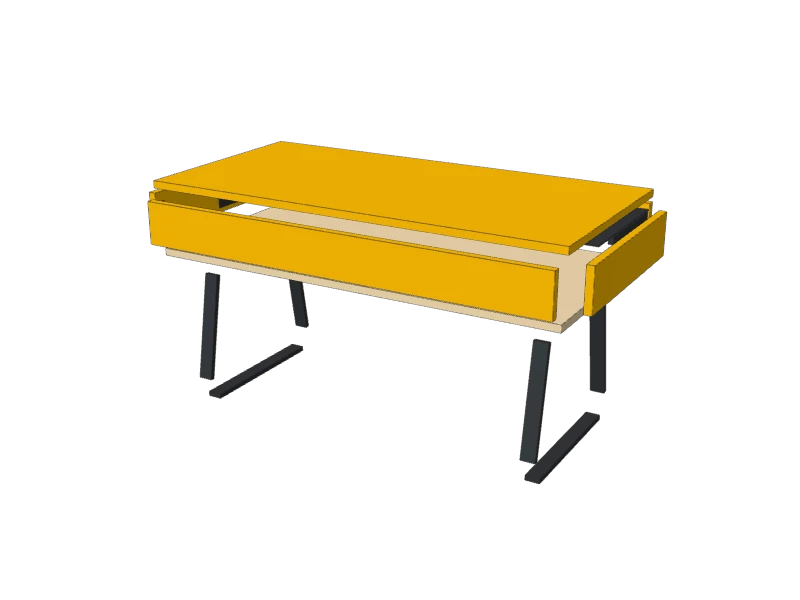 02
Band the edges and drill the pocket holes
Iron edge banding onto every edge of the top (D), the top edges of the front and back (B) and ends (C), and both ends of the front and back. Trim it flush.
Set the pocket-hole jig for ¾″ and drill two pocket holes at each end of both ends (C), on the inside face.
 03
Build the box
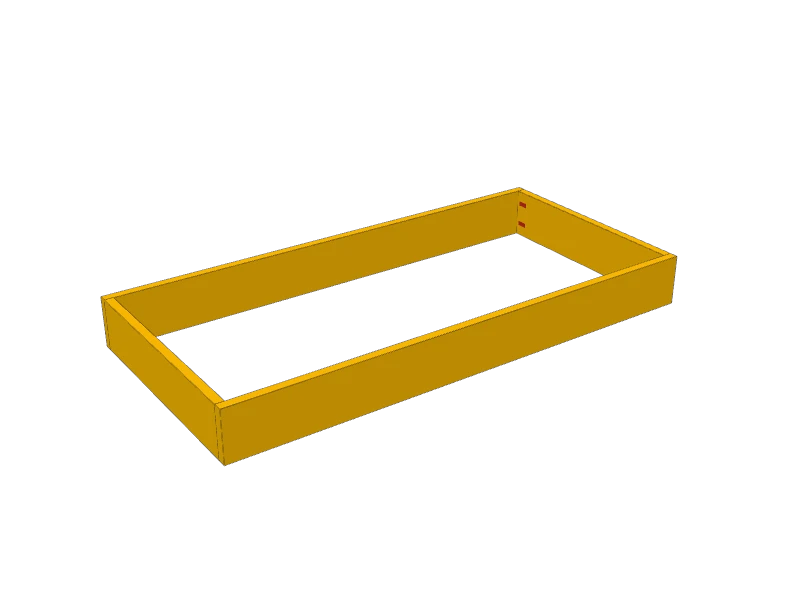
Stand the ends (C) between the front and back (B), flush at the top and the outside. Glue and pocket-screw them. Measure the diagonals: when they match, the box is square.
 04
Screw on the bottom
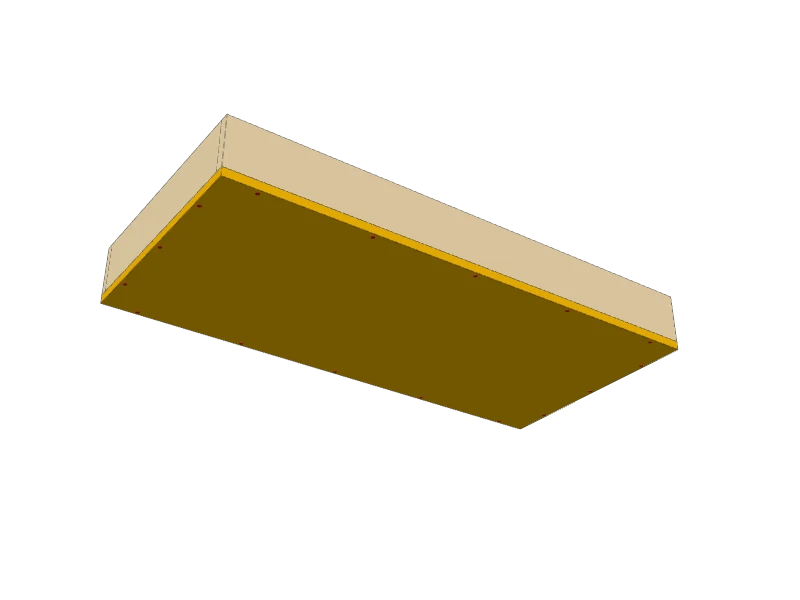
Turn the box over. Glue the bottom (A) on, flush all around, and screw it to the front, back and ends with 1¼″ screws.
 05
Add the legs
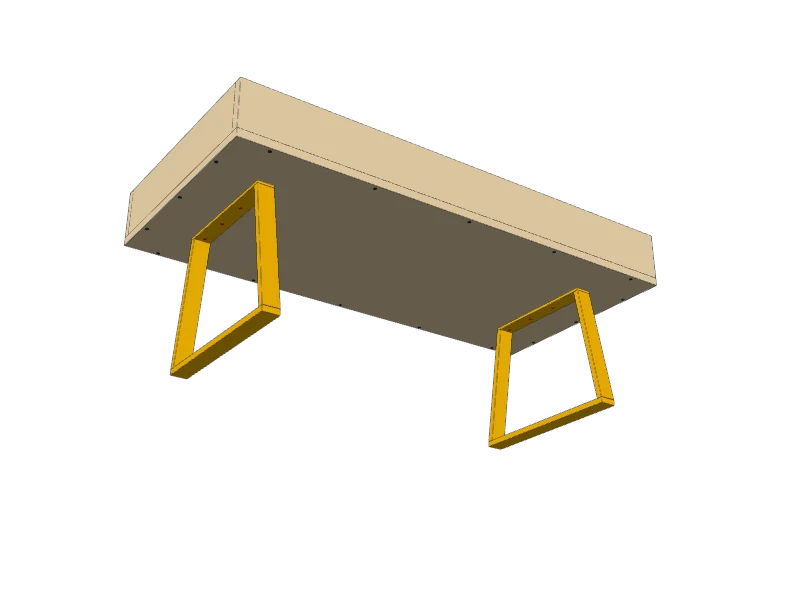
With the box still upside down, set a leg frame across each end, its top bar centered front to back and 5″ in from the end. Mark the holes, drill pilot holes no deeper than ½″, and screw the legs on with the screws that came with them.
TipCheck your legs' instructions for the screw size. The bottom is only ¾″ thick: a screw longer than ¾″ plus the bar would come through inside the box.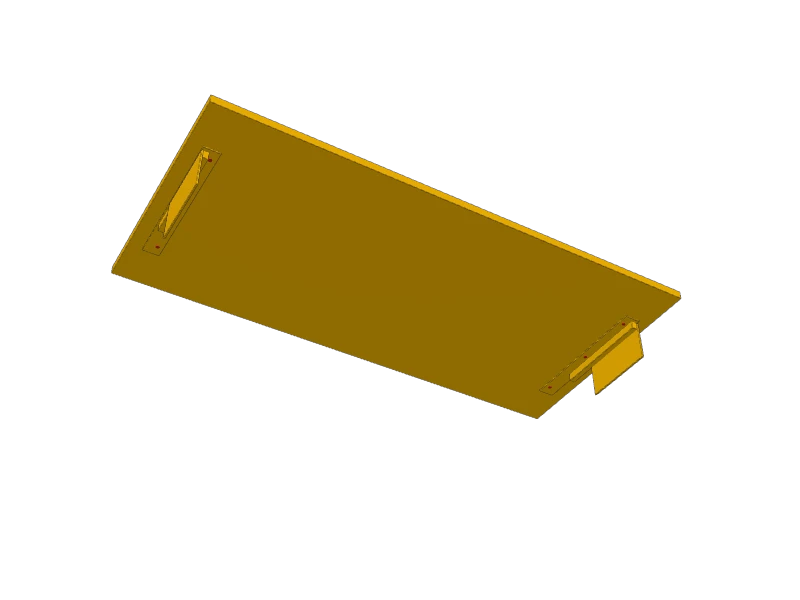 06
Screw the hinges to the top
Lay the top (D) upside down on a blanket. Keep each hinge closed, the way it comes in the box, and follow its instructions. Set one hinge at each end, its top plate 1¼″ in from the edge and centered front to back, with the arm's pivot toward the front. Screw the top plates on.
Watch outThe hinges are spring-loaded. Install them closed, as their instructions direct, and never take a spring apart.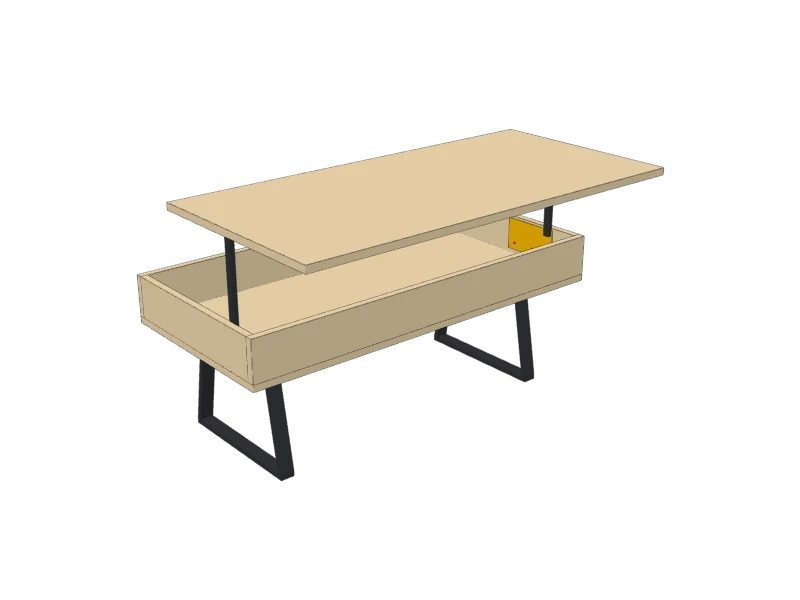 07
Set the top on and fix the hinges to the ends
With a helper, turn the box right side up and lower the top onto it with the hinges hanging inside against the ends. Center it: ½″ overhang all around.
Lift the top so the hinges open, and have your helper hold it. Hold each base plate flat against an end (C) and drive its screws.
 08
Test the lift
Lower the top (D) and raise it a few times. It should rise evenly, come toward you and stay up. If one end lags, loosen that hinge's base screws, line it up with the other, and tighten.
Watch outKeep fingers clear of the gap when you close the top: the hinges pinch. Keep kids away from the lid, and don't let anyone sit on the raised top.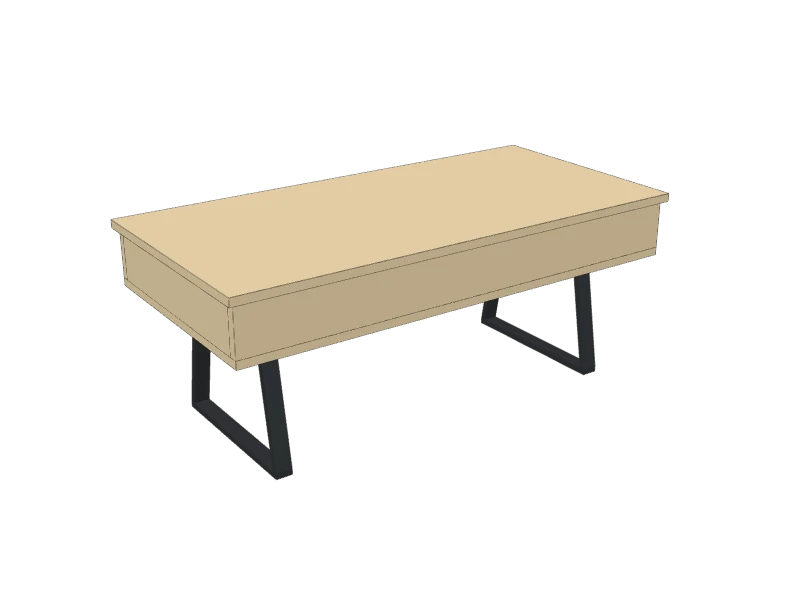 09
Finish
Sand with 180 grit and wipe on two or three coats of a clear matte finish.
Build at your own risk. Check every measurement against your own lumber before you cut, test-fit before you glue, and wear eye and ear protection.