









Nesting Side Tables
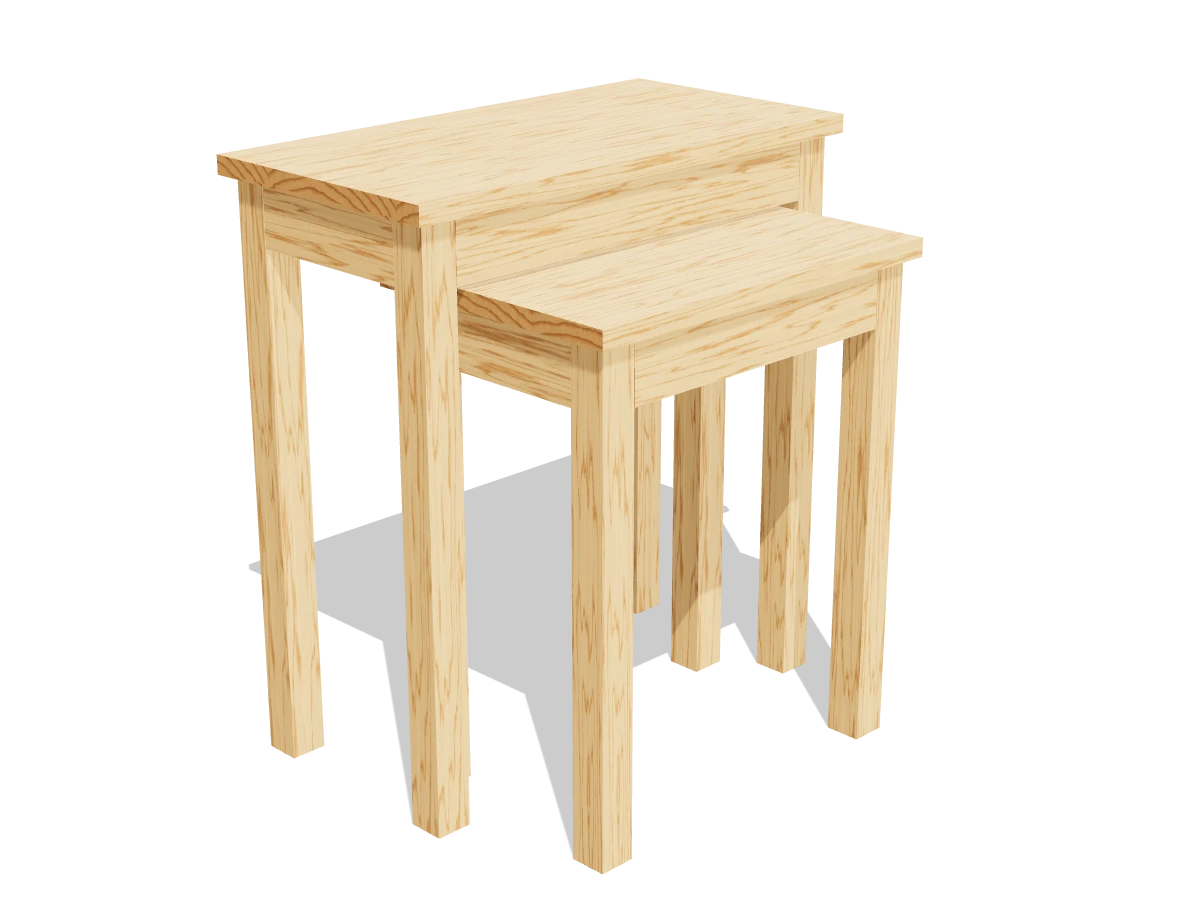
Two side tables that tuck one under the other. Slim 2x2 legs, 1x12 tops and pocket screws: use them apart, store them as one.
- Skill
- Level 3 of 5 · Intermediate
- Build time
- 5 to 7 hours, plus finish
- Lumber
- 2 2x2s, 1 1x3 and 1 1x12
- Joinery
- Pocket holes
- Finished size
- 22″ W × 11¼″ D × 24″ H, big table
- Small table
- 17″ W × 11¼″ D × 20½″ H
A 2x2 is actually 1½″ × 1½″, a 1x3 is ¾″ × 2½″ and a 1x12 is ¾″ × 11¼″. Every measurement in this plan uses the real size.
Shopping list
- 22x2, 8 ftThe legs. Sight down each one to make sure it's straight.
- 11x3, 8 ftThe aprons. Select or premium pine looks cleanest.
- 11x12, 6 ftBoth tops. Pick a flat board with no cup and no big knots.
- ~601¼″ coarse-thread pocket-hole screws
- 1Wood glue
- 8Felt padsFor the feet.
- —Sandpaper, 120 to 220 grit
- opt.Stain and polyurethane, or a clear matte finish
Tools
- Miter saw or circular saw
- Pocket-hole jigSet for ¾″.
- Drill/driver
- ClampsTwo that open 24″ or more.
- Random orbit sander
- Speed square, tape measure, pencil
Cut list
| Part | Qty | Size, inches | From |
|---|---|---|---|
| ABig table legs | 4 | 1½ × 1½ × 23¼ | 2x2 |
| BSmall table legs | 4 | 1½ × 1½ × 19¾ | 2x2 |
| CBig table long aprons | 2 | ¾ × 2½ × 18 | 1x3 |
| DSmall table long aprons | 2 | ¾ × 2½ × 13 | 1x3 |
| EShort apronsTwo for each table. | 4 | ¾ × 2½ × 7¼ | 1x3 |
| FBig table top | 1 | ¾ × 11¼ × 22 | 1x12 |
| GSmall table top | 1 | ¾ × 11¼ × 17 | 1x12 |
Board layout. Each row is one board, cut left to right, with the remainder hatched. Dark lines are saw cuts, about ⅛″ wide.
Build it
 01
Cut all the pieces
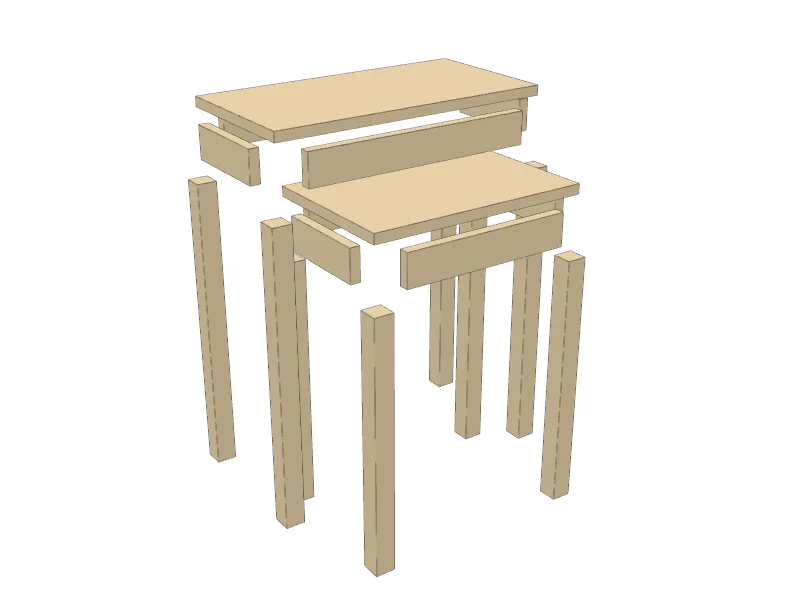
Cut every piece on the cut list:
- A Big table legs, four at 23¼″ from the 2x2
- B Small table legs, four at 19¾″ from the 2x2
- C Big table long aprons, two at 18″
- D Small table long aprons, two at 13″
- E Short aprons, four at 7¼″
- F Big table top, one at 22″
- G Small table top, one at 17″
Watch outClamp each set of four legs together and check the ends line up. Slim legs show any difference, and the table will rock.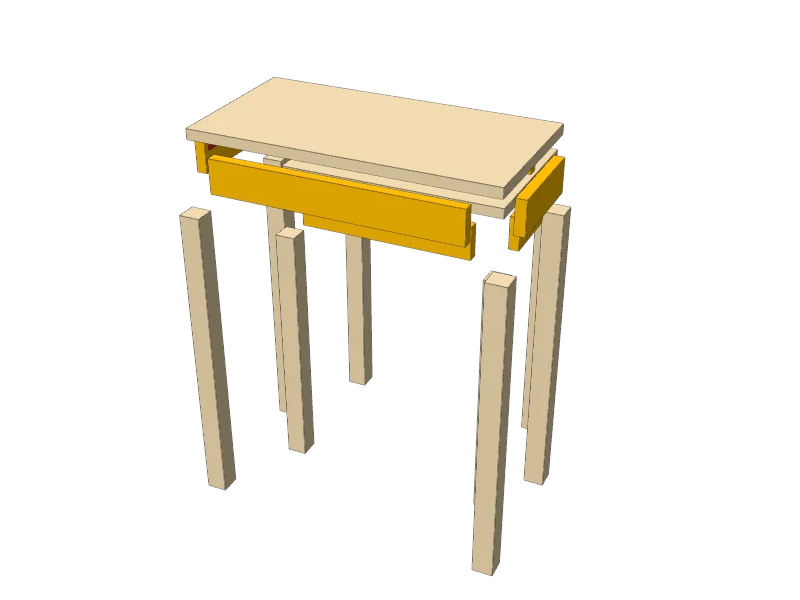 02
Drill the pocket holes
With the jig set for ¾″, drill on the inside faces of the aprons only, so no holes show:
- Long aprons (C) and (D): two at each end, plus two along the top edge for the top.
- Short aprons (E): two at each end, plus one in the middle of the top edge.
The aprons are only 2½″ tall, so set the two end holes close together, about 1″ apart.
 03
Build the ends of the big table
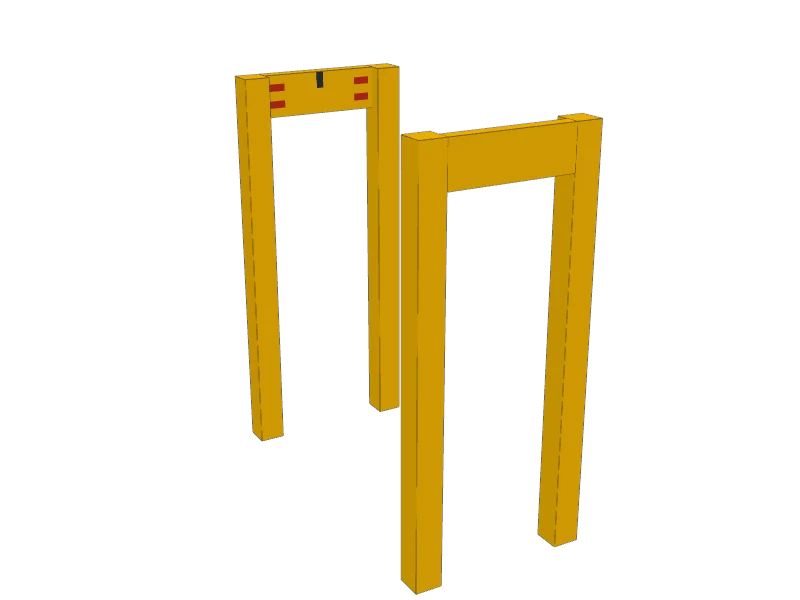
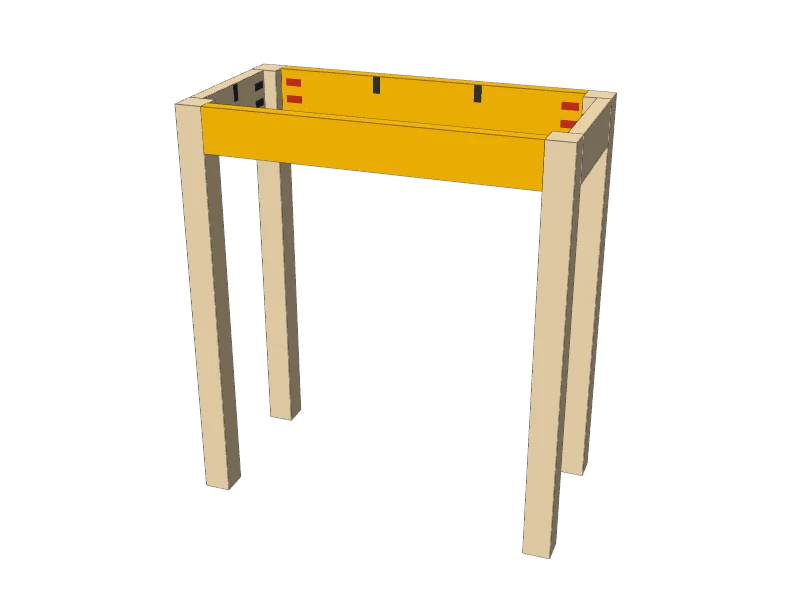
Fit a short apron (E) between two big legs (A) at the top, flush with the leg tops and the outside faces, pocket holes facing in. Glue and drive 1¼″ pocket screws. Build the second end to match.
 04
Join the ends with the long aprons
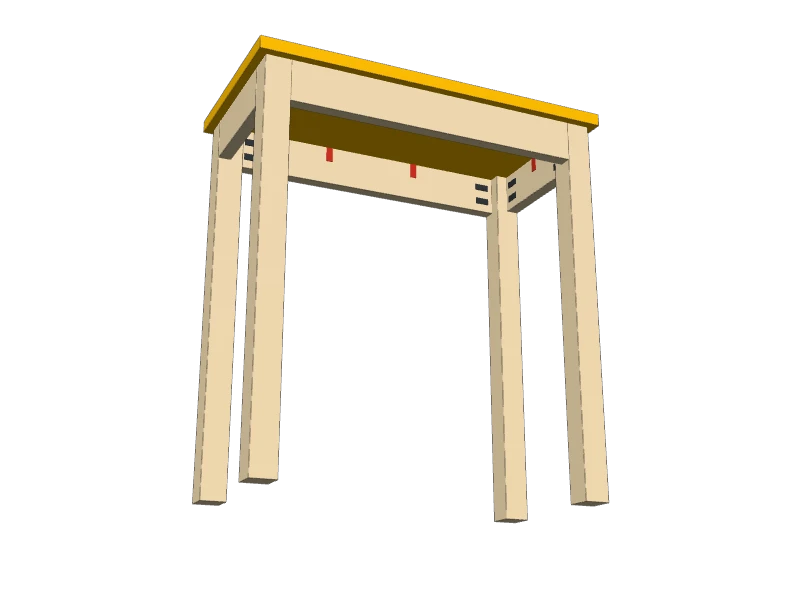
Stand the two ends up and fit the long aprons (C) between them the same way: flush with the tops and outside faces, pocket holes in. Glue and screw.
Measure corner to corner both ways. When the diagonals match, the base is square.
 05
Attach the big top
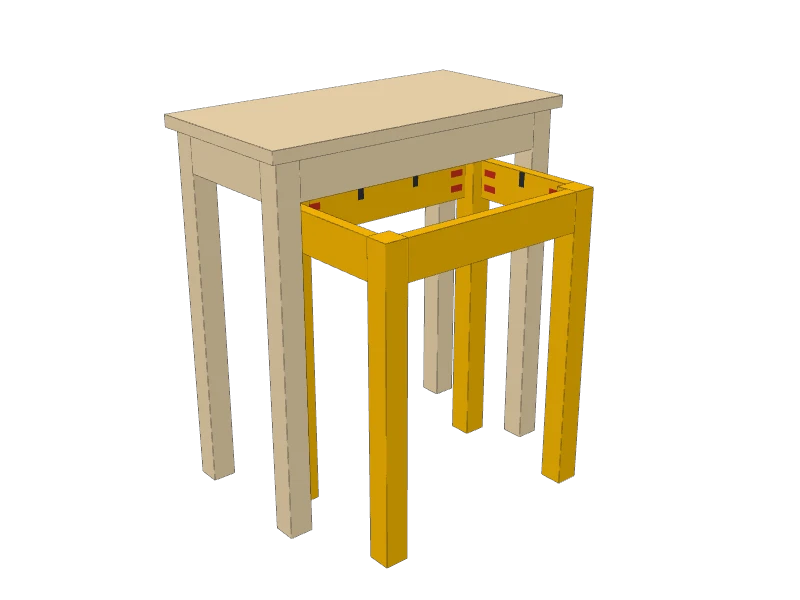
Lay the big top (F) face down on a blanket. Center the base upside down on it with ½″ of overhang on every side, and drive 1¼″ pocket screws through the apron holes into the top. No glue, so the top can move with the seasons.
 06
Build the small table
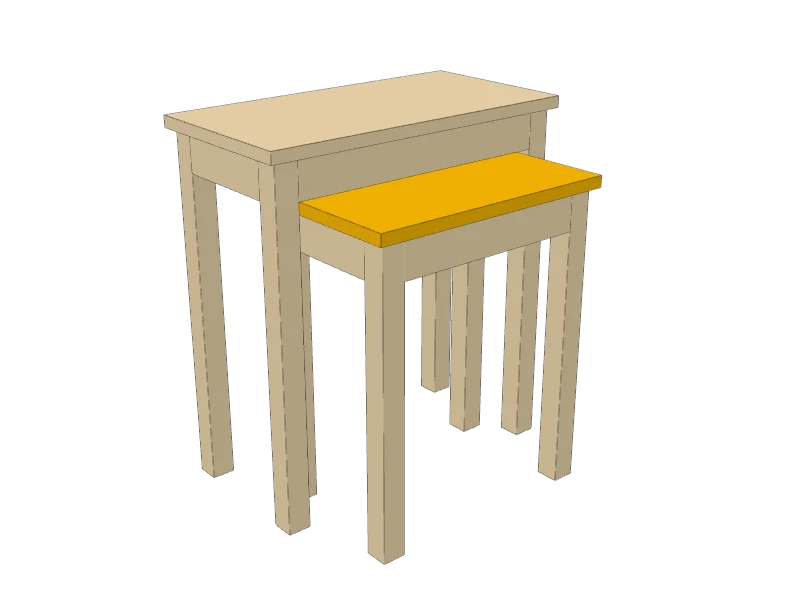
Build the small base the same way: a short apron (E) between each pair of small legs (B), then the long aprons (D) between the ends. Glue, screw and check the diagonals.
Measure it before the top goes on. The base must be 16″ across the outside of the legs, so its top passes between the big table's legs with ½″ to spare on each side.
 07
Attach the small top
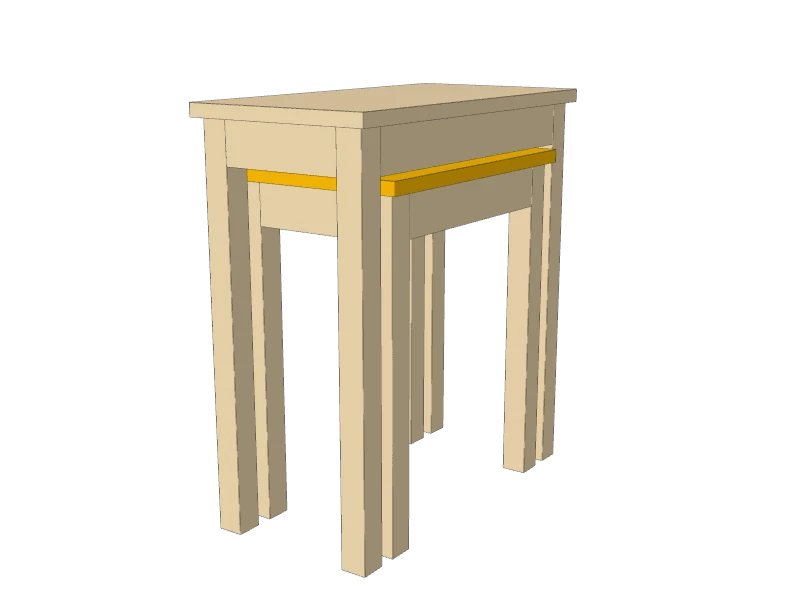
Screw the small top (G) to its base the same way, ½″ of overhang all around. The small table stands 20½″ tall, which leaves ¼″ between its top and the bottom of the big table's aprons (C) and (E).
 08
Test the fit
Slide the small table (G) under the big one (F) from the front. It should run in without touching the big legs (A) or aprons. If it rubs, sand the edge of the small top (G) where it touches, or trim the bottoms of the big legs.
TipPut felt pads under all eight feet. They protect the floor and make the small table slide out smoothly.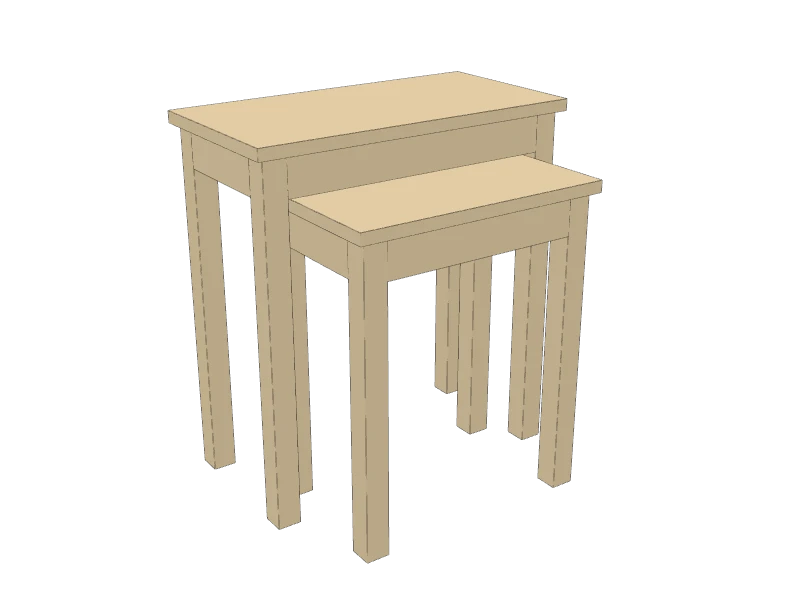 09
Sand and finish
Sand with 120, 180 and 220 grit and take the sharp corner off every edge. Finish both tables the same way: stain and polyurethane, or a clear matte finish. Let the finish cure for a few days before you nest them, so the tops don't stick.
Build at your own risk. Check every measurement against your own lumber before you cut, test-fit before you glue, and wear eye and ear protection.