









Rotating Bookshelf
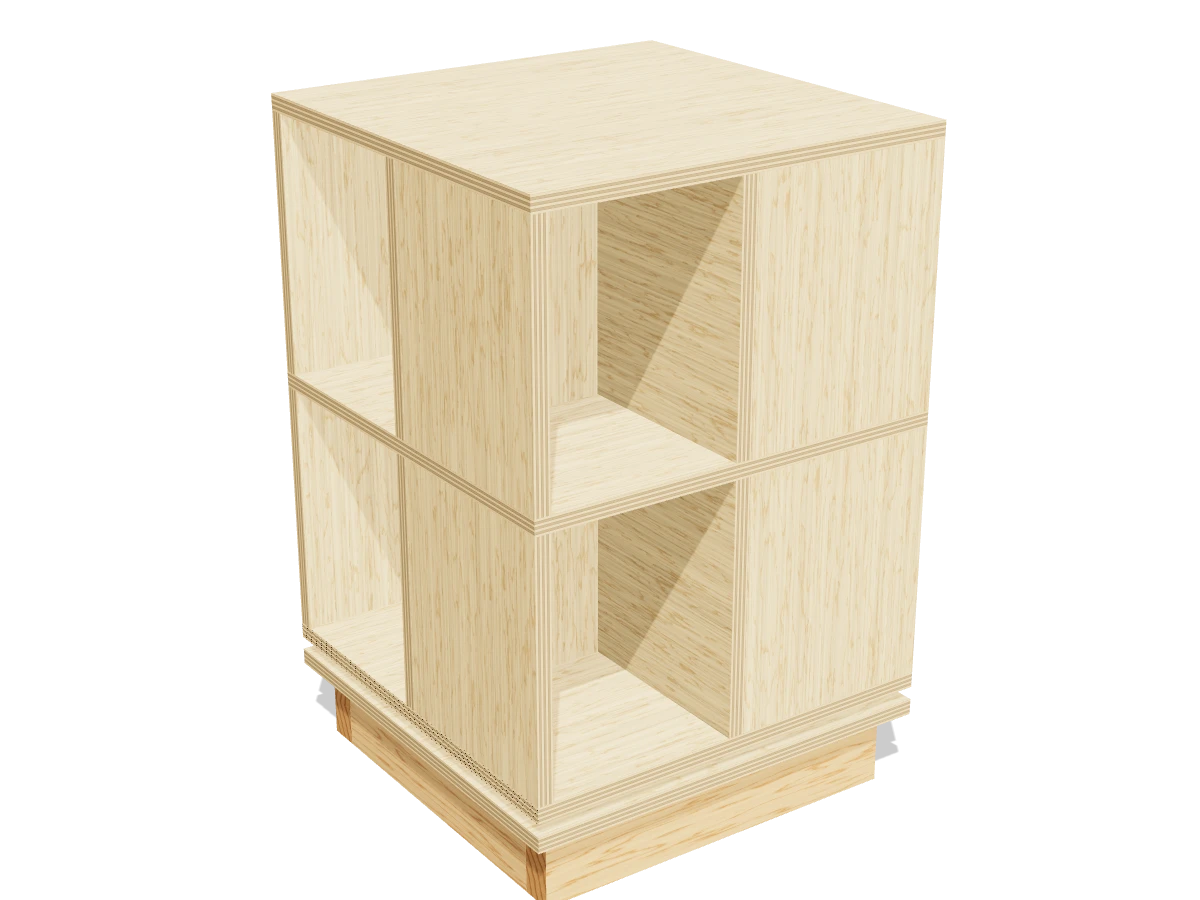
A revolving bookcase that holds books on all four sides and turns on a big lazy susan bearing. At about 30″ tall it doubles as a side table.
- Skill
- Level 3 of 5 · Intermediate
- Build time
- 6 to 8 hours, plus finish
- Lumber
- 1 2x4 and 1 sheet of ¾″ plywood
- Joinery
- Glue, screws and pocket holes
- Each cubby
- 8⅞″ wide × 11¾″ tall × 9⅝″ deep
- Finished size
- 20″ W × 20″ D × 30⅝″ H
A 2x4 is actually 1½″ × 3½″. Every measurement in this plan uses the real size. ¾″ plywood is drawn at full thickness, but plywood sold that way is often a hair thinner, so measure yours and cut the pieces that fit between panels to match.
Shopping list
- 12x4, 8 ftThe base frame.
- 1¾″ plywood, 4 × 8 ft sheetBirch or another smooth plywood paints and stains best.
- 1Large lazy susan bearing, about 17½″Rated 250 lb or more.
- 8#10 × ⅝″ pan-head screwsFor the bearing, four in each ring. Check its hole size.
- ~701⅝″ wood screws
- ~103″ wood screwsFor the base frame.
- ~101¼″ coarse-thread pocket-hole screws
- 1Wood glue
- 4Felt padsUnder the base.
- —Sandpaper, wood filler, paint or stain
- 1Clear polyurethane
Tools
- Circular sawWith a straight guide, or have the store cut the plywood.
- Miter sawOr the circular saw, for the 2x4s.
- Pocket-hole jigSet for ¾″.
- Drill/driverWith a ¾″ spade or Forstner bit.
- Clamps
- Random orbit sander
- Tape measure, speed square, pencil
Cut list
| Part | Qty | Size, inches | From |
|---|---|---|---|
| AShelves and base topThe bottom shelf gets a ¾″ access hole. | 4 | ¾ × 20 × 20 | ¾″ plywood |
| CLong dividers | 2 | ¾ × 11¾ × 20 | ¾″ plywood |
| DShort dividers | 4 | ¾ × 11¾ × 9⅝ | ¾″ plywood |
| EEnd boards | 8 | ¾ × 11¾ × 9⅝ | ¾″ plywood |
| FBase front and back | 2 | 1½ × 3½ × 18 | 2x4 |
| GBase sides | 2 | 1½ × 3½ × 15 | 2x4 |
Board layout. Each row is one board, cut left to right, with the remainder hatched. Dark lines are saw cuts, about ⅛″ wide.
Build it
 01
Cut the pieces
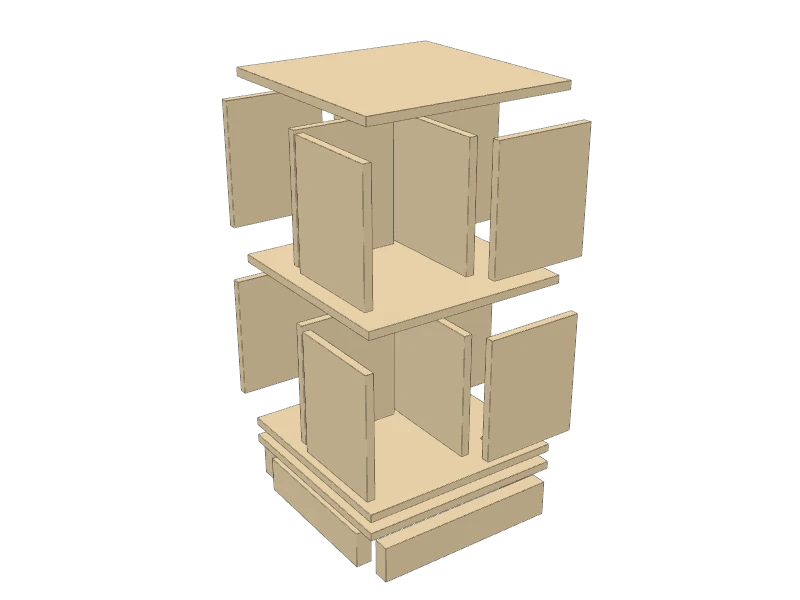
Cut every piece on the cut list. Ask the store to rip the plywood into 20″ strips if the sheet won't fit in your car:
- A Shelves and base top, four at 20″ × 20″
- C Long dividers, two at 11¾″ × 20″
- D Short dividers, four at 11¾″ × 9⅝″
- E End boards, eight at 11¾″ × 9⅝″
- F Base front and back, two at 18″
- G Base sides, two at 15″
TipThe dividers (C), (D) and end boards (E) must all be exactly the same height, or the shelves won't sit flat. Cut them all with the saw set once.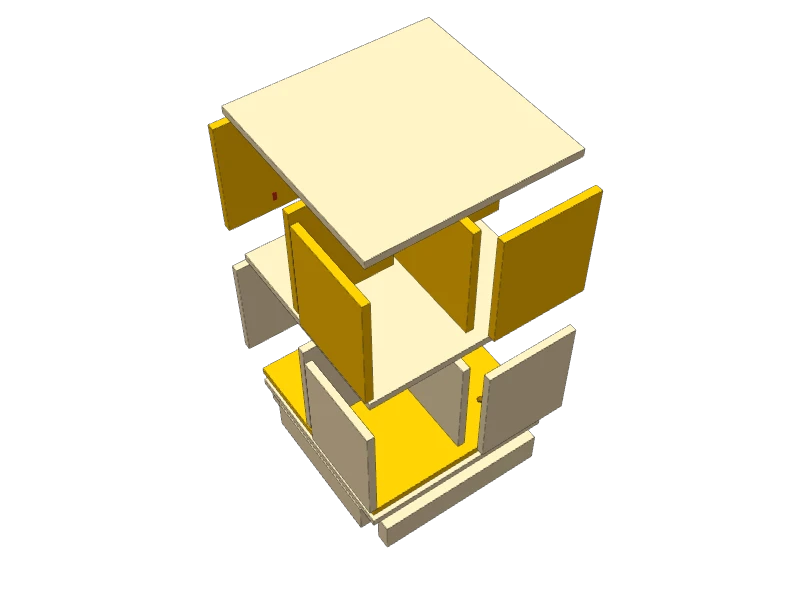 02
Drill the access hole and the pocket holes
Drill a ¾″ hole through one shelf (A), 4¼″ in from two sides that meet at a corner. This is the bottom shelf: the hole lets you reach the bearing's screws later.
With the pocket-hole jig set for ¾″, drill one pocket hole near the bottom edge of each short divider (D) and end board (E) for the top tier, and two in one long divider (C). They go on the faces that end up inside a cubby, behind the books.
 03
Build the base
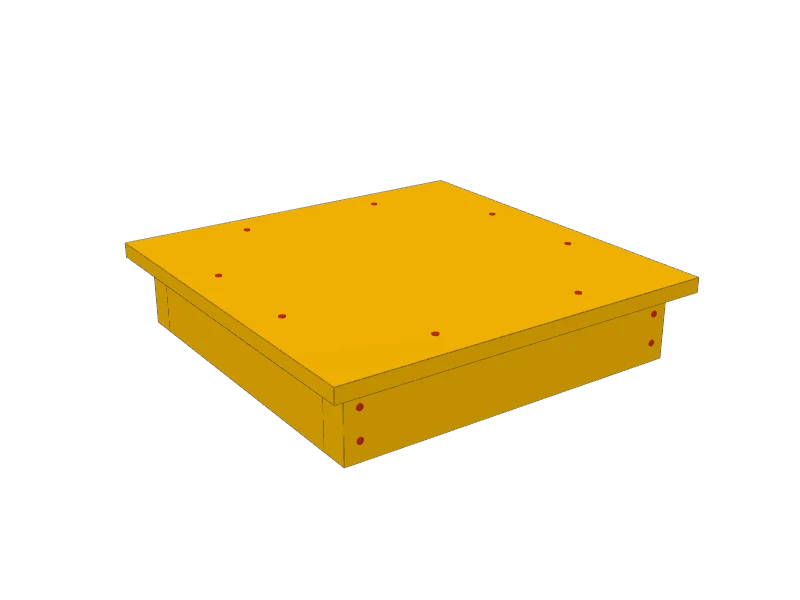
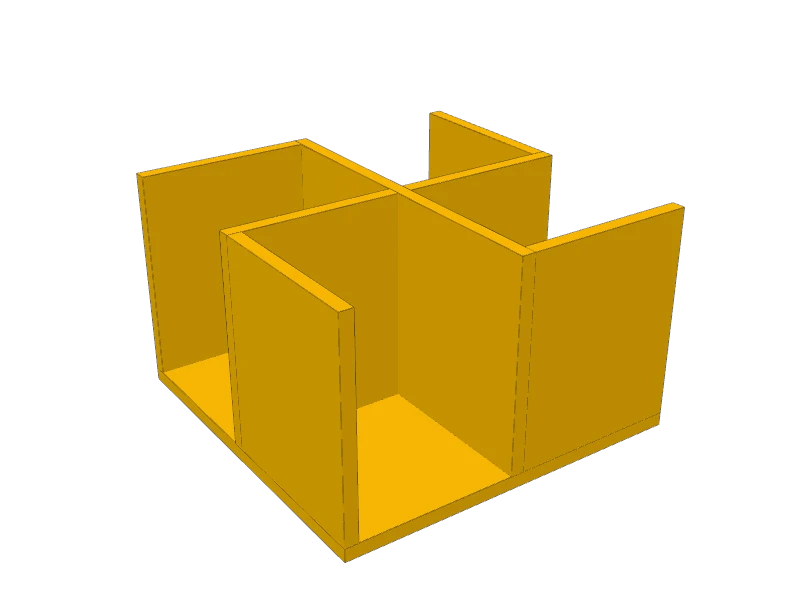
Stand the base sides (G) between the front and back (F) and drive two 3″ screws through the front and back into each end. Glue the base top (A) on, overhanging 1″ all around, and screw it down into the frame.
 04
Build the bottom tier
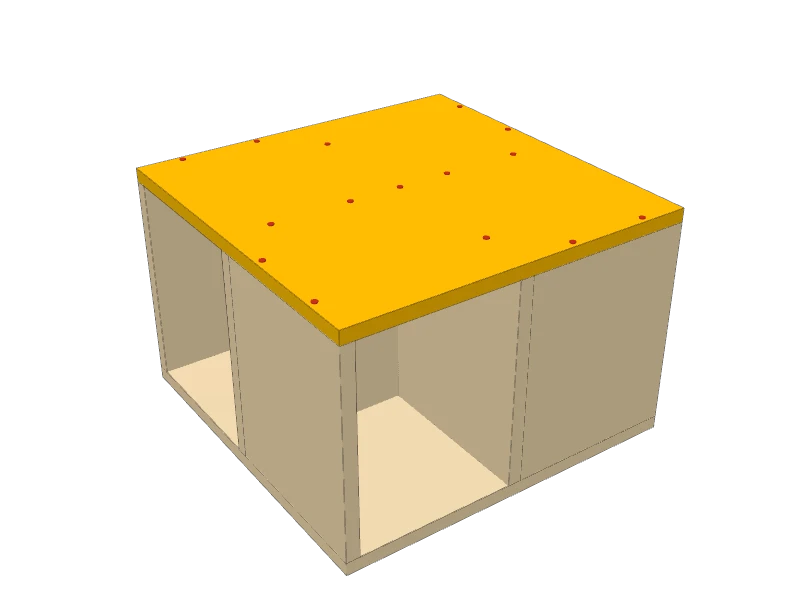
Lay the bottom shelf (A) on the bench, access hole up, and draw the cross: two lines ¾″ apart through the middle each way. Stand a long divider (C) on one pair of lines and the two short dividers (D) on the other, so they make a plus sign.
Add the four end boards (E) in a pinwheel: each one closes one side of one cubby, so every side of the case has one open cubby. Glue every joint. Turn the assembly over and drive 1⅝″ screws up through the shelf into each piece.
 05
Add the middle shelf
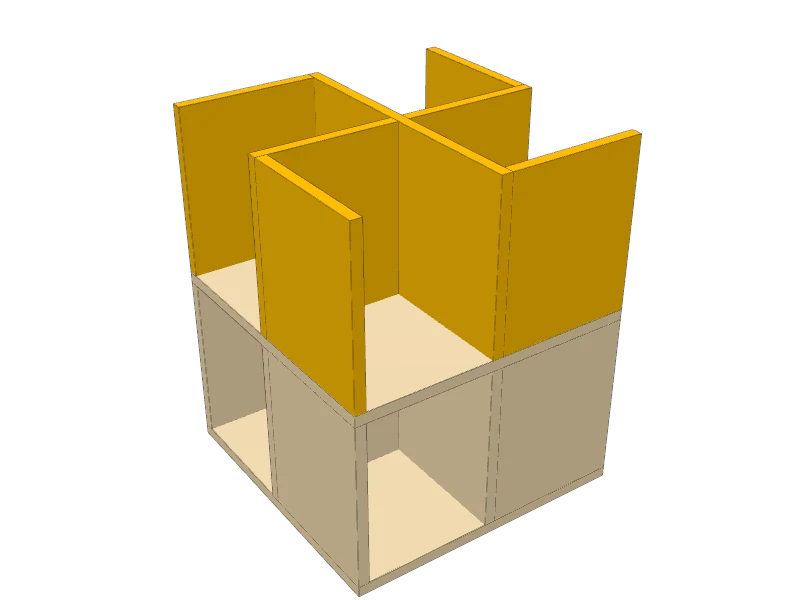
Glue the middle shelf (A) on top of the dividers, flush all around, and screw down through it into each divider. Sink the screw heads flush: the top tier sits on them.
 06
Build the top tier
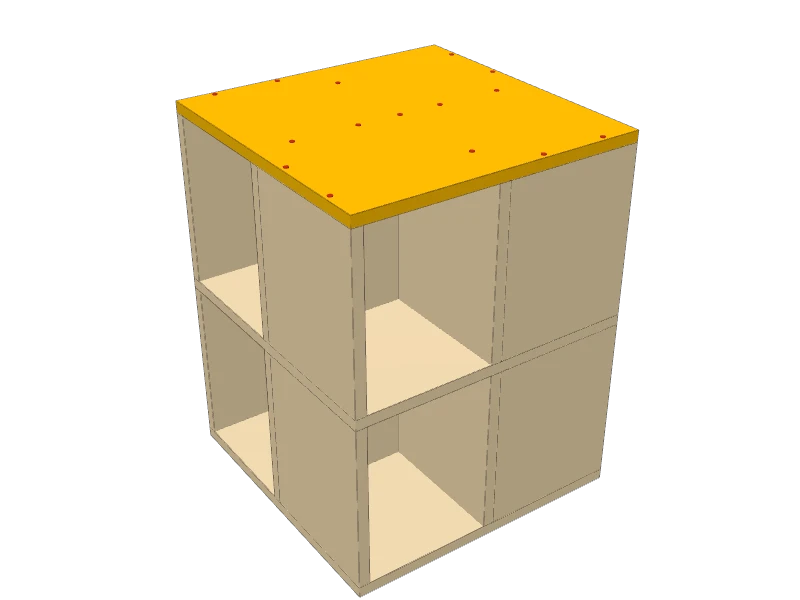
Set up the top tier on the middle shelf exactly over the bottom one: the long divider (C), the short dividers (D) and the end boards (E) in the same pinwheel. Glue them and drive the pocket screws into the middle shelf.
 07
Add the top
Glue the top (A) on, flush all around, and screw down through it into each divider. Fill the screw holes in the top.
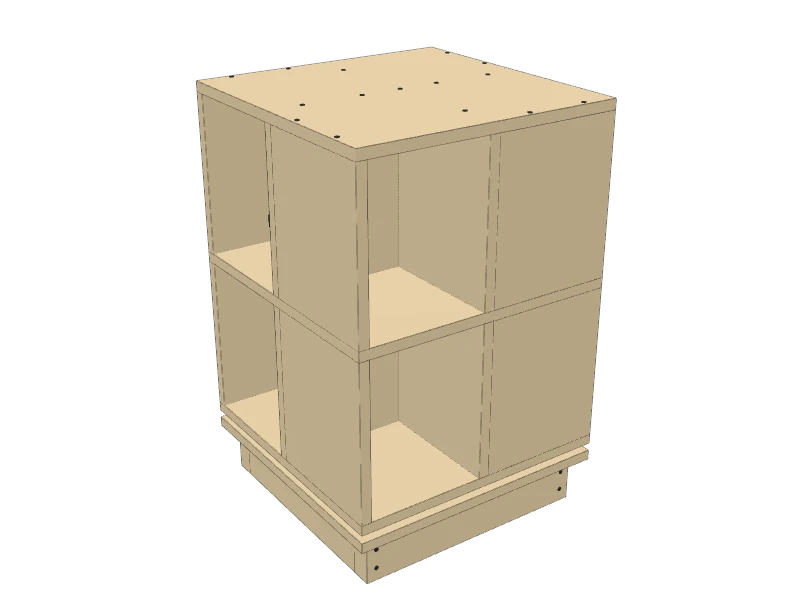 08
Sand and finish
Sand everything with 120 then 180 grit and ease every edge. Paint or stain the case and the base and add two coats of clear polyurethane.
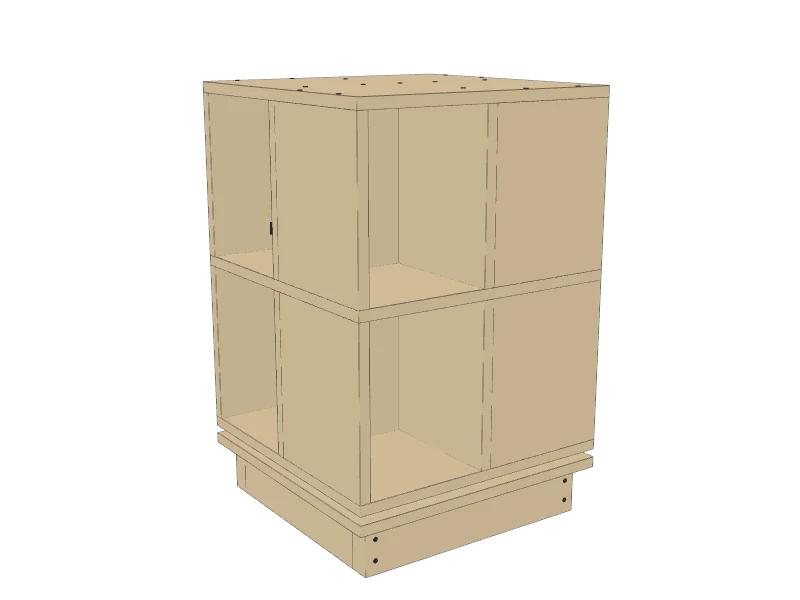 09
Mount the bearing
Check the bearing's own instructions for its screw holes and rating before you drill. Turn the case upside down. Center the bearing on the bottom shelf (A) and screw the ring that touches the shelf to it with #10 × ⅝″ pan-head screws.
Stand the base on its frame, set the case on it with the bearing centered on the base top, and turn the case until the access hole lines up with a screw hole in the bearing's other ring. Drop a screw through the hole and drive it into the base. Turn to the next hole and repeat until every hole has a screw.
Watch outLoad the cubbies evenly, heavy books low, and turn the case gently. Keep fingers out of the gap between the case and the base.
Build at your own risk. Check every measurement against your own lumber before you cut, test-fit before you glue, and wear eye and ear protection.