









Rustic X End Table
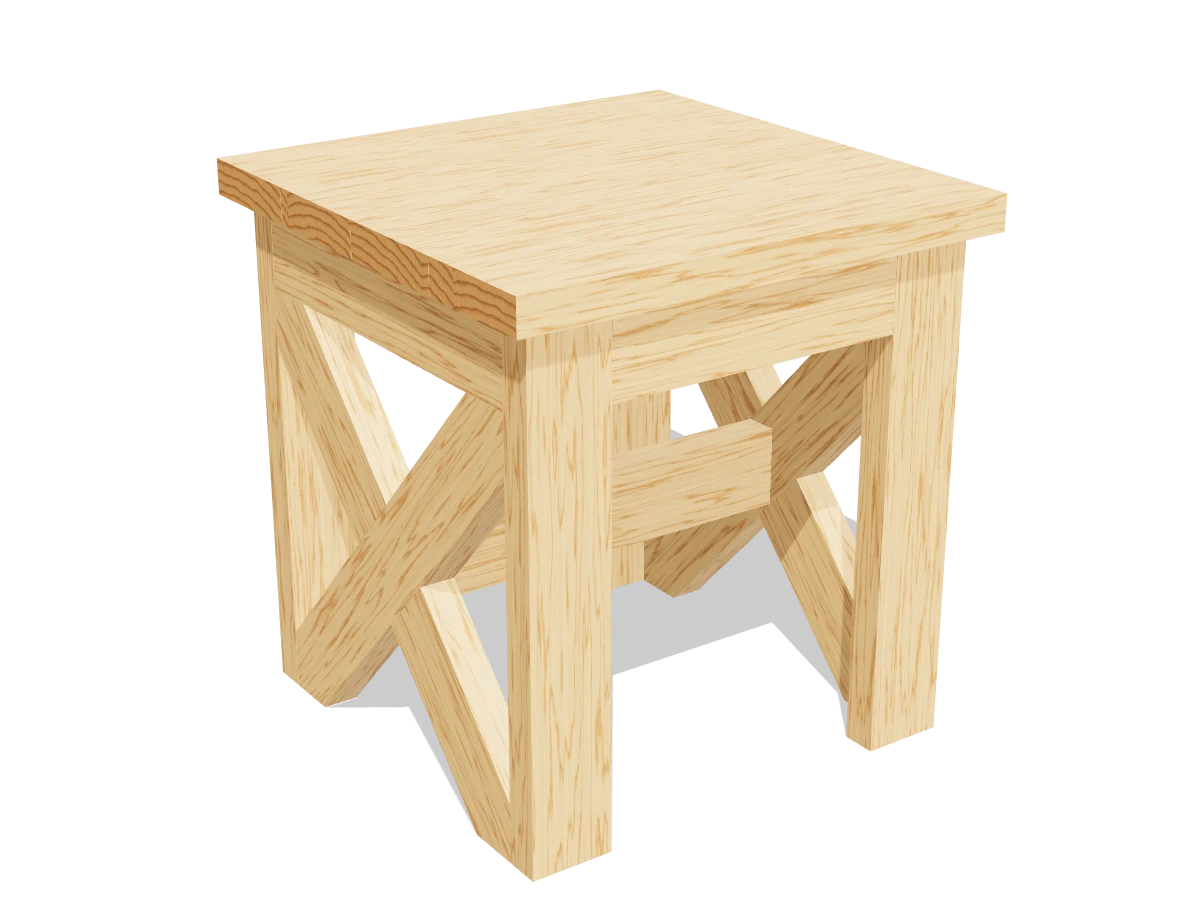
Draft · not yet checked by a carpenterBold X ends under a square plank top. The X angles stay within what a standard miter saw can cut.
- Skill
- Intermediate
- Build time
- 4 to 6 hours, plus finish
- Lumber
- 4 2x4s and 1 2x6
- Joinery
- Pocket holes
- Finished size
- 22″ L × 22″ W × 23″ H
A 2x4 is actually 1½″ × 3½″ and a 2x6 is 1½″ × 5½″. Every measurement in this plan uses the real size.
Shopping list
- 42x4, 8 ftFrame, X pieces and stretcher. One board is spare for test-fitting the X.
- 12x6, 8 ftFor the top. Pick the straightest boards in the pile.
- ~502½″ coarse-thread pocket-hole screwsA box of 100 covers it.
- 1Wood glue
- —Sandpaper, 80, 120 and 180 grit
- opt.Dark stain and a clear topcoat
Tools
- Miter sawMakes the angled X cuts much easier than a circular saw. It needs to reach 46¾°.
- Pocket-hole jigSet for 1½″ material.
- Drill/driver
- ClampsAt least two that open 24″ or more.
- Speed square, tape measure, pencil
- A straight boardFor tracing the X cuts.
- Random orbit sander
Cut list
| Part | Qty | Size, inches | From |
|---|---|---|---|
| ALegs | 4 | 1½ × 3½ × 21½ | 2x4 |
| BEnd aprons | 2 | 1½ × 3½ × 17 | 2x4 |
| CFront and back aprons | 2 | 1½ × 3½ × 13 | 2x4 |
| DStretcher | 1 | 1½ × 3½ × 17 | 2x4 |
| ETop boards | 4 | 1½ × 5½ × 22 | 2x6 |
| FLong X piecesBlank. Cut to fit, about 24¾″ point to point. | 2 | 1½ × 3½ × 25½ | 2x4 |
| GShort X piecesBlank. Cut to fit, about 10¾″ long. | 4 | 1½ × 3½ × 11½ | 2x4 |
Board layout. Each row is one board, cut left to right, with the remainder hatched. F and G are rough blanks. Dark lines are saw cuts, about ⅛″ wide.
Build it
 01
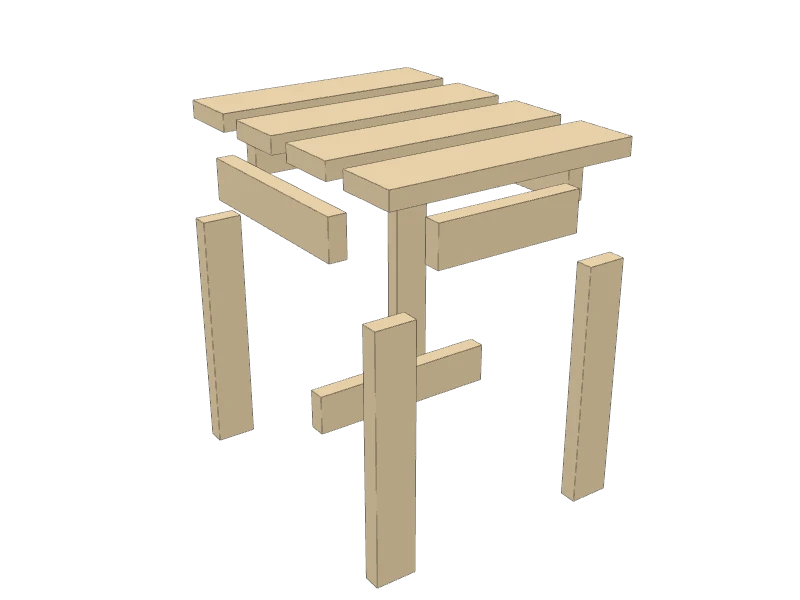
Cut the straight pieces
Cut these to length:
- A Legs, four at 21½″
- B End aprons, two at 17″
- C Front and back aprons, two at 13″
- D Stretcher, one at 17″
- E Top boards, four at 22″
Then rough-cut the X blanks: two at 25½″ (F) and four at 11½″ (G). You'll trim those to fit later.
Watch outClamp the four legs together and check the ends line up before you build anything. Uneven legs make a table that rocks.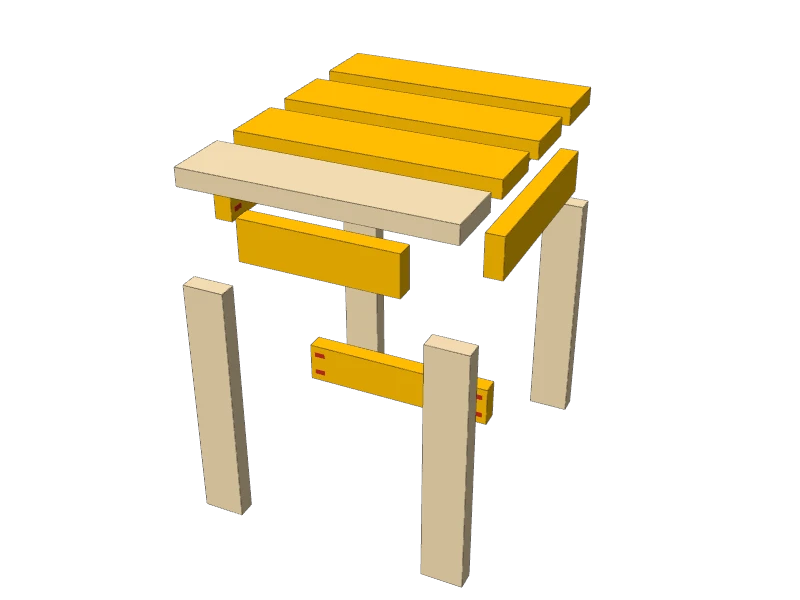 02
Drill the pocket holes
Set your jig for 1½″ material and drill on the inside faces only:
- B end aprons: 2 at each end, plus 2 along the top edge
- C front and back aprons: 2 at each end, plus 2 along the top edge
- D stretcher: 2 at each end, on the same face
- E top boards: 2 along one edge of three boards
The X pieces get their pocket holes later, after you fit them.
 03
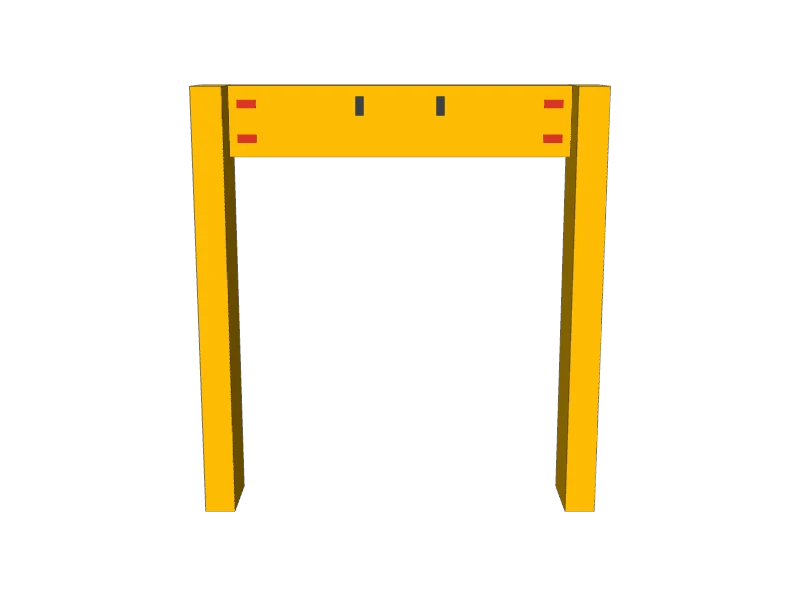
Build the two end frames
Lay two legs (A) on a flat bench. Fit an end apron (B) between them at the top, flush with the leg tops and the outside faces, pocket holes facing in. Glue and drive 2½″ pocket screws.
Lay a straight board across the bottom ends of the legs. That edge stands in for the floor when you fit the X. Build the second frame to match.
 04
Fit the long X piece
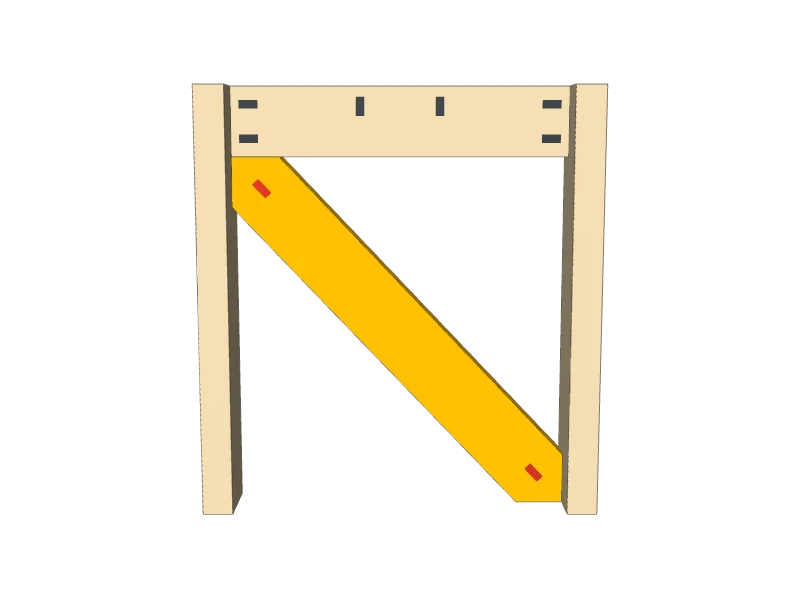
Lay a 25½″ blank (F) across the opening from the bottom of one leg to the top corner on the other side. Trace along the legs, the apron and the floor board where they cross it, and cut to the lines.
Your saw will be close to 43¼° for the cuts that meet the floor and the apron, and 46¾° for the cuts that meet the legs. The finished piece is about 24¾″ point to point.
Drill a pocket hole near each end on the inside face, then glue and screw it into the frame.
Watch outSneak up on the fit. Cut a little long, test it, and trim. A snug X is what makes the end rigid. The spare 2x4 is there for a second try.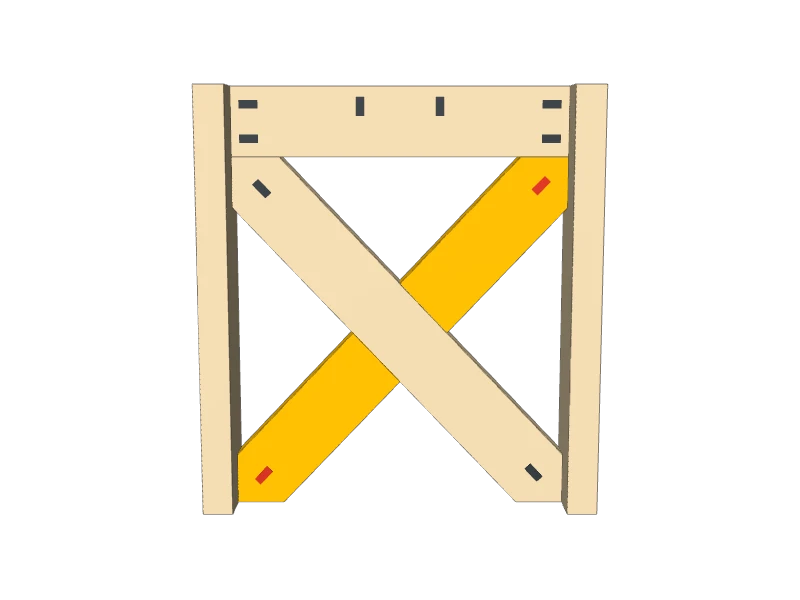 05
Fit the short X pieces
Each short piece (G) runs from a corner to the long piece. Cut the corner end to a point the same way as F. Then hold it in place, mark where it meets F, and cut that end at about 3¼°. They come out about 10¾″ long.
Drill one pocket hole near the corner end, glue both ends and screw it to the frame. Repeat on the second frame.
 06
Connect the ends with the front and back aprons
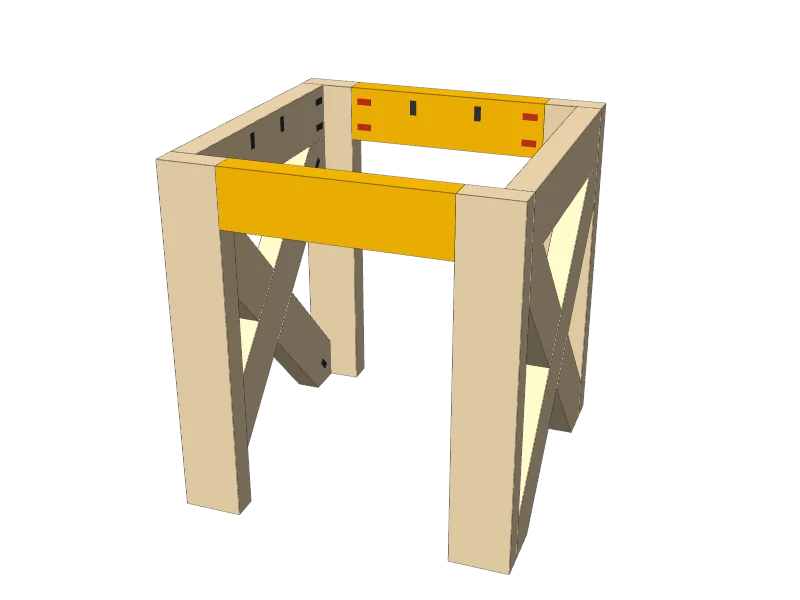
Stand the two end frames up with their pocket holes facing in. Fit the front and back aprons (C) between them at the top, flush with the tops and outside faces. Glue and screw.
Measure corner to corner both ways. When the diagonals match, the base is square.
 07
Add the stretcher
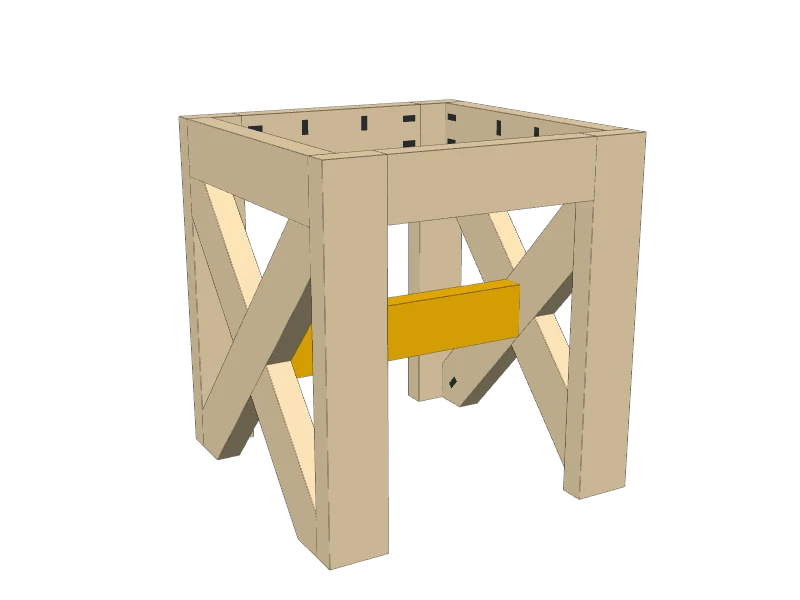
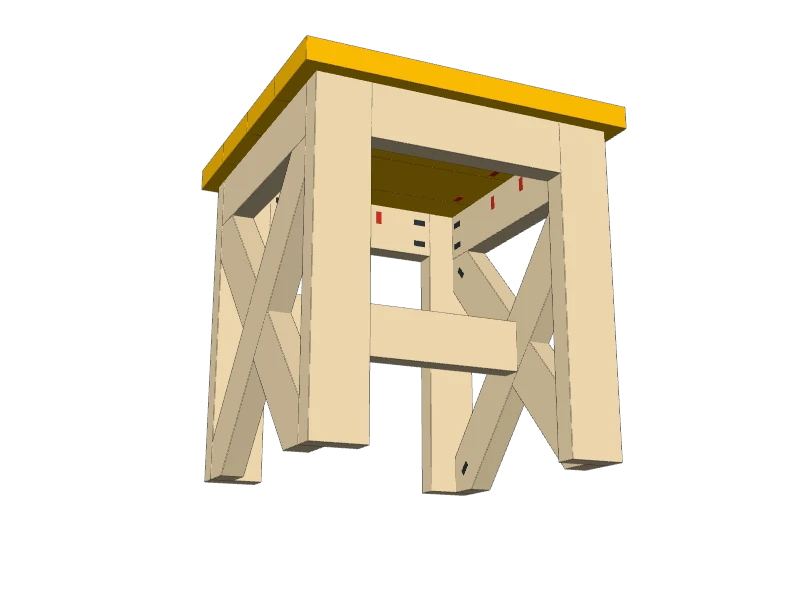
Fit the stretcher (D) between the two X's where the pieces cross: its middle sits 9″ up from the floor and centered front to back. Drive pocket screws through its ends into the long X pieces.
 08
Build and attach the top
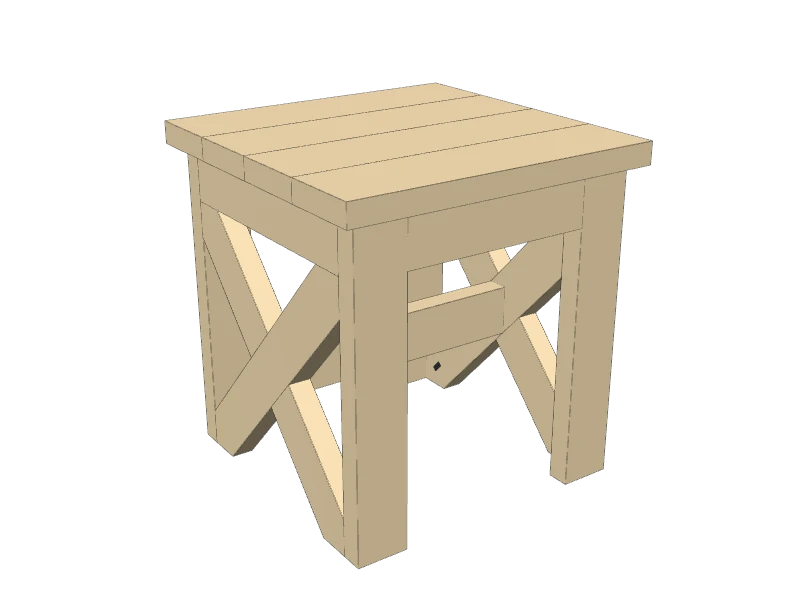
Lay the four top boards (E) face down, pocket holes along the joints. Clamp them flat, glue the edges and drive 2½″ pocket screws from the middle out.
Center the base upside down on the top, with 1″ of overhang on every side, and screw up through the apron holes. No glue between the top and the base.
 09
Sand and finish
Sand with 80 grit to flatten the top joints, then 120 and 180. Soften the edges and the points of the X a little.
A dark stain followed by a clear topcoat suits the rustic look. Test the stain on an offcut first.
Build at your own risk. Check every measurement against your own lumber before you cut, test-fit before you glue, and wear eye and ear protection.