









Sawhorses
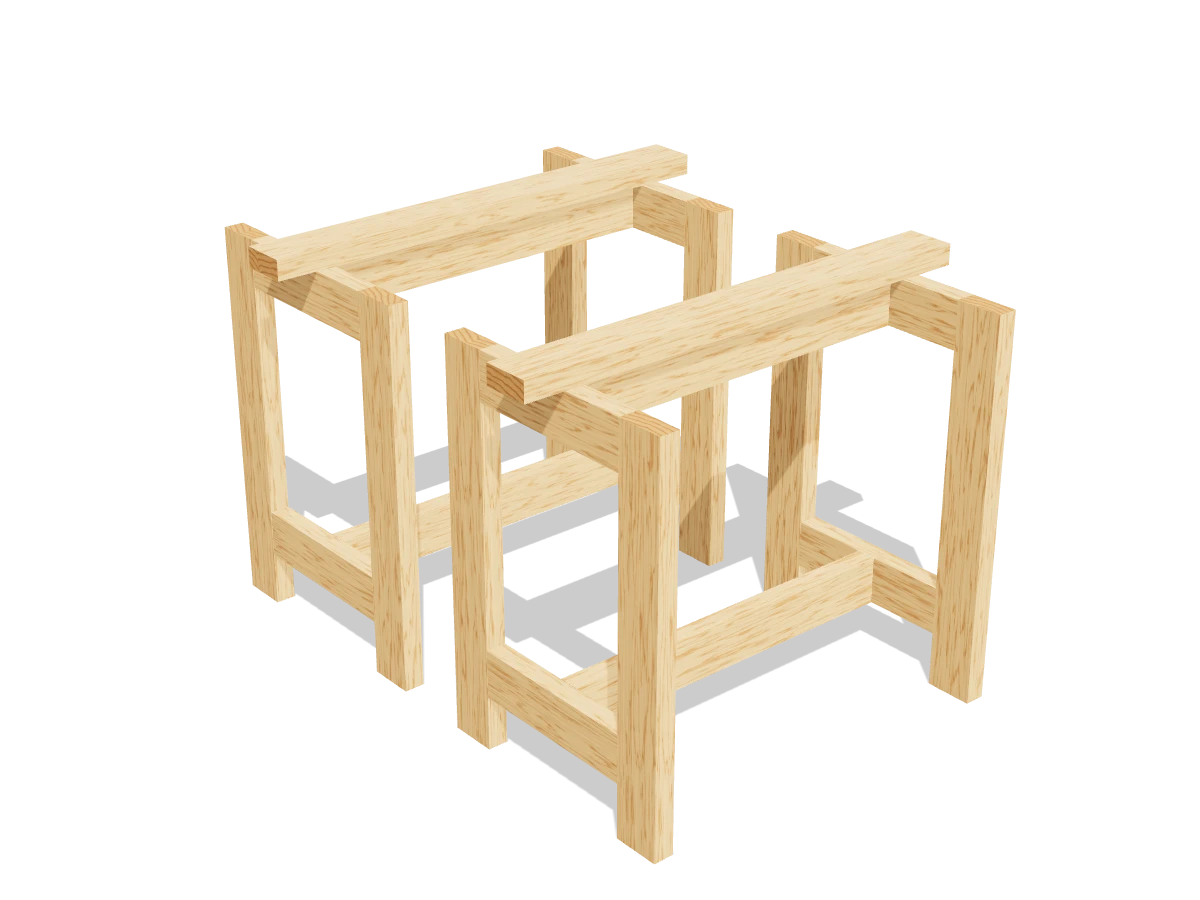
Draft · not yet checked by a carpenterA pair of sturdy straight-leg sawhorses from 2x4s, with a replaceable cap on top. No angled cuts.
- Skill
- Beginner
- Build time
- 2 to 3 hours
- Lumber
- 6 2x4s
- Joinery
- Pocket holes and screws
- Finished size
- 36″ L × 20″ W × 30″ H each
A 2x4 is actually 1½″ × 3½″. Every measurement in this plan uses the real size.
Shopping list
- 62x4, 8 ftConstruction grade is fine. Pick straight ones for the caps.
- ~602½″ coarse-thread pocket-hole screws
- ~203″ construction screwsFor the caps.
Tools
- Miter saw or circular saw
- Pocket-hole jigSet for 1½″ material.
- Drill/driver
- Speed square, tape measure, pencil
Cut list
| Part | Qty | Size, inches | From |
|---|---|---|---|
| ALegs | 8 | 1½ × 3½ × 28½ | 2x4 |
| BCross pieces | 8 | 1½ × 3½ × 13 | 2x4 |
| CBeams | 2 | 1½ × 3½ × 27 | 2x4 |
| DStretchers | 2 | 1½ × 3½ × 27 | 2x4 |
| ECaps | 2 | 1½ × 3½ × 36 | 2x4 |
Board layout. Each row is one board, cut left to right, with the remainder hatched. Dark lines are saw cuts, about ⅛″ wide.
Build it
 01
Cut the pieces
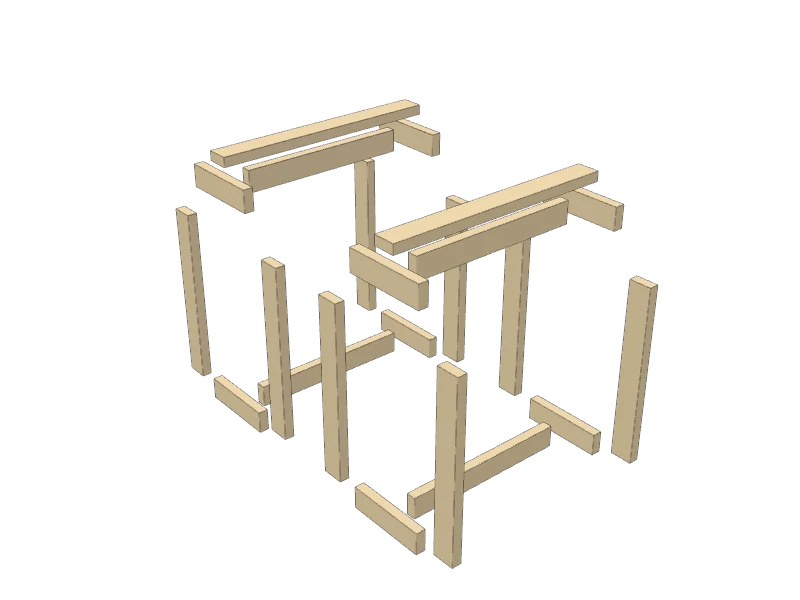
These pieces make a pair of sawhorses:
- A Legs, eight at 28½″
- B Cross pieces, eight at 13″
- C Beams, two at 27″
- D Stretchers, two at 27″
- E Caps, two at 36″
Watch outCut all eight legs to exactly the same length, or the horses will rock and your work won't sit flat across them.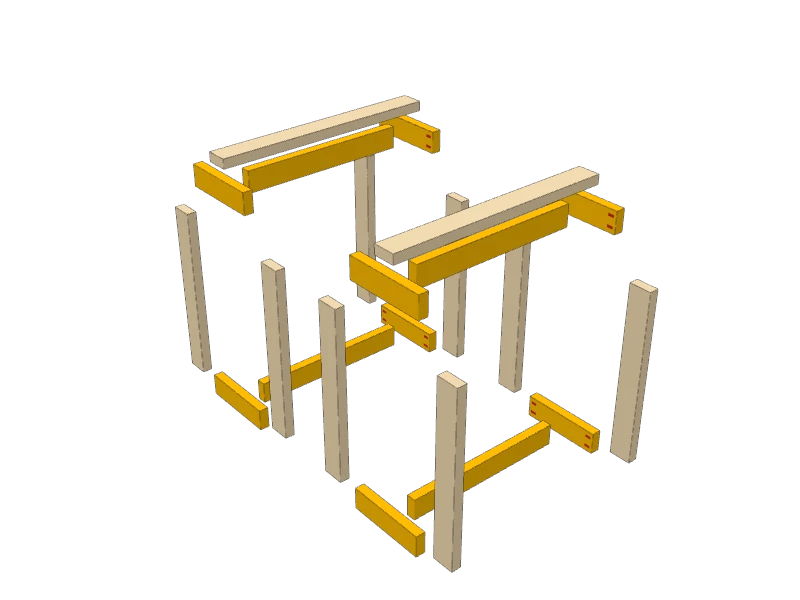 02
Drill the pocket holes
Set your jig for 1½″ material. Drill 2 pocket holes at each end of every cross piece (B), beam (C) and stretcher (D), all on one face.
 03
Build the end frames
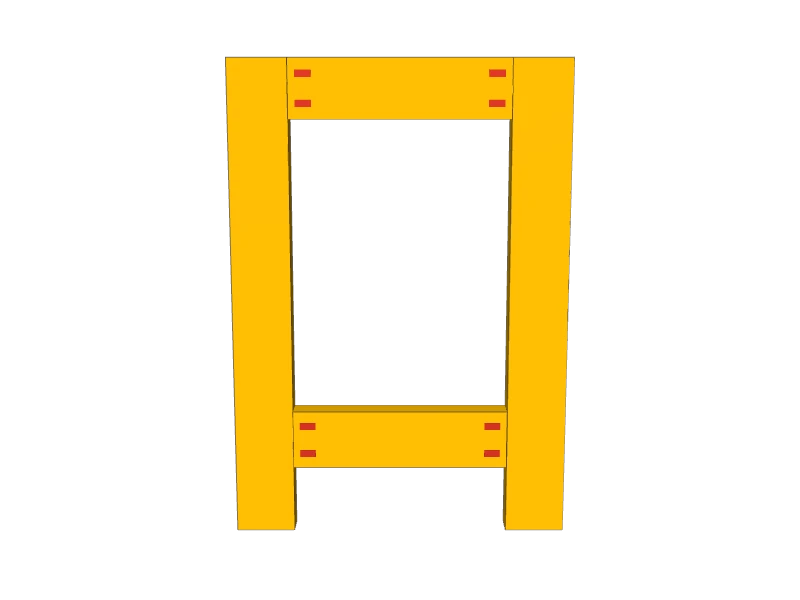
Lay two legs (A) on the bench, wide faces up. Fit a cross piece (B) between them at the top, flush with the leg tops, and another with its bottom edge 4″ up from the floor ends. Pocket holes up. Drive 2½″ pocket screws.
Build four frames like this, two for each sawhorse.
 04
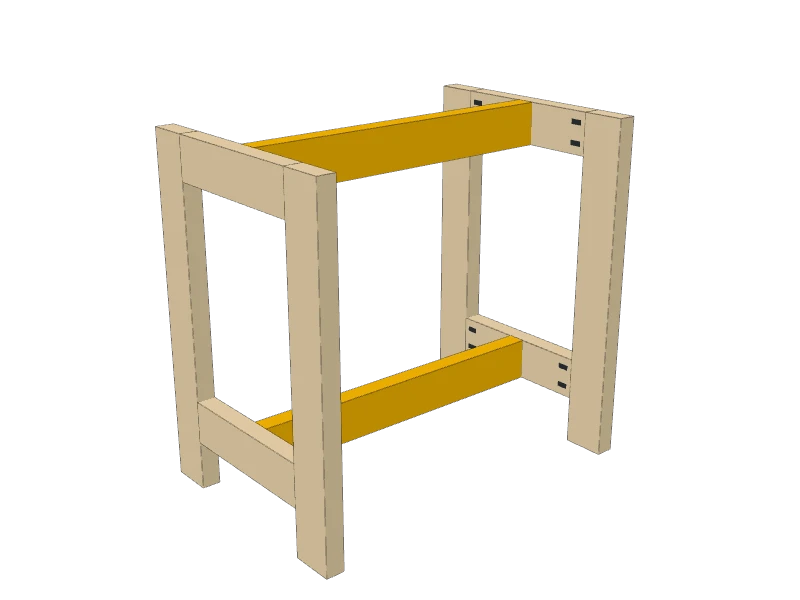
Add the beam and the stretcher
Stand two frames up, pocket holes facing in, 27″ apart. Fit the beam (C) between the top cross pieces and the stretcher (D) between the bottom ones, centered side to side and flush with the top and bottom edges. Screw them in.
 05
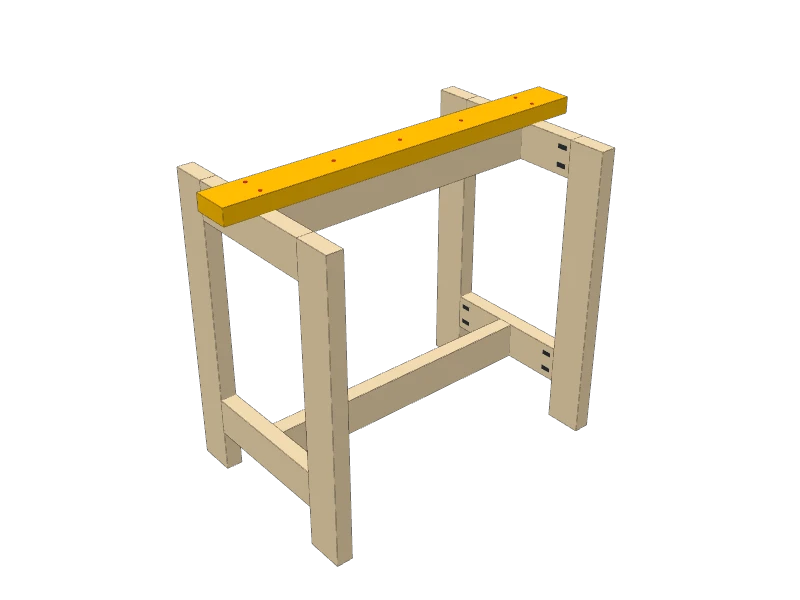
Screw on the cap
Lay the cap (E) flat on top, centered on the beam, with 3″ hanging past each frame. Pre-drill and drive 3″ screws down through it: two into each top cross piece and three into the beam.
TipThe cap is the part you'll cut into over the years. When it gets chewed up, unscrew it and add a new 2x4.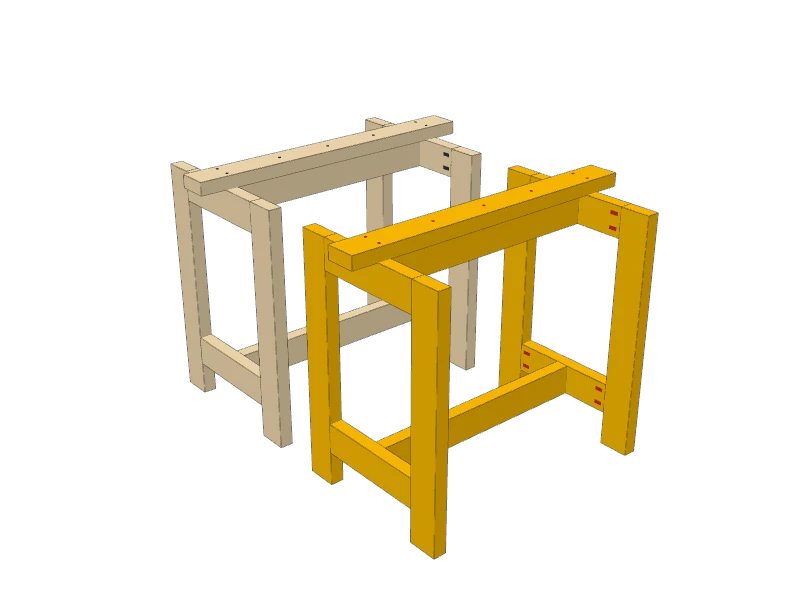 06
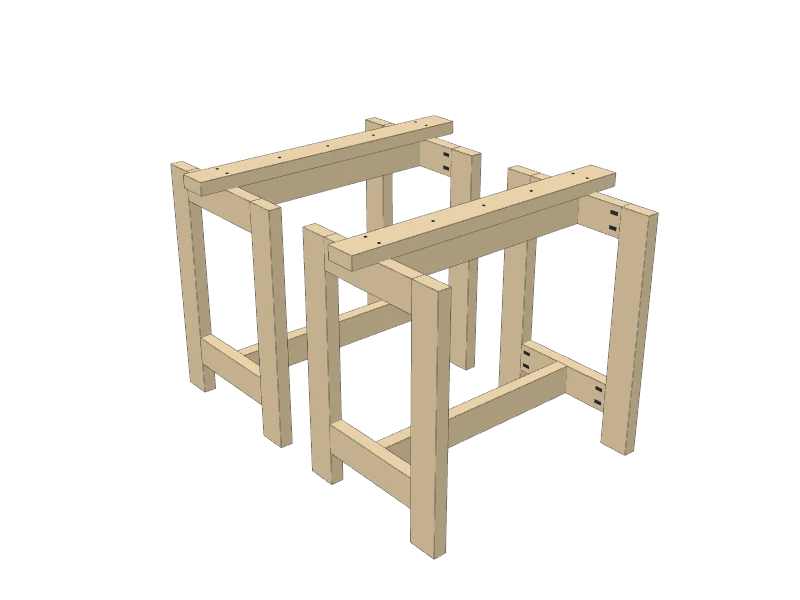
Build the second sawhorse
Build the second sawhorse the same way, from the other four legs (A), four cross pieces (B), the second beam (C), stretcher (D) and cap (E). Set them side by side on a flat floor and check that the caps sit level with each other.
 07
Put them to work
Knock the sharp edges off the caps with sandpaper. No finish is needed.
Lay a pair of 2x4s across the caps to support plywood while you cut, or add a door or a sheet of plywood on top for an instant work table.
Build at your own risk. Check every measurement against your own lumber before you cut, test-fit before you glue, and wear eye and ear protection.