









Serving Tray
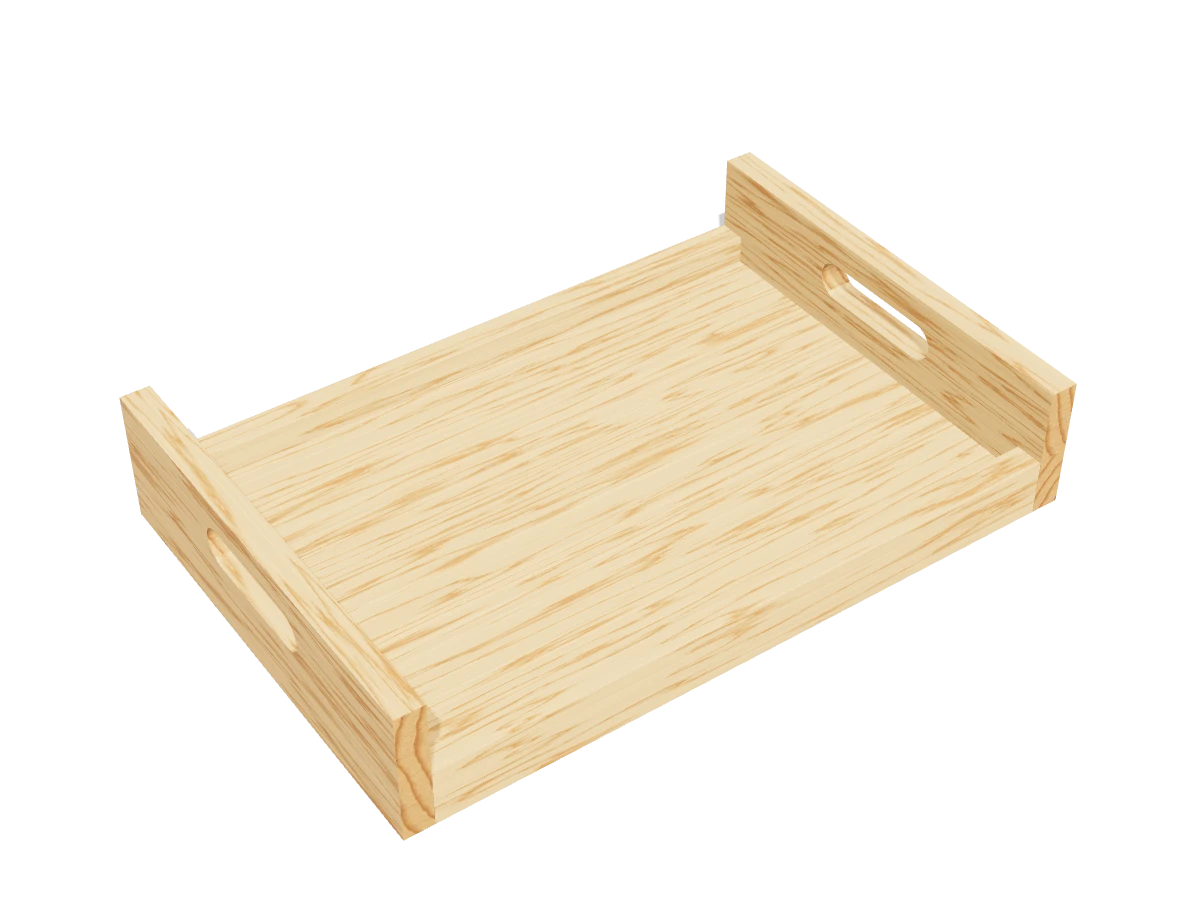
Draft · not yet checked by a carpenterA wooden serving tray with cut-out handles. One 1x4, one 1x2 and an afternoon: an easy gift.
- Skill
- Beginner
- Build time
- 1 to 2 hours, plus finish
- Lumber
- 1 1x4 and 1 1x2
- Joinery
- Glue and brad nails
- Finished size
- 18″ L × 12″ W × 3½″ H
A 1x4 is actually ¾″ × 3½″ and a 1x2 is ¾″ × 1½″. Every measurement in this plan uses the real size.
Shopping list
- 11x4, 8 ftPoplar, oak or select pine.
- 11x2, 6 ftSame wood as the 1x4.
- ~301¼″ brad nails
- 1Wood glue
- —Sandpaper, 120, 180 and 220 grit
- 1Food-safe oil or wipe-on polyurethaneSee the last step.
Tools
- SawMiter saw, circular saw or hand saw.
- JigsawFor the hand holes.
- DrillWith a 1″ spade or Forstner bit.
- Brad nailer or hammer and nail set
- ClampsTwo that open 12″ or more.
- Speed square, tape measure, pencil
Cut list
| Part | Qty | Size, inches | From |
|---|---|---|---|
| AEndsWith a 1″ × 4″ hand hole. | 2 | ¾ × 3½ × 12 | 1x4 |
| BSides | 2 | ¾ × 1½ × 16½ | 1x2 |
| CBottom boards | 3 | ¾ × 3½ × 16½ | 1x4 |
Board layout. Each row is one board, cut left to right, with the remainder hatched. Dark lines are saw cuts, about ⅛″ wide.
Build it
 01
Cut the pieces
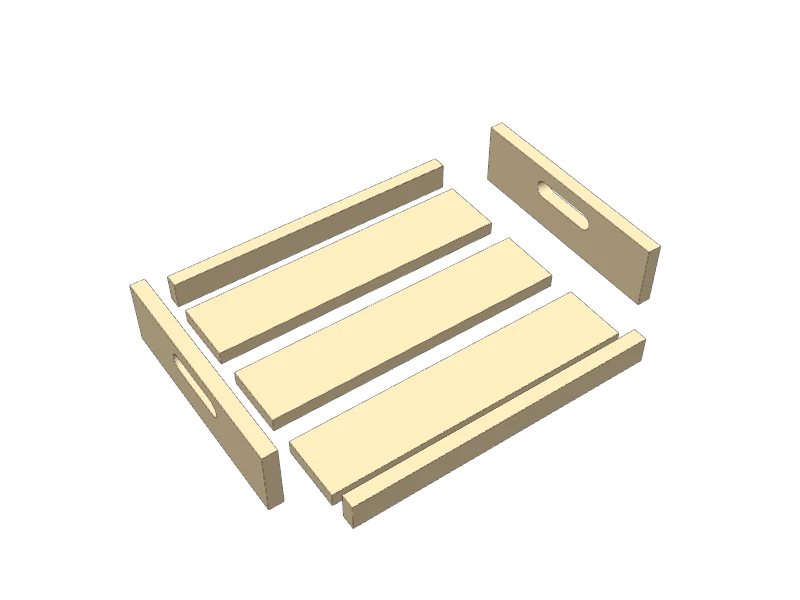
Cut every piece on the cut list:
- A Ends, two at 12″
- B Sides, two at 16½″
- C Bottom boards, three at 16½″
TipPoplar or oak looks nicer than pine for a tray and dents less. The sizes are the same.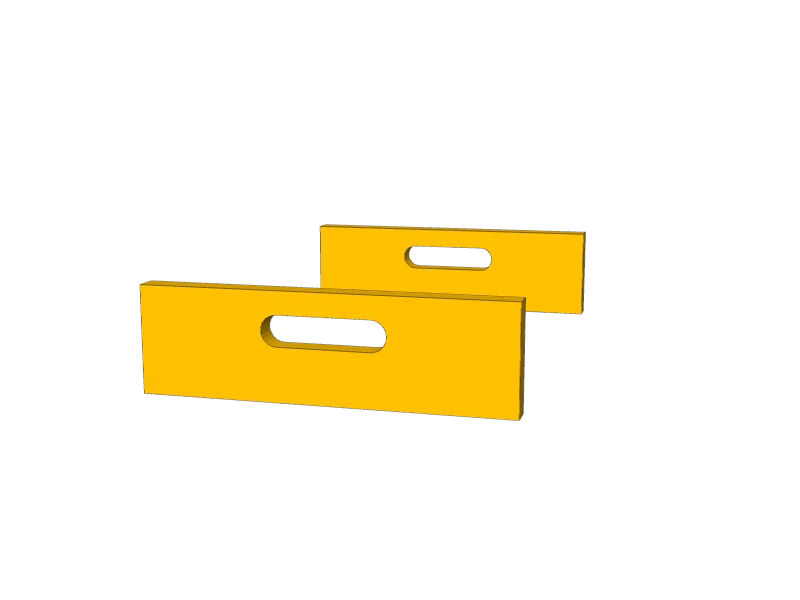 02
Cut the hand holes
On each end (A), mark two points 2¼″ up from the bottom edge, 1½″ either side of the center. Drill a 1″ hole on each mark, then cut out the wood between them with a jigsaw. You get a hand hole 4″ wide and 1″ tall.
Sand the inside of the hole smooth with sandpaper wrapped around a dowel.
TipClamp a scrap behind the board when you drill so the bit doesn't splinter the back.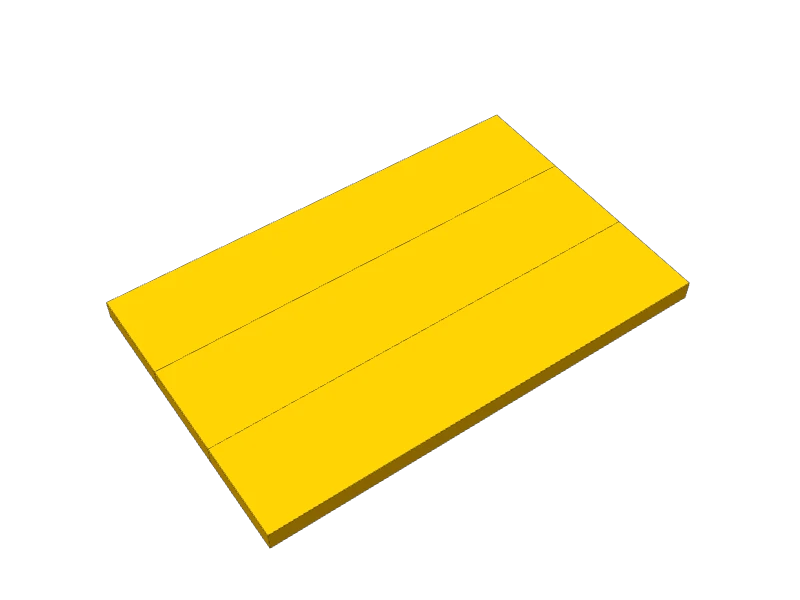 03
Glue up the bottom
Glue the three bottom boards (C) edge to edge, ends lined up. Clamp them flat across the joints and let the glue set for an hour.
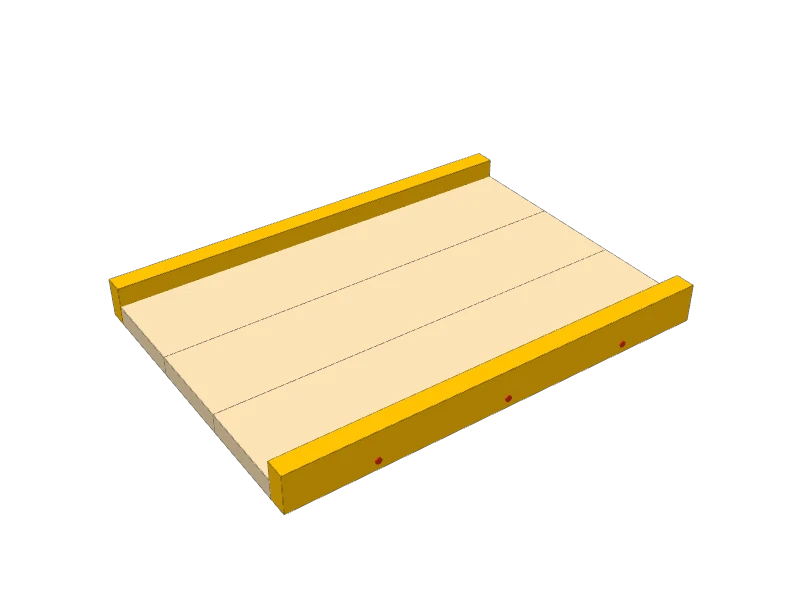 04
Add the sides
Glue a side (B) along each long edge of the bottom, flush with the bottom face and the ends. Drive three 1¼″ brad nails through each side into the bottom.
 05
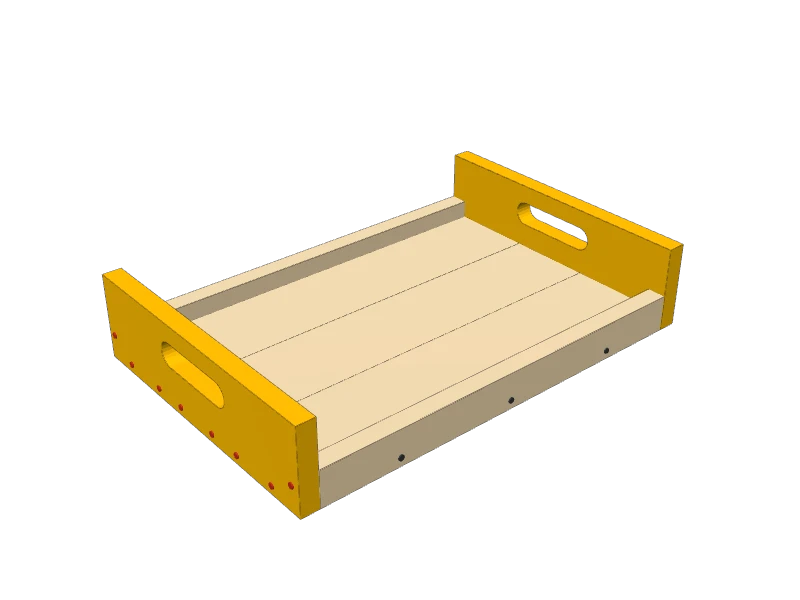
Add the ends
Glue an end (A) across each end of the bottom and the sides, hand hole up, flush with the bottom and both sides. Drive brad nails through the end: two into each bottom board and one into each side.
Watch outKeep the brads at least ¼″ in from the faces so they don't blow out the side of the board.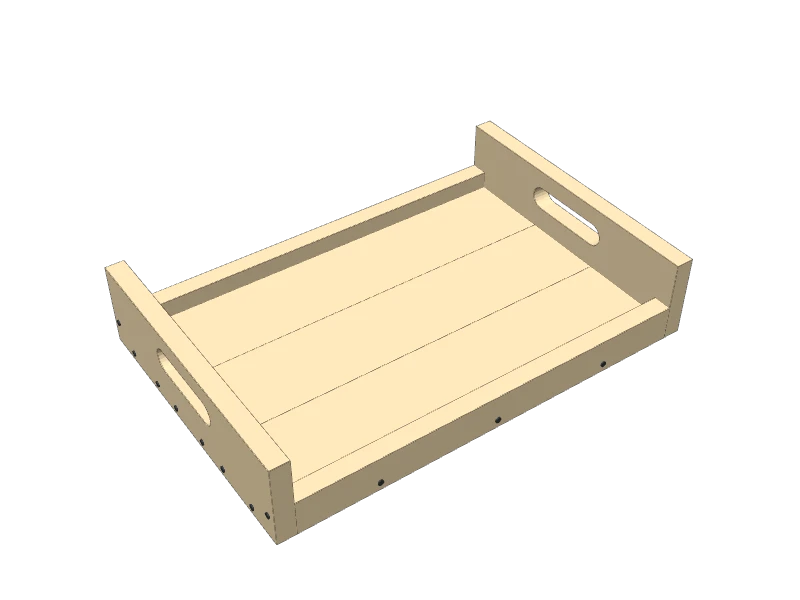 06
Sand and finish
Set the nail heads and fill them. Sand with 120, 180, then 220 grit and round over every edge a little.
For a tray that touches food, wipe on mineral oil or a board butter and reapply now and then. For drinks and decor only, a wipe-on polyurethane holds up better.
Build at your own risk. Check every measurement against your own lumber before you cut, test-fit before you glue, and wear eye and ear protection.