









Shoe Rack
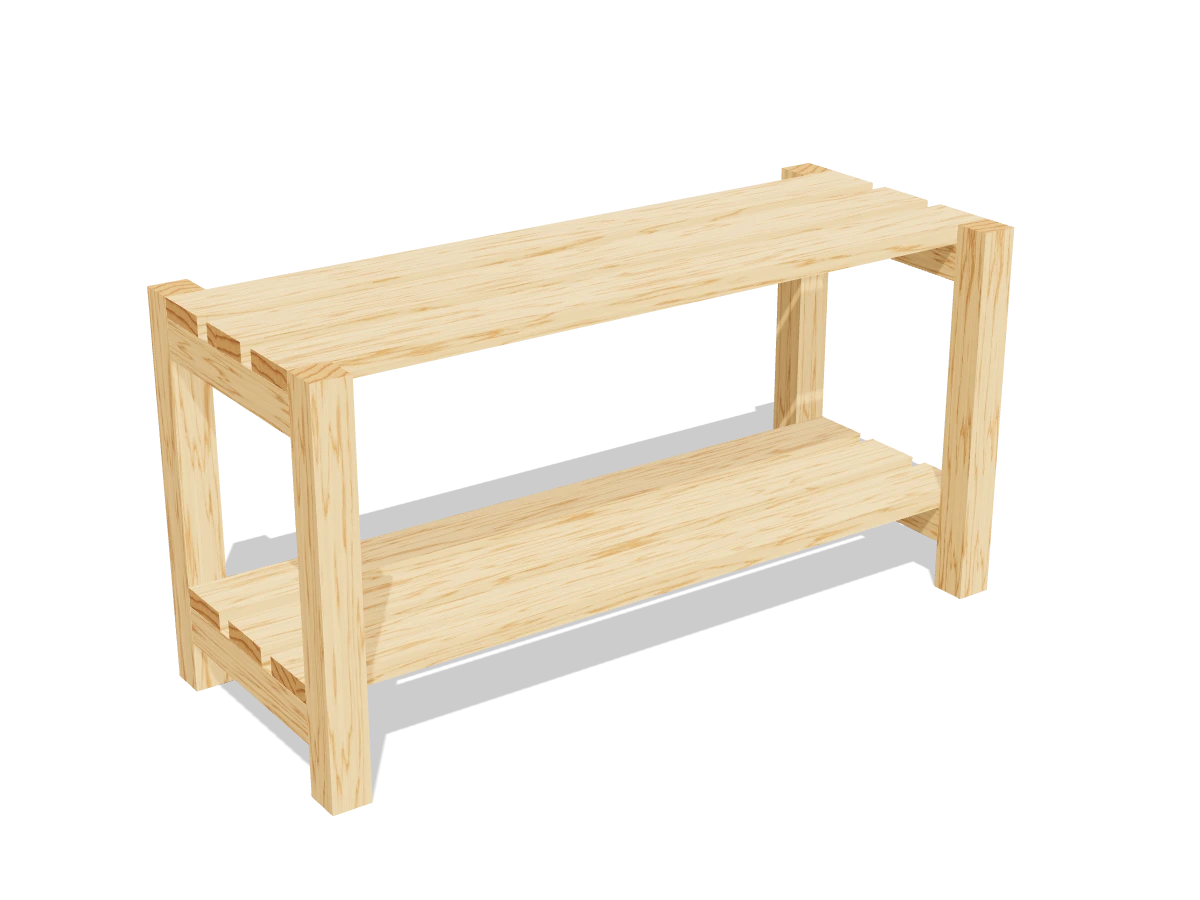
Draft · not yet checked by a carpenterA two-shelf slatted rack for the entry. It holds about eight pairs, and the open slats let wet boots drip and dry.
- Skill
- Beginner
- Build time
- 2 to 3 hours, plus finish
- Lumber
- 2 2x2s and 2 1x3s
- Joinery
- Pocket holes and screws
- Finished size
- 30″ L × 12″ W × 15¼″ H
A 2x2 is actually 1½″ × 1½″ and a 1x3 is ¾″ × 2½″. Every measurement in this plan uses the real size.
Shopping list
- 22x2, 8 ftFor the legs and rails. Pick straight ones.
- 21x3, 8 ftFor the slats.
- ~202½″ coarse-thread pocket-hole screws
- 241½″ wood screwsFor the slats.
- —Sandpaper, 120 and 180 grit
- opt.Clear finish or paint
- opt.Felt pads
Tools
- Miter saw or circular saw
- Pocket-hole jigSet for 1½″ material.
- Drill/driverWith a ⅛″ bit for pilot holes.
- Speed square, tape measure, pencil
Cut list
| Part | Qty | Size, inches | From |
|---|---|---|---|
| ALegs | 4 | 1½ × 1½ × 15¼ | 2x2 |
| BSide rails | 4 | 1½ × 1½ × 9 | 2x2 |
| CBack rails | 2 | 1½ × 1½ × 27 | 2x2 |
| DSlats | 6 | ¾ × 2½ × 30 | 1x3 |
Board layout. Each row is one board, cut left to right, with the remainder hatched. Dark lines are saw cuts, about ⅛″ wide.
Build it
 01
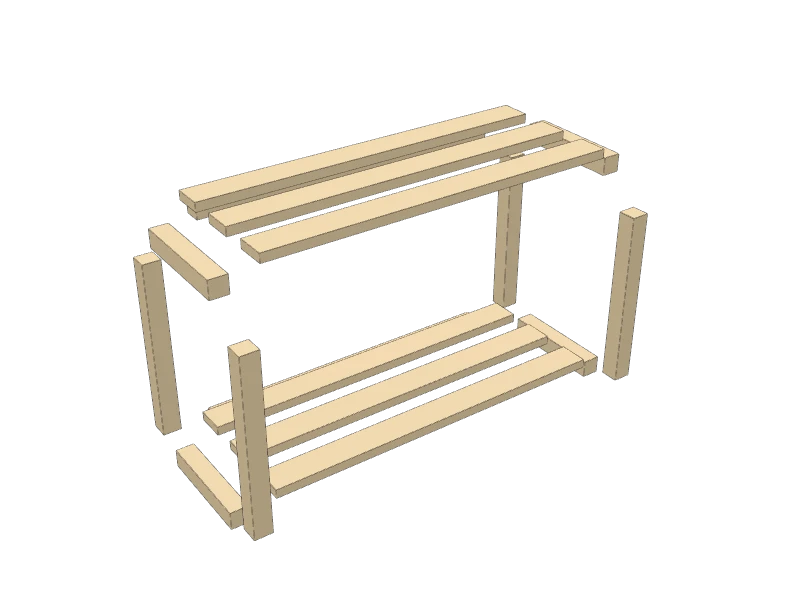
Cut the pieces
Cut every piece on the cut list:
- A Legs, four at 15¼″
- B Side rails, four at 9″
- C Back rails, two at 27″
- D Slats, six at 30″
Watch outSight down each 2x2 before you buy it. They warp easily, and a bent leg makes the rack rock.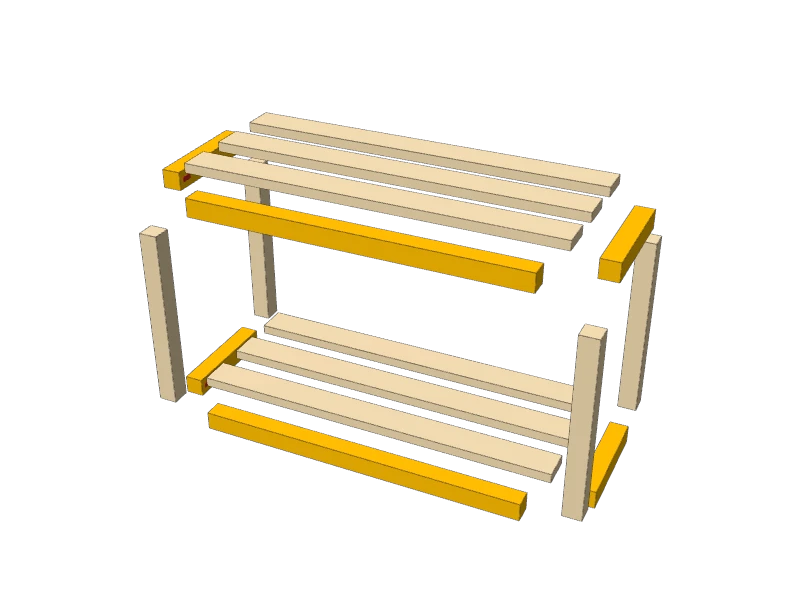 02
Drill the pocket holes
Set your jig for 1½″ material. A 2x2 only has room for one pocket hole, so drill 1 at each end of every side rail (B) and back rail (C), all on one face. Those faces go on the inside.
 03
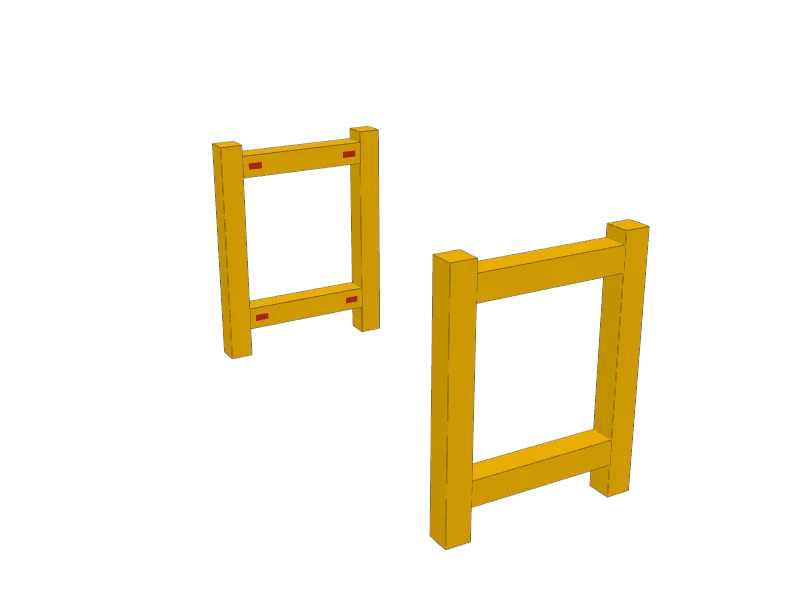
Build the two ends
Lay two legs (A) on the bench. Fit two side rails (B) between them: one with its bottom edge 2″ up from the floor ends, and one 13″ up. Keep them flush with the outside faces, pocket holes facing in, and drive 2½″ pocket screws.
Build the second end to match.
TipCut a 2″ spacer block and a 13″ one from scrap. Stand each rail on its block while you screw, and both ends come out identical.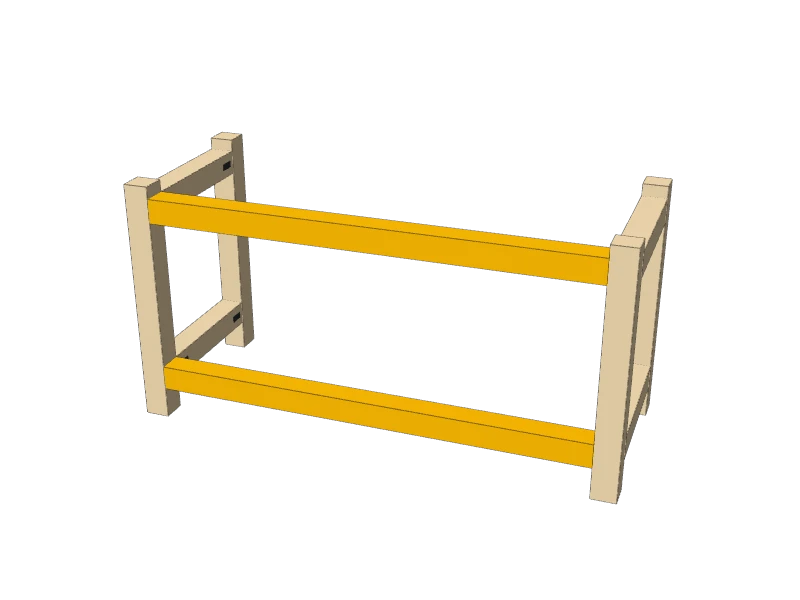 04
Add the back rails
Stand the ends up and fit the two back rails (C) between the back legs, lined up with the side rails. Screw them in.
Measure corner to corner both ways. When the diagonals match, the rack is square.
 05
Add the slats
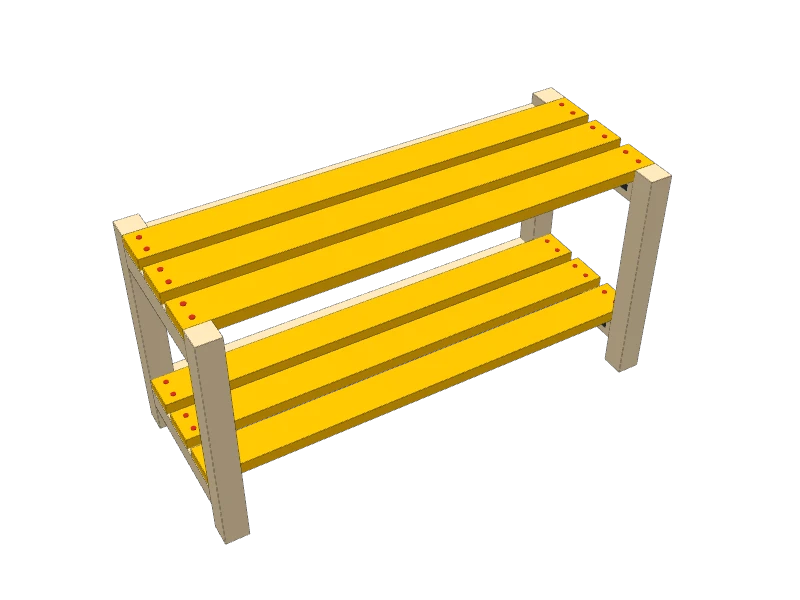
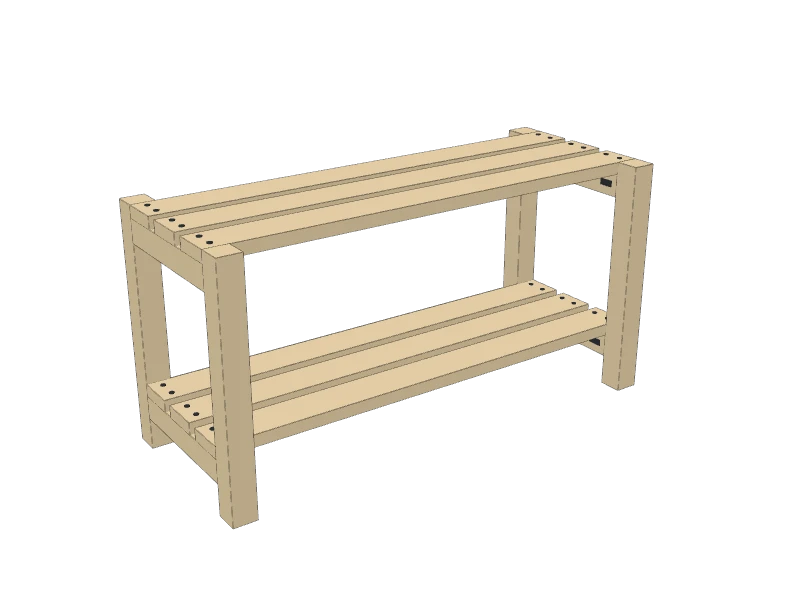
Lay three slats (D) across each pair of side rails, about ¾″ apart, with the ends flush with the outside of the rails.
Pre-drill and drive two 1½″ wood screws through each slat end into the rail. Glue them too if you like.
 06
Sand and finish
Sand with 120 grit, then 180, and soften every edge. Wipe on two coats of a clear finish or paint: wet boots are hard on bare wood.
TipStick felt pads under the legs if it sits on a hardwood floor.
Build at your own risk. Check every measurement against your own lumber before you cut, test-fit before you glue, and wear eye and ear protection.