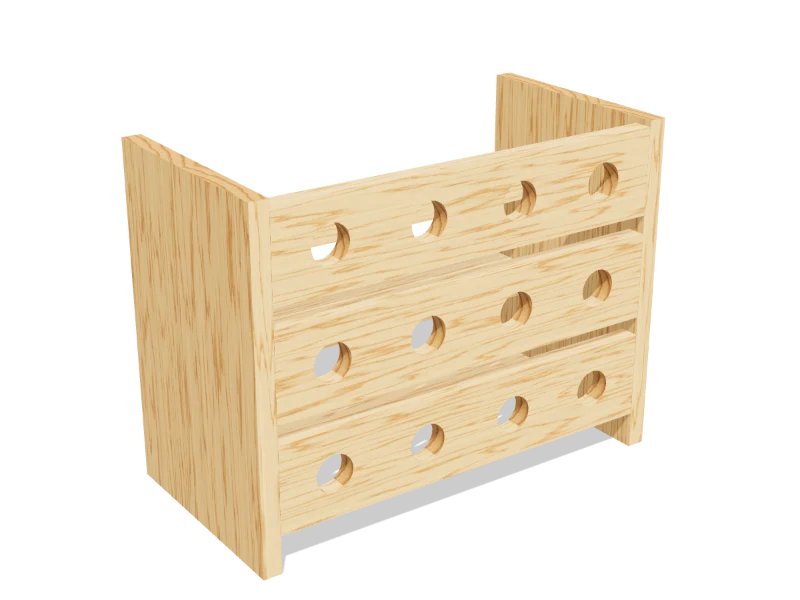
Wall Spice Rack
Draft · not yet checked by a carpenterThree shallow shelves with guard rails, sized for standard spice jars, from one 1x4 and one 1x2. Hangs on the wall like a picture frame.
- Skill
- Beginner
- Build time
- 1 to 2 hours, plus finish
- Lumber
- 2 1x4s and 1 1x2
- Joinery
- Glue and brad nails
- Finished size
- 18″ W × 4¼″ D × 24″ H
What you need
A 1x4 is actually ¾″ × 3½″ and a 1x2 is ¾″ × 1½″. Every measurement in this plan uses the real size.
Shopping list
- 21x4, 6 ftSides and shelves.
- 11x2, 6 ftGuard rails and hanging rail.
- ~301¼″ brad nailsOr 1¼″ screws with pilot holes.
- 22½″ wood screwsFor hanging.
- opt.Drywall anchors rated 25 lbWhere there's no stud.
- 1Wood glue
- —Sandpaper, wood filler, paint or clear finish
Tools
- Miter saw or circular saw
- Brad nailer or hammer
- Drill/driver
- Stud finder
- Level
- Tape measure, pencil
Cut list
Nine pieces from three boards. Label each piece with its letter in pencil as you cut it.
| Part | Qty | Size, inches | From |
|---|---|---|---|
| ASides | 2 | ¾ × 3½ × 24 | 1x4 |
| BShelves | 3 | ¾ × 3½ × 16½ | 1x4 |
| CGuard rails | 3 | ¾ × 1½ × 18 | 1x2 |
| DHanging rail | 1 | ¾ × 1½ × 16½ | 1x2 |
Board layout. Each row is one board, cut left to right, with the remainder hatched. Dark lines are saw cuts, about ⅛″ wide.
Build it
Five steps. The 3D view follows along as you scroll. The parts you're working on are yellow, and the pocket holes or screws for that step are red.
- 01
Cut the pieces
Cut every piece on the cut list:
- A Sides, two at 24″
- B Shelves, three at 16½″
- C Guard rails, three at 18″
- D Hanging rail, one at 16½″
- 02
Build the box
Mark the shelf positions on the inside of both sides (A): the bottoms of the shelves at 0″, 8″ and 16″ from the bottom end. Glue the three shelves (B) between the sides on the marks, flush at the front and back, and nail through the sides with two 1¼″ brads per joint.
Glue the hanging rail (D) between the sides at the top back corner, flush with the top and back edges, and nail it the same way.
- 03
Add the guard rails
Glue a guard rail (C) across the front edges of the sides above each shelf, with its bottom edge 2″ above the shelf top. Nail each end into the side.
TipStand a spice jar on a shelf first and check it clears the rail when you tilt it out. Raise the rails a little for tall jars. - 04
Sand and finish
Fill the nail holes, sand with 120 then 180 grit, and finish with paint or a wipe-on clear finish.
- 05
Hang it
Find a stud with a stud finder. Hold the rack level on the wall and drive two 2½″ screws through the hanging rail (D): into a stud where you can, and into rated drywall anchors where you can't.
Watch outFull spice jars add up. Use at least one screw into a stud, or anchors rated for 25 lb or more each.
Build at your own risk. Check every measurement against your own lumber before you cut, test-fit before you glue, and wear eye and ear protection. Full disclaimer.