









Stackable Storage Crates
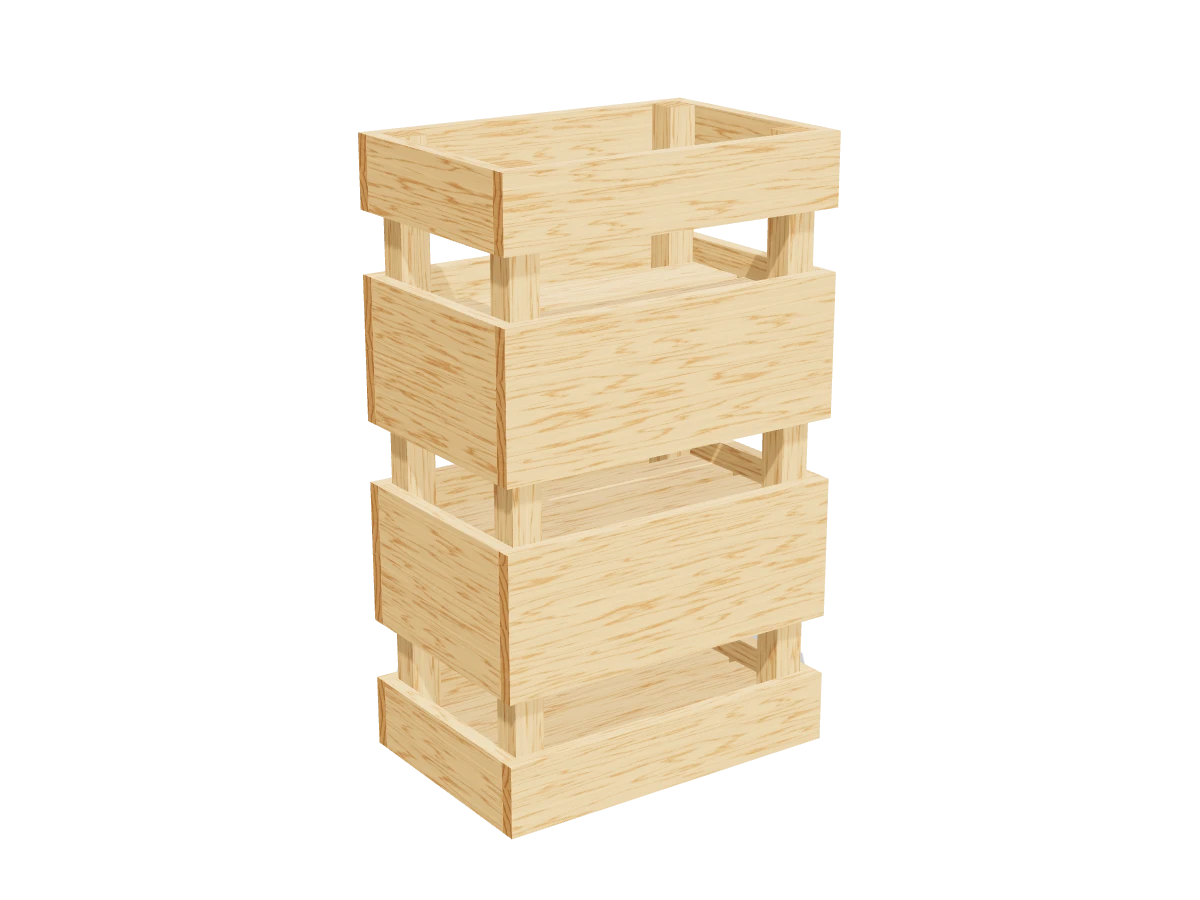
Draft · not yet checked by a carpenterA set of three sturdy wooden crates that stack. Use them as open shelving, for toys, or for firewood and garden gear.
- Skill
- Beginner
- Build time
- 4 to 6 hours, plus finish
- Lumber
- 2 2x2s and 5 1x4s
- Joinery
- Screws
- Finished size
- 18″ L × 12″ W × 10″ H each
A 2x2 is actually 1½″ × 1½″ and a 1x4 is ¾″ × 3½″. Every measurement in this plan uses the real size.
Shopping list
- 22x2, 8 ftCorner posts and bottom rails.
- 51x4, 8 ftEvery slat.
- ~1401¼″ wood screwsAbout 70 per crate.
- —Sandpaper, 120 grit
- opt.Oil, stain or paint
Tools
- Miter saw or circular sawA stop block helps.
- Drill/driverWith a ⅛″ bit for pilot holes.
- Tape measure, pencil
Cut list
| Part | Qty | Size, inches | From |
|---|---|---|---|
| ACorner posts | 12 | 1½ × 1½ × 10 | 2x2 |
| BBottom rails | 6 | 1½ × 1½ × 7½ | 2x2 |
| CBottom slats | 6 | ¾ × 3½ × 16½ | 1x4 |
| DSide slats | 12 | ¾ × 3½ × 18 | 1x4 |
| EEnd slats | 12 | ¾ × 3½ × 10½ | 1x4 |
Board layout. Each row is one board, cut left to right, with the remainder hatched. Dark lines are saw cuts, about ⅛″ wide.
Build it
 01
Cut the pieces
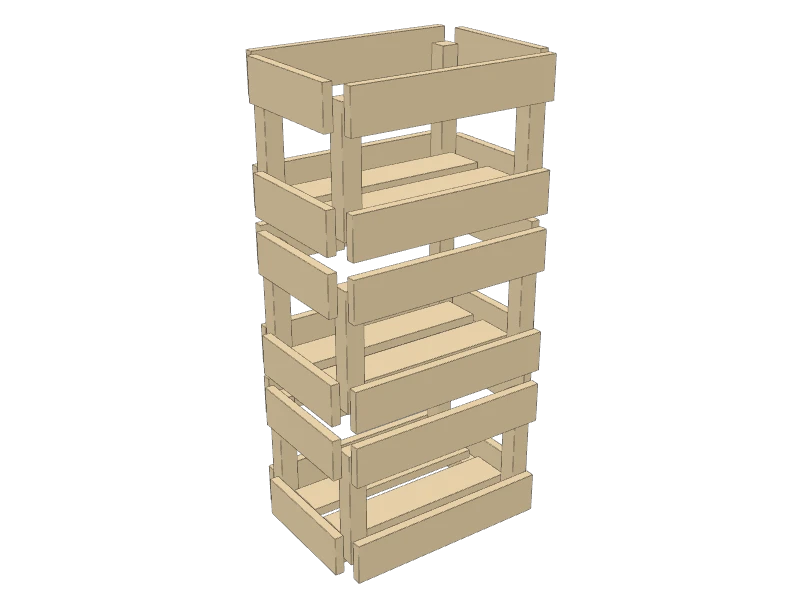
Cut every piece on the cut list. These numbers make all three crates:
- A Corner posts, twelve at 10″
- B Bottom rails, six at 7½″
- C Bottom slats, six at 16½″
- D Side slats, twelve at 18″
- E End slats, twelve at 10½″
TipSet a stop block on your saw for each length. Cutting all twelve posts or all twelve side slats in a row keeps every crate the same size, so they stack straight.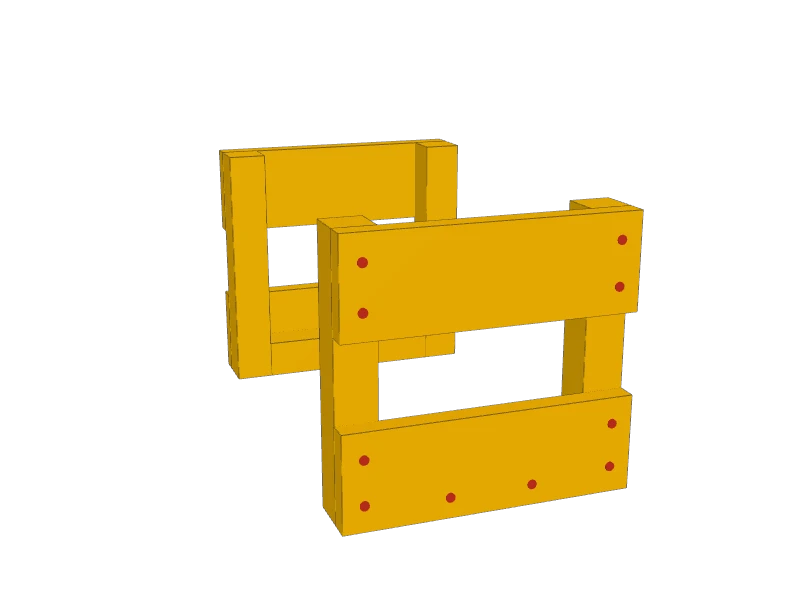 02
Build the two ends
For each end, lay two posts (A) on the bench 10½″ apart at the outside edges, with a bottom rail (B) between them at the bottom. Screw two end slats (E) across the posts: one flush with the bottom and one flush with the top, flush with the outside edges of the posts.
Pre-drill and drive two 1¼″ screws into each post at every slat end, and two more through the bottom slat into the rail.
 03
Add the sides
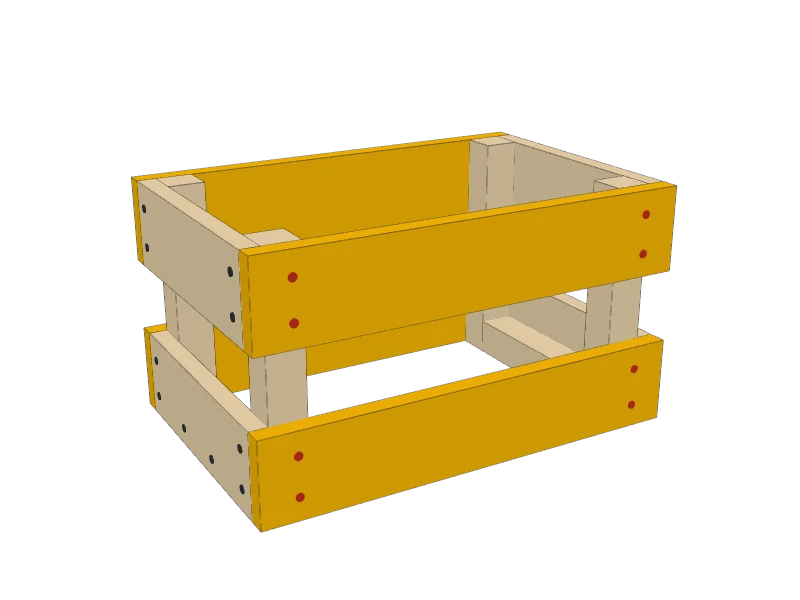
Stand the two ends up, slats facing out. Screw the side slats (D) to the posts at the bottom and the top, flush with the ends of the end slats so they cover them.
 04
Add the bottom
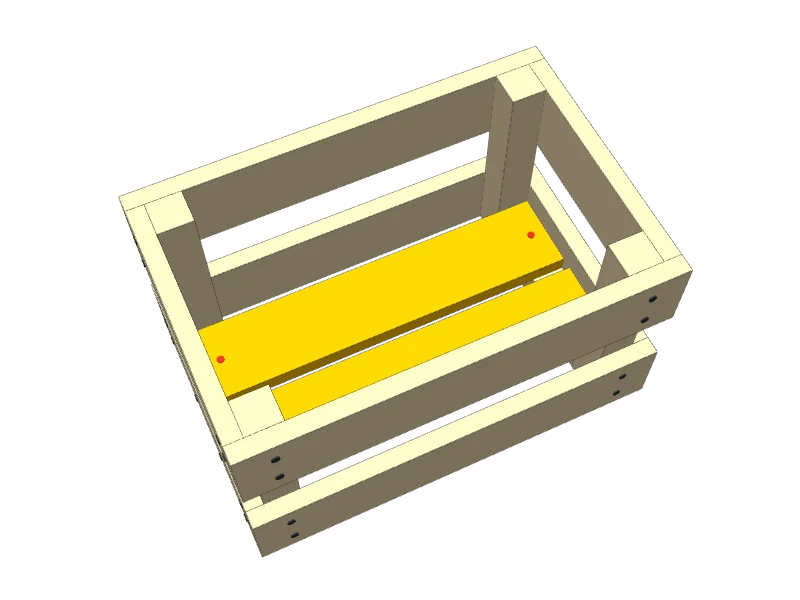
Drop the two bottom slats (C) in onto the bottom rails, tight against the sides, and screw each end into a rail. The gap in the middle lets dust fall through.
 05
Build two more
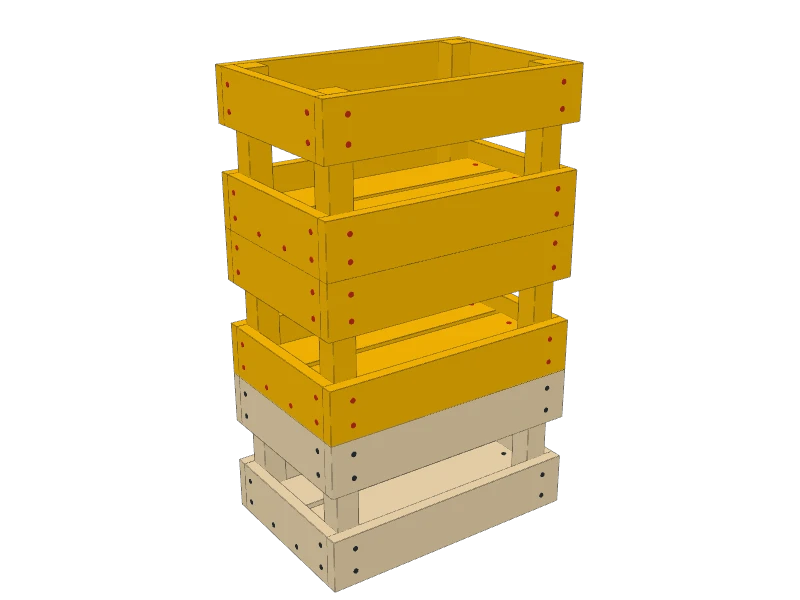
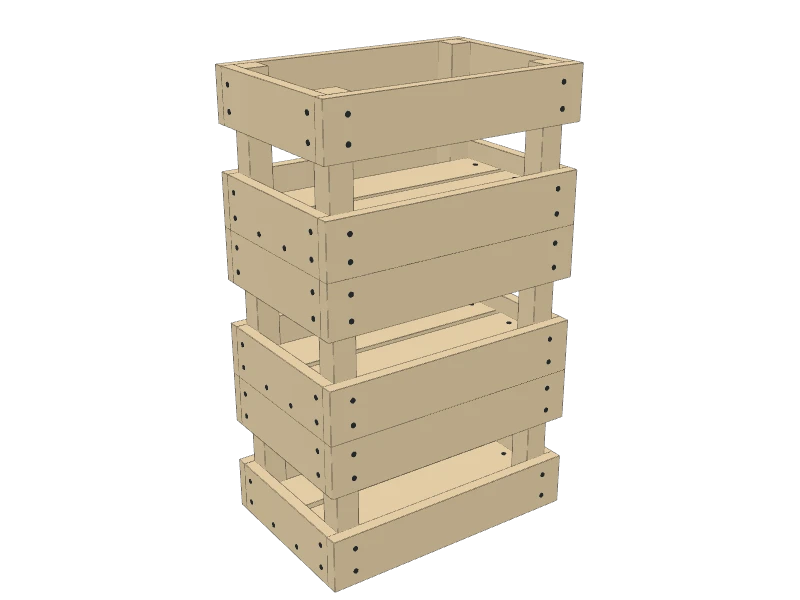
Build the other two crates the same way, from the rest of the posts (A), rails (B), bottom slats (C), side slats (D) and end slats (E). Stack them to check they sit square on each other.
 06
Sand and finish
Sand the top edges and the hand-hold gaps smooth, then finish with oil, stain or paint.
TipThe posts stand on the crate below, so they stack without sliding. Add felt pads under the bottom crate for wood floors.
Build at your own risk. Check every measurement against your own lumber before you cut, test-fit before you glue, and wear eye and ear protection.