Toy Box with Lid Support
A plywood toy box with a lid that stays open wherever you leave it, air holes, hand holds and no latch, built to the CPSC's toy chest advice.
- Skill
- Level 2 of 5 · Beginner
- Build time
- 4 to 5 hours, plus finish
- Lumber
- 1 sheet of ¾″ plywood
- Joinery
- Glue and screws
- Finished size
- about 33″ W × 16½″ D × 18″ H
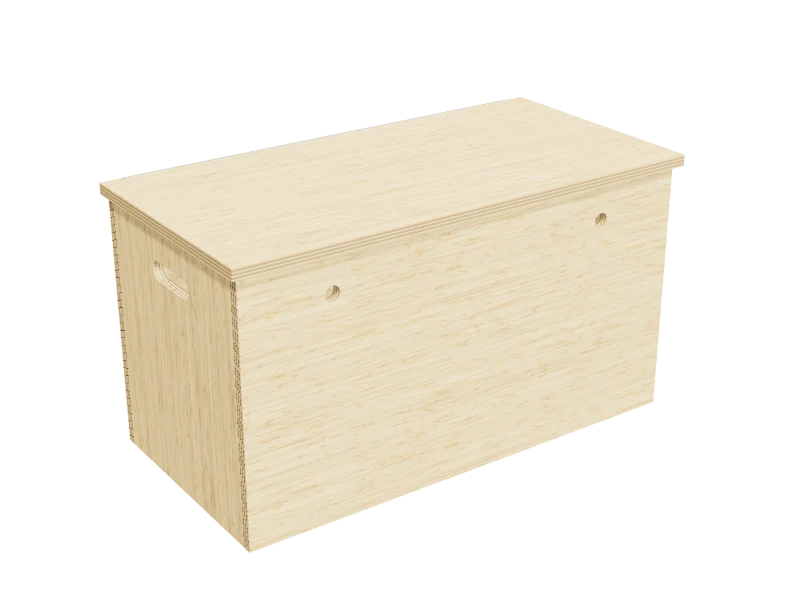
What you need
Every measurement in this plan uses the real size. ¾″ plywood is drawn at full thickness, but plywood sold that way is often a hair thinner, so measure yours and cut the pieces that fit between panels to match.
Shopping list
- 1¾″ plywood, 4 × 8 ft sheetBirch or another smooth hardwood plywood paints best.
- ~301⅝″ wood screws
- 1Piano hinge, 30″With its screws.
- 2Toy box lid supportsOnes that hold the lid in any position, rated for a lid of about 9 lb.
- 1Wood glue
- 4Felt pads
- —Toy-safe water-based paint, sandpaper
Tools
- Circular sawOr have the store cut the plywood.
- JigsawFor the hand holds.
- Drill/driverWith a 1″ and a 1¼″ bit.
- Router with a ¼″ roundover bitOr a sanding block.
- Clamps
- Tape measure, square, pencil
Cut list
Six pieces from one sheet. Label each piece with its letter in pencil as you cut it.
| Part | Qty | Size, inches | From |
|---|---|---|---|
| AFront and backWith two 1″ air holes. | 2 | ¾ × 17¼ × 32 | ¾″ plywood |
| BEndsWith a hand hold. | 2 | ¾ × 14½ × 17¼ | ¾″ plywood |
| CBottom | 1 | ¾ × 14½ × 30½ | ¾″ plywood |
| DLid | 1 | ¾ × 16½ × 33 | ¾″ plywood |
Board layout. Each row is one board, cut left to right, with the remainder hatched. Dark lines are saw cuts, about ⅛″ wide.
Hardware & tools
Everything besides the lumber, with a link for each.
Links go to Amazon. Woodable earns a small commission at no cost to you.
Hardware
- Piano hinge, 30″With its screws.1View on Amazon
- Toy box lid supportsOnes that hold the lid in any position, rated for a lid of about 9 lb.2View on Amazon
- Felt padsSelf-stick felt pads for the feet.4View on Amazon
Fasteners
- 1⅝″ wood screws#8 × 1⅝″, flat head, coarse thread.~30View on Amazon
Glue & finish
- Wood gluePVA wood glue for indoor projects.1View on Amazon
- Sandpaper5″ hook-and-loop discs for a random orbit sander, 80 to 220 grit.View on Amazon
- Toy-safe finishWater-based paint or clear finish labeled safe for toys once dry.View on Amazon
Tools
- Circular sawOr have the store cut the plywood.View on Amazon
- JigsawFor the hand holds.View on Amazon
- Drill/driverWith a 1″ and a 1¼″ bit.View on Amazon
- RouterCompact or trim router.View on Amazon
- ¼″ roundover router bit¼″ radius roundover bit with a bearing.View on Amazon
- ClampsTwo or more bar clamps that open 24″ or more.View on Amazon
- Tape measure25 ft tape measure.View on Amazon
- Speed square7″ rafter square for marking and guiding cuts.View on Amazon
Build it
Eight steps. The 3D view follows along as you scroll. The parts you're working on are yellow, and the pocket holes or screws for that step are red.
- 01
Cut the pieces
Cut every piece from the plywood. Ask the store to rip the sheet into strips first if it won't fit in your car:
- A Front and back, two at 17¼″ × 32″
- B Ends, two at 14½″ × 17¼″
- C Bottom, one at 14½″ × 30½″
- D Lid, one at 16½″ × 33″
- 02
Cut the hand holds and air holes
On each end (B), mark a hand hold 4½″ long and 1¼″ tall, centered across the end, its center 3″ below the top edge. Drill a 1¼″ hole at each end of the slot and cut between them with a jigsaw.
On the front and back (A), drill two 1″ air holes, 6″ in from each end and 2½″ below the top edge.
Watch outThe air holes matter. A child who climbs in and gets shut in needs air. Holes in the front and in the ends stay open even when the back is against a wall. - 03
Build the box
Stand the two ends (B) between the front and back (A), flush at the top, bottom and outside faces. Glue each joint, drill pilot holes and drive three 1⅝″ screws through the front and back into each end.
TipMeasure the two diagonals across the top: when they match, the box is square. Let the glue set before you move on. - 04
Add the bottom
Turn the box over and fit the bottom (C) inside, flush with the bottom edges. Glue it and screw through the front, back and ends into its edges.
- 05
Round every edge and sand
Round over every edge and corner of the front and back (A), the ends (B), the hand holds and the lid (D) with a ¼″ roundover bit or a sanding block, until there are no sharp corners anywhere. Sand everything with 120 then 180 grit.
- 06
Hinge the lid
Lay the lid (D) on the box, flush at the back, overhanging ½″ at the front and both ends. Screw a piano hinge along the back: one leaf to the back of the box, the other to the back edge of the lid.
- 07
Add the lid supports
Screw a toy box lid support to the inside of each end (B) and to the underside of the lid (D), following the maker's instructions for this lid's weight, about 9 lb. The supports have to hold the lid open in any position, not just fully open.
Test it: lift the lid partway and let go. It must stay where you left it, at every height. If it drifts down, tighten or adjust the supports until it doesn't.
Watch outA lid that falls can hit a child's head or neck. Never use a plain hinge with no support, and never add a latch, hasp or lock. - 08
Finish
Paint with a water-based paint that's labeled safe for toys, inside and out, and let it cure for a few days. Add felt pads under the corners.
Watch outCheck the lid supports every few months and tighten their screws: some loosen with use. Keep the air holes clear.
Build at your own risk. Check every measurement against your own lumber before you cut, test-fit before you glue, and wear eye and ear protection. Full disclaimer.