









Trapezoid-Leg Coffee Table
A coffee table with a chunky 3½″ edge that weighs half what it looks: a plywood panel inside a mitered skirt, on two steel trapezoid legs.
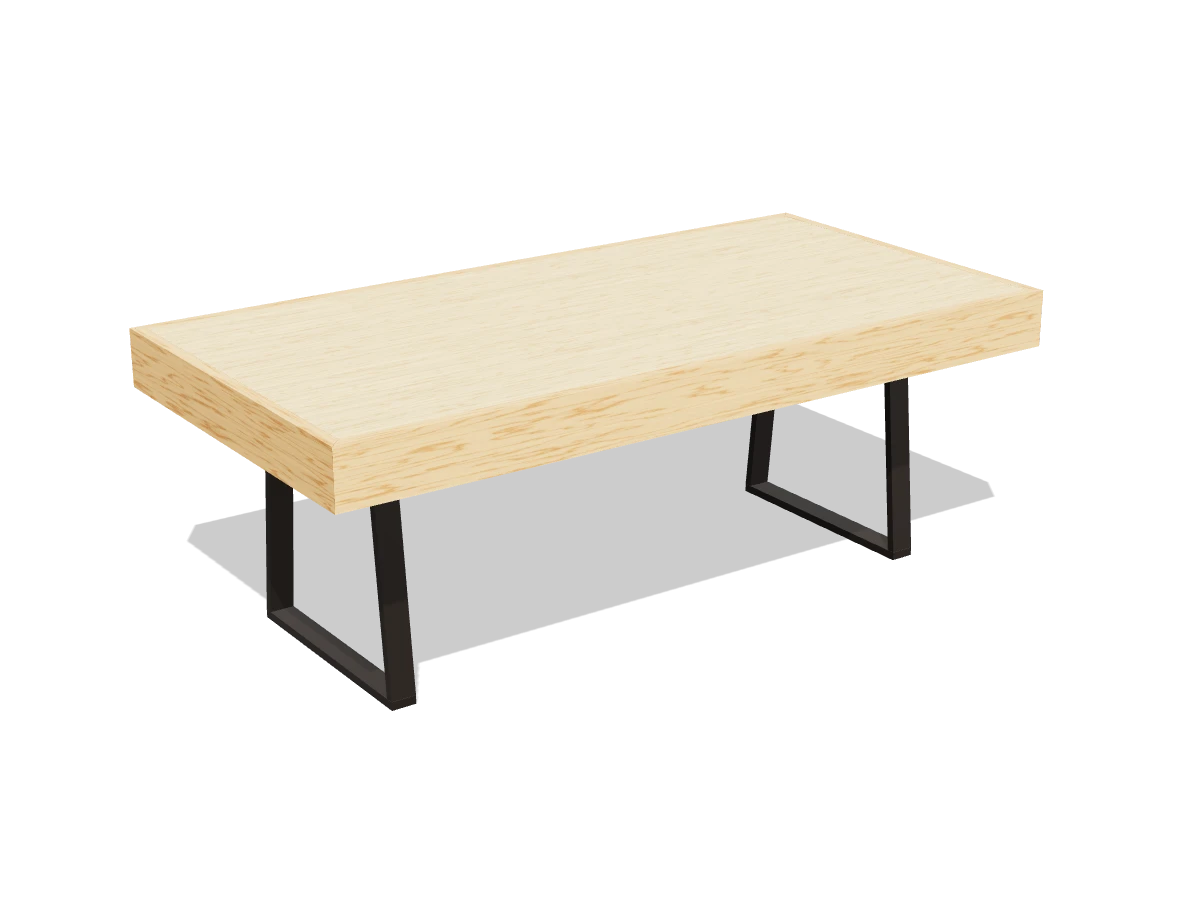
- Skill
- Level 3 of 5 · Intermediate
- Build time
- 4 to 6 hours, plus finish
- Lumber
- 2 1x4s and 1 panel of ¾″ plywood
- Joinery
- Miters, pocket holes and screws
- Finished size
- 48″ L × 24″ W × 17½″ H
A 1x4 is actually ¾″ × 3½″. Every measurement in this plan uses the real size. ¾″ plywood is drawn at full thickness, but plywood sold that way is often a hair thinner, so measure yours and cut the pieces that fit between panels to match.
Shopping list
- 21x4, 8 ftThe skirt and cleats. Select or premium pine: the skirt shows on every side.
- 1¾″ plywood, 2 × 4 ft panelThe top. Birch or another smooth hardwood plywood.
- 1 pair16″ trapezoid legs, pairAbout 11¾″ across the top bar.
- ~10#10 × 1″ pan-head screwsFor the legs, if yours don't come with screws.
- ~201¼″ coarse-thread pocket-hole screws
- ~201¼″ wood screwsFor the cleats.
- ~101¼″ brad nailsFor the miters.
- 1Wood glue
- —Sandpaper, wood filler, stain or paint
- opt.Clear polyurethane
Tools
- Miter sawFor the 45° miters.
- Circular sawOr have the store cut the plywood.
- Pocket-hole jigSet for ¾″.
- Drill/driverWith a ⅛″ bit for pilot holes.
- Band clampOr four corner clamps, for the miters.
- Brad nailer or hammer
- Random orbit sander
- Tape measure, speed square, pencil
Cut list
| Part | Qty | Size, inches | From |
|---|---|---|---|
| ATop panel | 1 | ¾ × 22½ × 46½ | ¾″ plywood |
| BLong skirtBoth ends mitered at 45°, long point to long point. | 2 | ¾ × 3½ × 48 | 1x4 |
| CShort skirtBoth ends mitered at 45°, long point to long point. | 2 | ¾ × 3½ × 24 | 1x4 |
| DLeg cleats | 2 | ¾ × 3½ × 22½ | 1x4 |
Board layout. Each row is one board, cut left to right, with the remainder hatched. Dark lines are saw cuts, about ⅛″ wide.
Build it
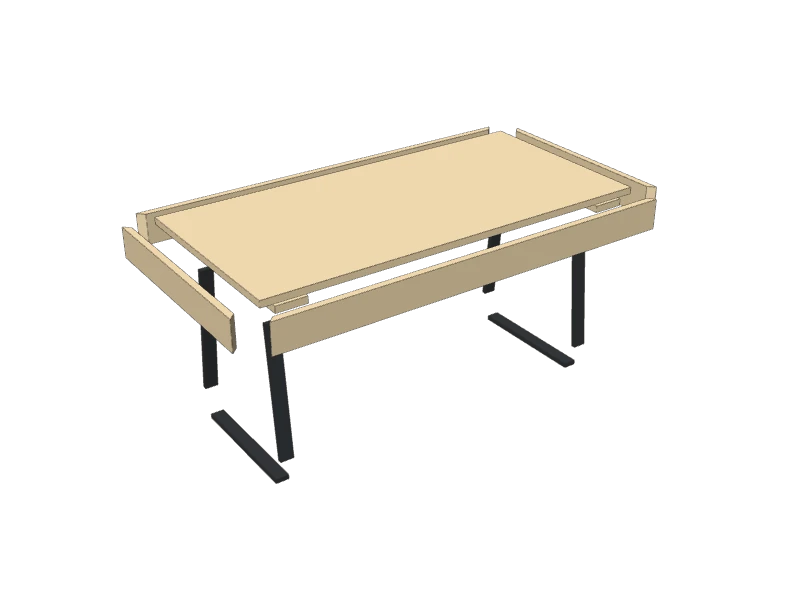 01
Cut the pieces
Cut the panel from the plywood and the rest from the 1x4s:
- A Top panel, one at 22½″ × 46½″
- B Long skirt, two at 48″
- C Short skirt, two at 24″
- D Leg cleats, two at 22½″
Set the miter saw to 45°. Miter both ends of each skirt board (B) and (C) so the long points are the lengths above, and both miters lean the same way, like a picture frame.
TipCut the two long skirts (B) with one stop block and the two short ones (C) with another. Matching pairs give tight corners.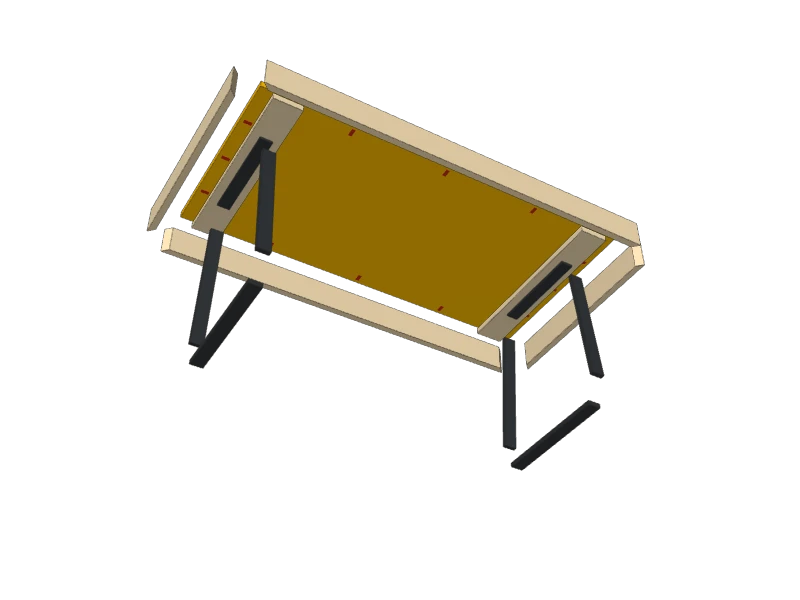 02
Drill the pocket holes
With the jig set for ¾″, drill pocket holes on the underside of the panel (A), about 1″ in from the edge: three along each long edge and three along each short edge, clear of where the cleats go 3½″ in from each end.
 03
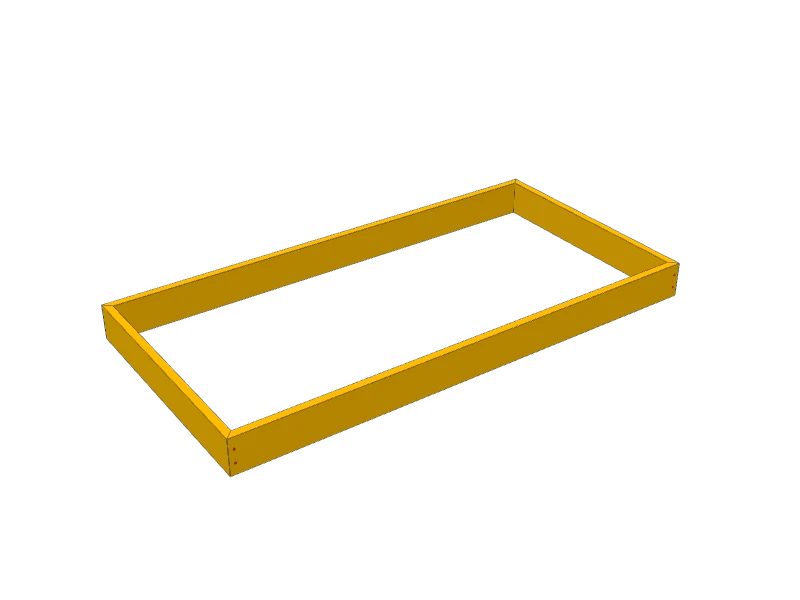
Build the skirt
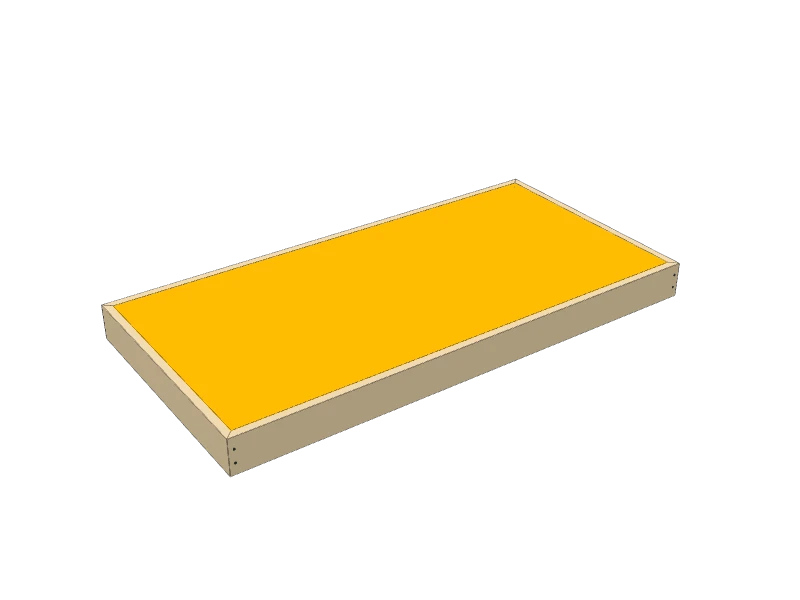
Glue the miters and pull the four skirt boards (B) and (C) together into a frame with a band clamp. Check the diagonals match, then drive two 1¼″ brad nails across each corner, through the long skirt into the end of the short one.
 04
Fit the top panel
Lay the frame face down on a flat floor. Drop the panel (A) in, pocket holes up, so its face sits flush with the edges of the skirt (B) and (C). Glue the edges and drive 1¼″ pocket screws into the skirt.
TipPlywood sold as ¾″ is often a hair thinner. Shim the panel with paper or a playing card on the floor so its face lands exactly flush.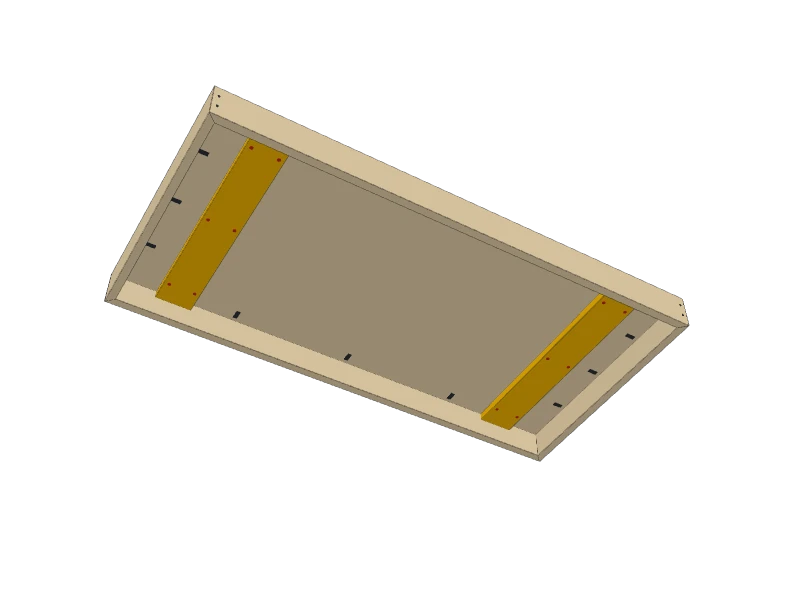 05
Add the leg cleats
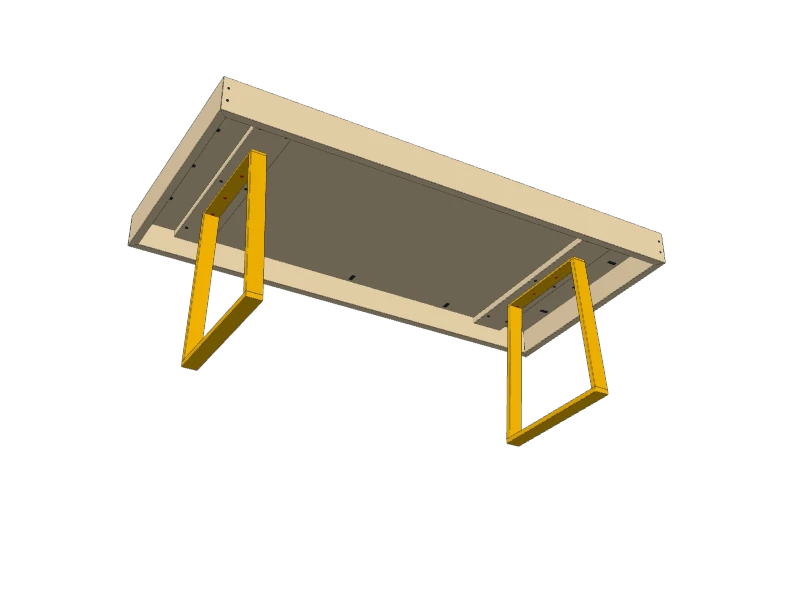
Glue a cleat (D) across the underside of the panel (A) 5¼″ from each end to its center, tight between the skirts. Screw each one down with six 1¼″ wood screws, kept off its center line where the leg bar goes.
 06
Screw on the trapezoid legs
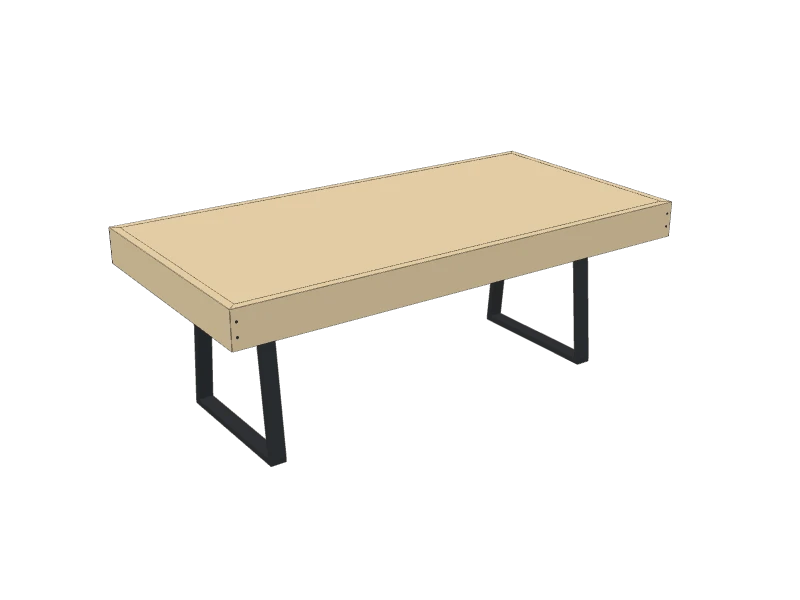
Center a trapezoid leg on each cleat (D), across the table, with 5⅜″ of cleat showing at each end of the top bar. Mark the holes, drill ⅛″ pilot holes no deeper than 1¼″, and drive a #10 × 1″ pan-head screw in every hole.
Check your legs' own instructions before drilling. The plan is drawn for legs 11¾″ across the top bar; wider or narrower ones work as long as the bar sits on the cleat.
 07
Sand and finish
Turn it over. Sand the top and skirt with 120 then 180 grit, and break the sharp edges with one light pass. Fill the brad holes.
Stain and seal it, or paint the skirt and leave the top natural under a clear coat.
Build at your own risk. Check every measurement against your own lumber before you cut, test-fit before you glue, and wear eye and ear protection.