









Valet Charging Station
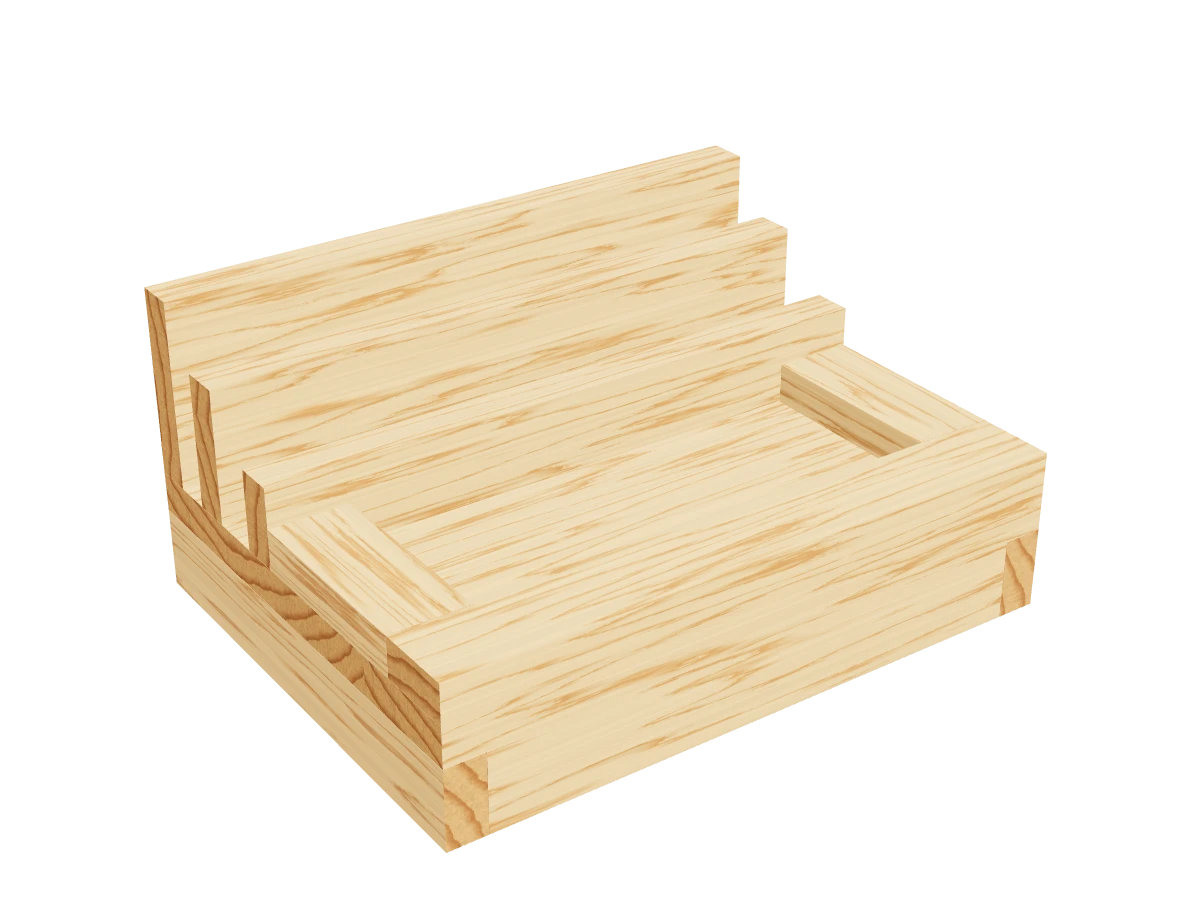
A dresser-top valet with a phone slot that charges through the base, a slot for a wallet and a tray for keys and a watch.
- Skill
- Level 2 of 5 · Beginner
- Build time
- 2 to 3 hours, plus finish
- Lumber
- 1 1x10, 1 1x4, 1 1x3 and 1 1x2
- Joinery
- Glue and brad nails
- Finished size
- 12″ W × 9¼″ D × 5¾″ H
A 1x10 is actually ¾″ × 9¼″, a 1x4 is ¾″ × 3½″, a 1x3 is ¾″ × 2½″ and a 1x2 is ¾″ × 1½″. Every measurement in this plan uses the real size.
Shopping list
- 11x10, 6 ftThe base. One short piece.
- 11x4, 6 ftThe back rail.
- 11x3, 6 ftThe middle rail.
- 11x2, 6 ftThe front rail, the lips and the plinth.
- ~401¼″ brad nails
- 1Wood glue
- 4Felt padsFor under the plinth.
- —Wood filler, sandpaper 120 to 220 grit
- 1Wipe-on oil or polyurethane
Tools
- Miter saw or circular saw
- Drill/driverWith a ¾″ spade or Forstner bit.
- Brad nailerOr a hammer and nail set.
- Clamps
- Random orbit sander
- Tape measure, speed square, pencil
Cut list
| Part | Qty | Size, inches | From |
|---|---|---|---|
| ABaseWith two ¾″ cord holes. | 1 | ¾ × 9¼ × 12 | 1x10 |
| BBack rail | 1 | ¾ × 3½ × 12 | 1x4 |
| CMiddle rail | 1 | ¾ × 2½ × 12 | 1x3 |
| DFront rail | 1 | ¾ × 1½ × 12 | 1x2 |
| EFront lip | 1 | ¾ × 1½ × 12 | 1x2 |
| FPlinth sides | 2 | ¾ × 1½ × 9¼ | 1x2 |
| GPlinth front | 1 | ¾ × 1½ × 10½ | 1x2 |
| HSide lips | 2 | ¾ × 1½ × 3¾ | 1x2 |
Board layout. Each row is one board, cut left to right, with the remainder hatched. Dark lines are saw cuts, about ⅛″ wide.
Build it
 01
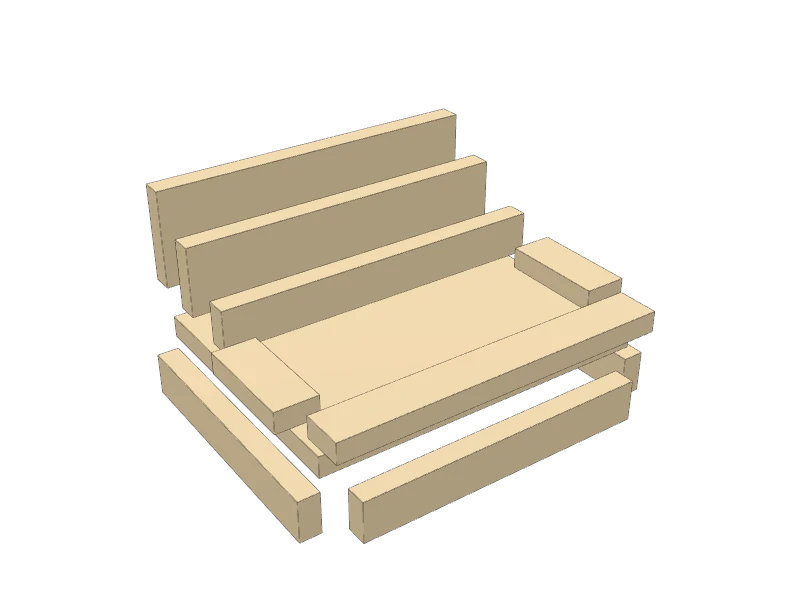
Cut the pieces
Cut every piece on the cut list:
- A Base, one at 12″
- B Back rail, one at 12″
- C Middle rail, one at 12″
- D Front rail, one at 12″
- E Front lip, one at 12″
- F Plinth sides, two at 9¼″
- G Plinth front, one at 10½″
- H Side lips, two at 3¾″
TipOak, cherry or walnut makes a nicer gift than pine. The sizes are the same.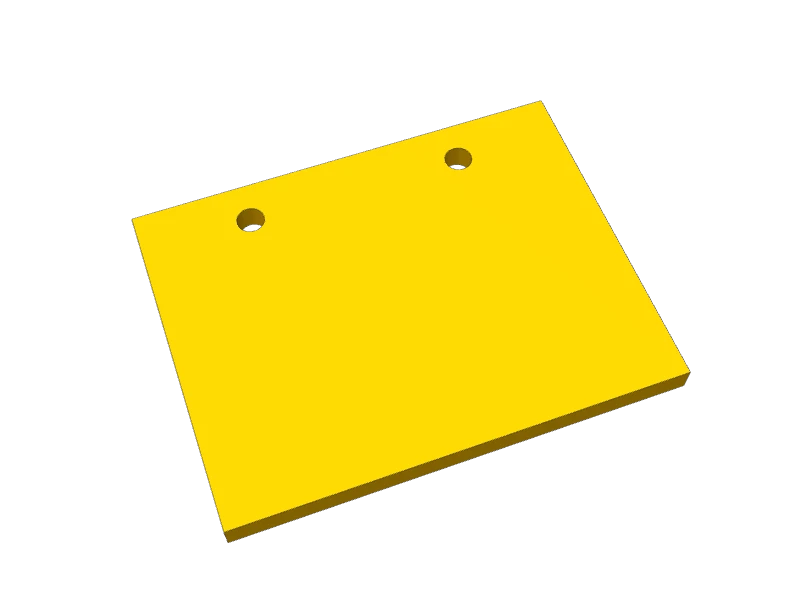 02
Drill the cord holes
On the base (A), draw a line across the top face 1⅛″ from the back edge. That's the middle of the phone slot. Mark two points on it, 3″ in from each end, and drill a ¾″ hole straight through at each with a spade or Forstner bit.
TipClamp a scrap under the base so the bit doesn't splinter the bottom face.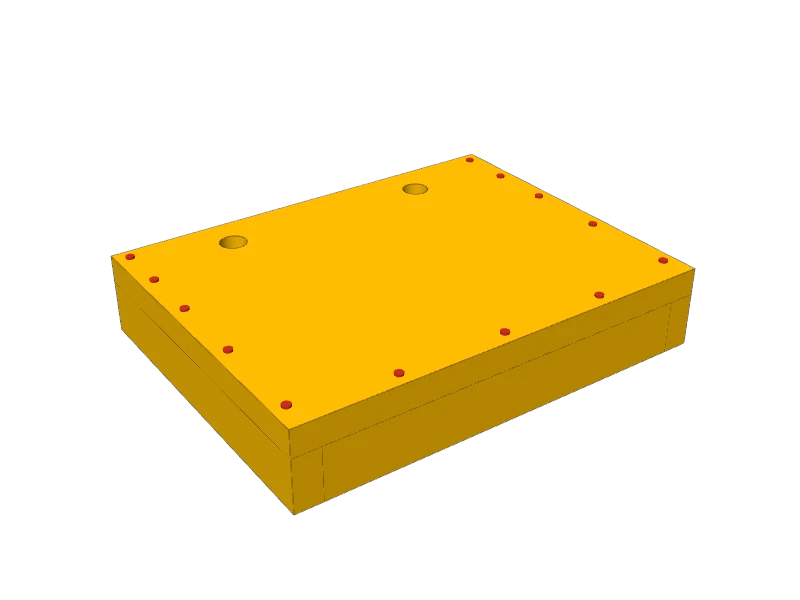 03
Add the plinth
Glue the two plinth sides (F) under the ends of the base (A), flush with the ends, the front and the back. Glue the plinth front (G) between them, flush with the front edge. The back stays open for the cords.
Pin each piece with 1¼″ brads down through the base. Put them only where the rails and lips will cover them: ⅜″, 1⅞″, 3⅝″, 5⅞″ and 8½″ from the back on each end, and three along the front.
 04
Add the rails
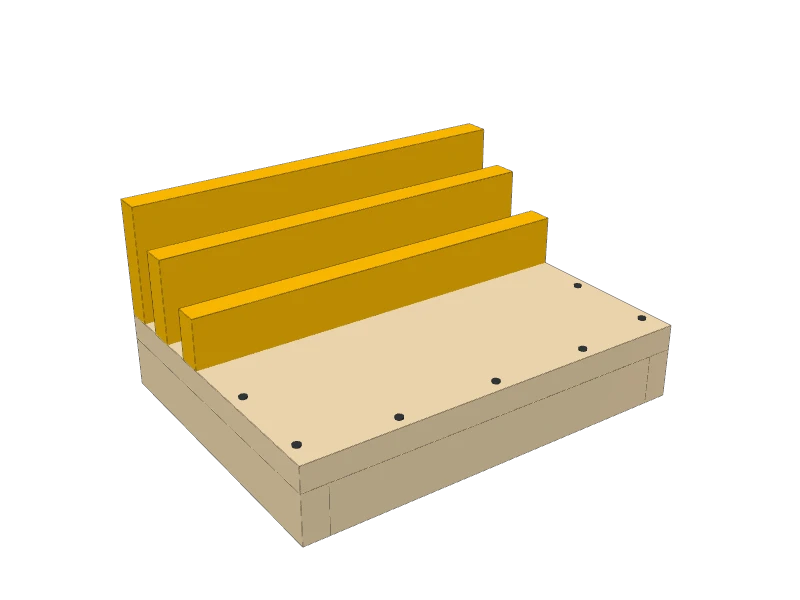
Glue the three rails on edge across the base, ends flush:
- Back rail (B) flush with the back edge.
- Middle rail (C) with a ¾″ gap behind it for the phone, right over the cord holes.
- Front rail (D) with a 1″ gap behind it for a wallet.
Use a ¾″ and a 1″ scrap as spacers so the slots come out even, and clamp the rails down with the spacers still in. Stand the station on one end and drive three brads up through the base into each rail.
 05
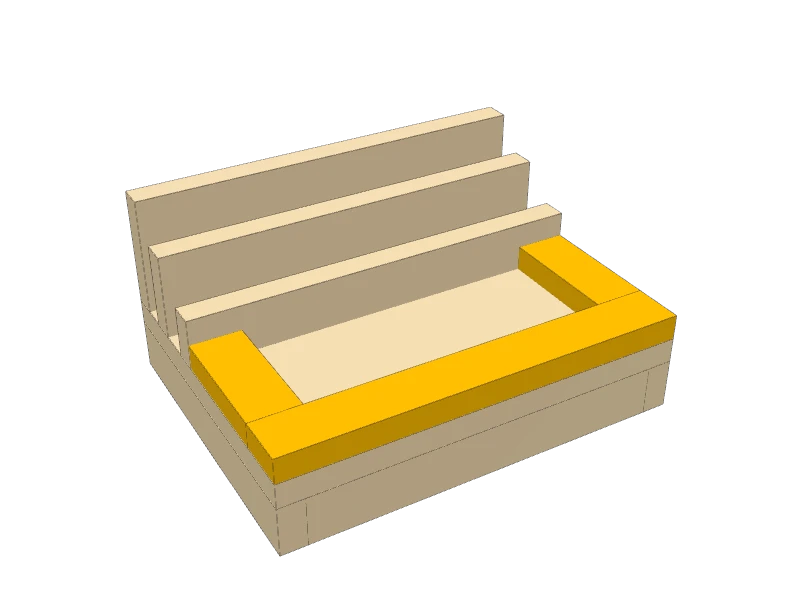
Add the tray lips
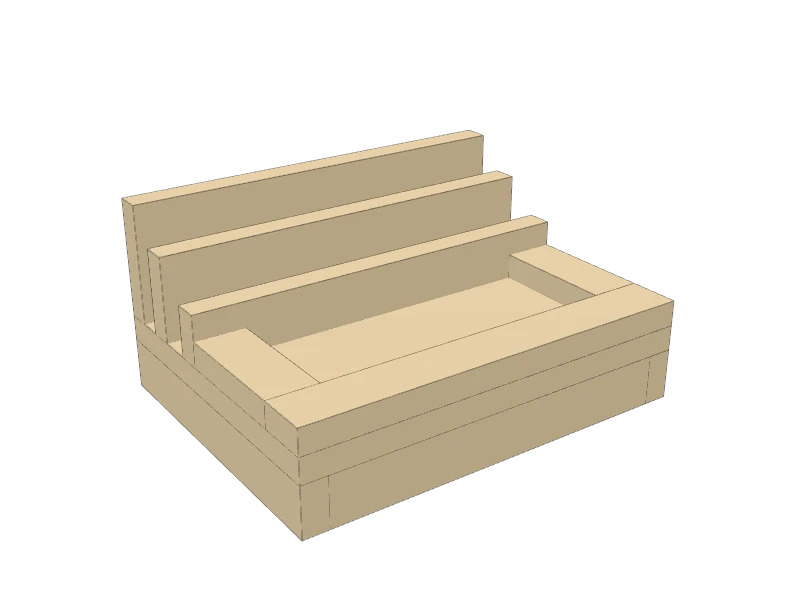
Glue the front lip (E) flat along the front edge of the base (A), and the two side lips (H) flat along the ends between the front lip and the front rail (D). Clamp them, stand the station on end again and drive brads up through the base: three into the front lip, two into each side lip.
The tray in front is 3¾″ deep, room for keys, a watch and a ring dish.
 06
Sand and finish
Fill the brad holes, then sand with 120, 180 and 220 grit. Round the top edges of the rails and lips so they're soft to the hand. Finish with wipe-on oil or polyurethane, and stick felt pads under the plinth.
Feed a charging cord up through a hole from below, plug in the phone and stand it in the slot. The cord runs out under the open back.
Watch outLeave the charger's plug-in block outside the station, on the floor or at the outlet, not under the base where heat can build up.
Build at your own risk. Check every measurement against your own lumber before you cut, test-fit before you glue, and wear eye and ear protection.