









Countertop Wine Rack
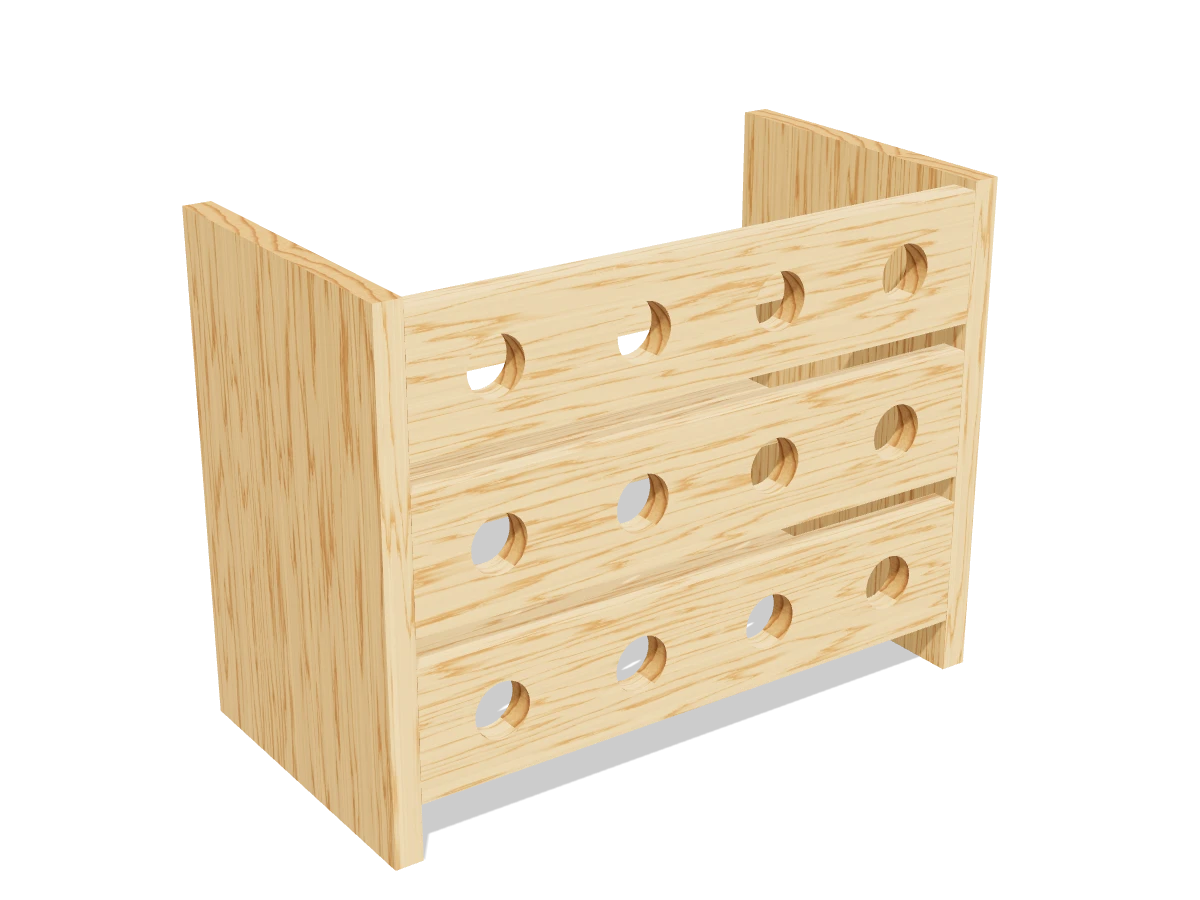
Draft · not yet checked by a carpenterA small rack that holds a dozen bottles on their sides on a counter or a shelf. Two 1x4s, a short 1x10, a 1½″ drill bit and an afternoon.
- Skill
- Intermediate
- Build time
- 2 to 3 hours, plus finish
- Lumber
- 1 1x10 and 2 1x4s
- Joinery
- Glue and screws
- Finished size
- 18″ W × 9¼″ D × 13¾″ H
A 1x10 is actually ¾″ × 9¼″ and a 1x4 is ¾″ × 3½″. Every measurement in this plan uses the real size.
Shopping list
- 11x10, 6 ftThe two ends.
- 21x4, 6 ftThe rails. Pick clear boards: the holes show any knots.
- ~301¼″ wood screws
- 1Wood glue
- —Sandpaper, oil or stain and a clear coat
Tools
- Miter saw or circular saw
- Drill/driverWith a 1½″ Forstner or spade bit.
- Clamps
- Tape measure, pencil
Cut list
| Part | Qty | Size, inches | From |
|---|---|---|---|
| AEnds | 2 | ¾ × 9¼ × 13¾ | 1x10 |
| BFront rails | 3 | ¾ × 3½ × 16½ | 1x4 |
| CBack rails | 3 | ¾ × 3½ × 16½ | 1x4 |
Board layout. Each row is one board, cut left to right, with the remainder hatched. Dark lines are saw cuts, about ⅛″ wide.
Build it
 01
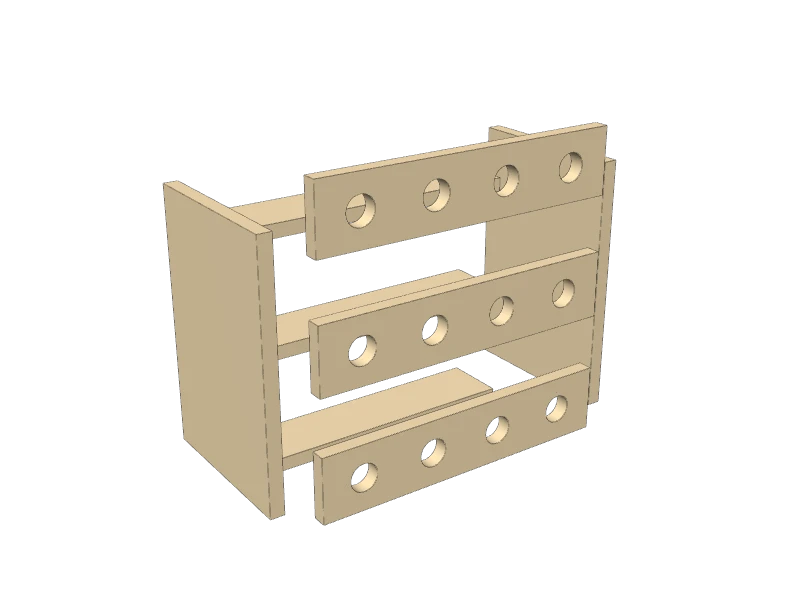
Cut the pieces
Cut every piece on the cut list:
- A Ends, two at 13¾″
- B Front rails, three at 16½″
- C Back rails, three at 16½″
 02
Drill the neck holes
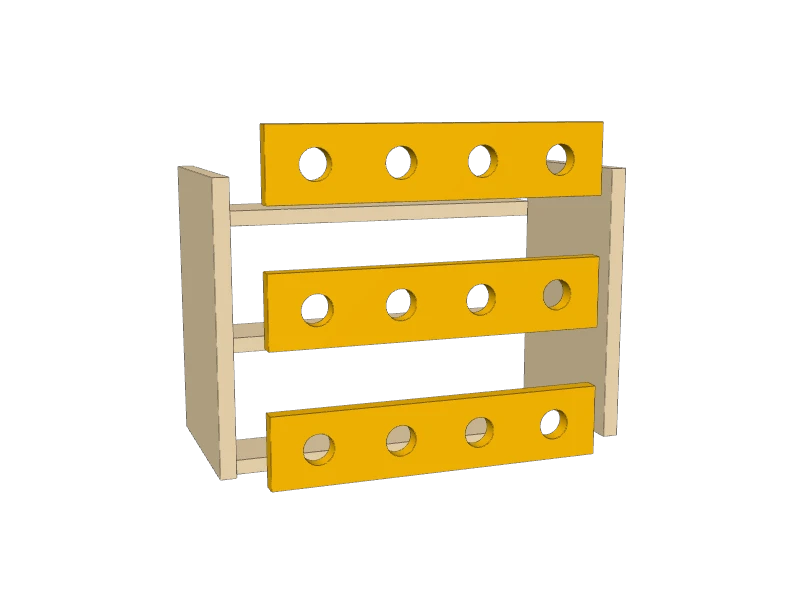
On each front rail (B), mark four hole centers along the middle of the board, 2¼″, 6¼″, 10¼″ and 14¼″ from one end. Drill a 1½″ hole at each mark with a Forstner or spade bit.
TipClamp the three rails together, ends lined up, and drill each hole through a scrap backer board so the back of the hole doesn't splinter.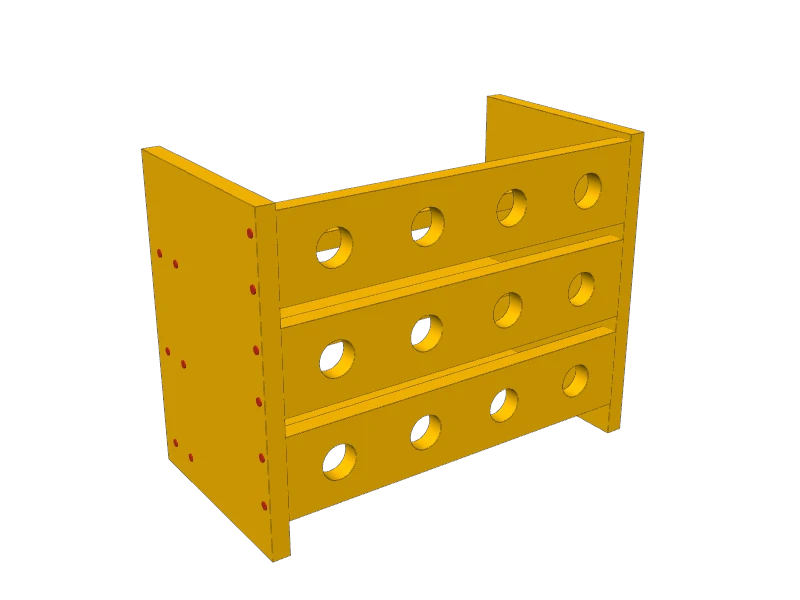 03
Assemble the rack
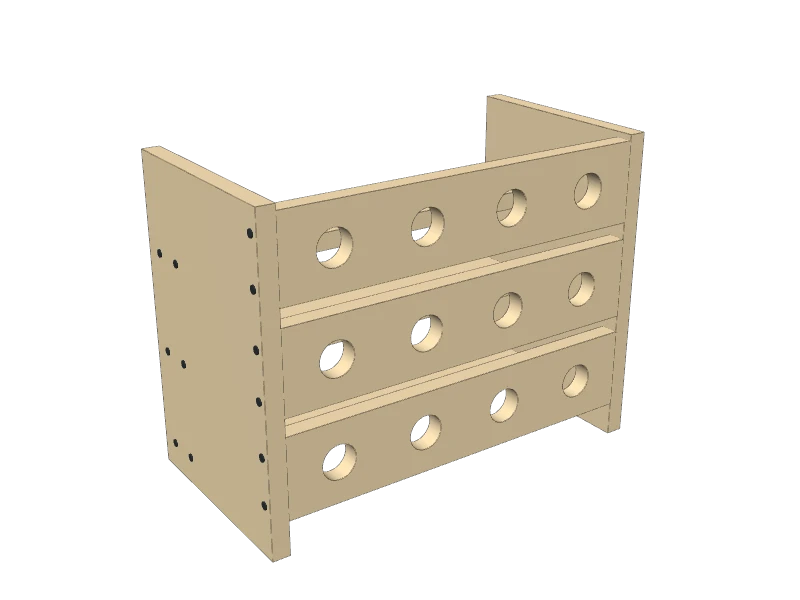
Mark the rail positions on the inside of both ends (A): the front rails (B) stand on edge at the front, their centers 3¼″, 7½″ and 11¾″ up from the bottom. The back rails (C) lie flat at the back, their tops 1⅝″ lower than each front rail's center, so the bottles lie level.
Glue each rail between the ends on its marks and drive two 1¼″ screws through each end into each rail end. Stand it up and check that it sits flat.
 04
Sand and finish
Sand with 120 then 180 grit and ease the edges of the holes. Finish with a wipe-on oil or stain and a clear coat.
TipLoad it bottom row first. Standard 750 mL bottles fit; wide Champagne or Pinot bottles may not.
Build at your own risk. Check every measurement against your own lumber before you cut, test-fit before you glue, and wear eye and ear protection.