









Book Display Shelf
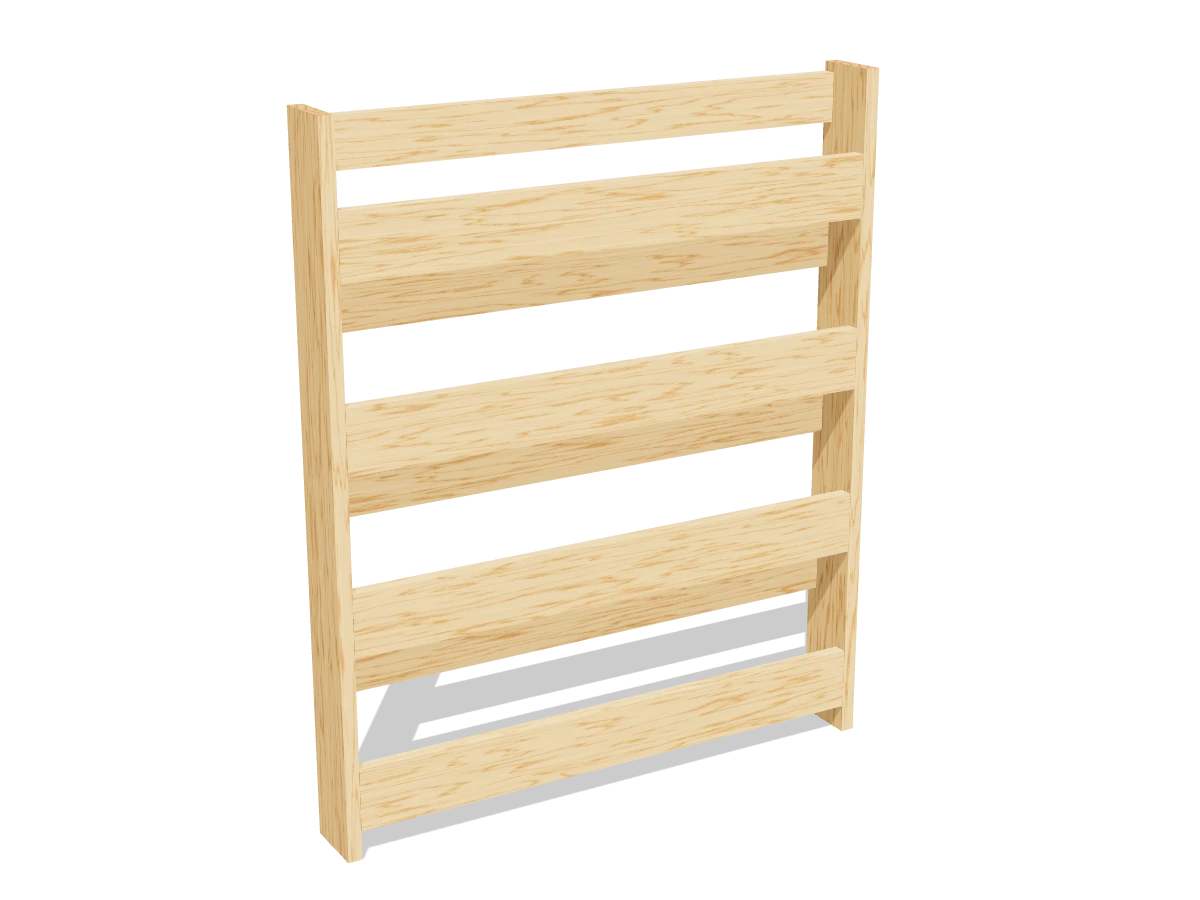
Draft · not yet checked by a carpenterFour shallow ledges that show books face-out, so little kids can see the covers and pick their own. Two 1x4s and two 1x3s.
- Skill
- Beginner
- Build time
- 2 to 3 hours, plus finish
- Lumber
- 3 1x4s and 3 1x3s
- Joinery
- Glue and screws
- Finished size
- 30″ W × 3½″ D × 36″ H
A 1x4 is actually ¾″ × 3½″ and a 1x3 is ¾″ × 2½″. Every measurement in this plan uses the real size.
Shopping list
- 31x4, 6 ftSides and ledges.
- 21x3, 8 ftFront lips and back rails.
- 11x3, 6 ftFront lips and back rails.
- ~601¼″ wood screws
- 1Furniture anti-tip strap or two L-bracketsTo anchor it to a wall stud.
- 1Wood glue
- —Sandpaper, child-safe paint or clear finish
Tools
- Miter saw or circular saw
- Drill/driverWith a ⅛″ bit for pilot holes.
- Stud finder
- Tape measure, pencil
Cut list
| Part | Qty | Size, inches | From |
|---|---|---|---|
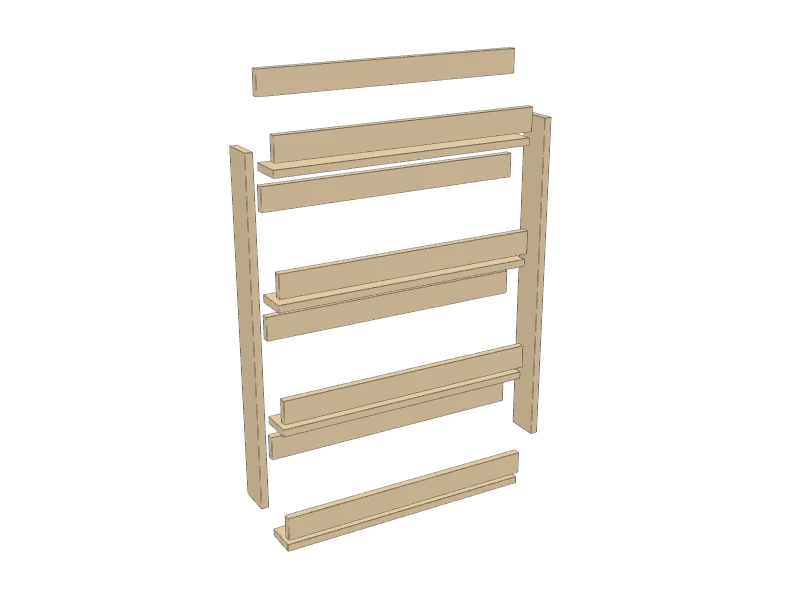
| ASides | 2 | ¾ × 3½ × 36 | 1x4 |
| BLedges | 4 | ¾ × 3½ × 28½ | 1x4 |
| CFront lips | 4 | ¾ × 2½ × 28½ | 1x3 |
| DBack rails | 4 | ¾ × 2½ × 28½ | 1x3 |
Board layout. Each row is one board, cut left to right, with the remainder hatched. Dark lines are saw cuts, about ⅛″ wide.
Build it
 01
Cut the pieces
Cut every piece on the cut list:
- A Sides, two at 36″
- B Ledges, four at 28½″
- C Front lips, four at 28½″
- D Back rails, four at 28½″
 02
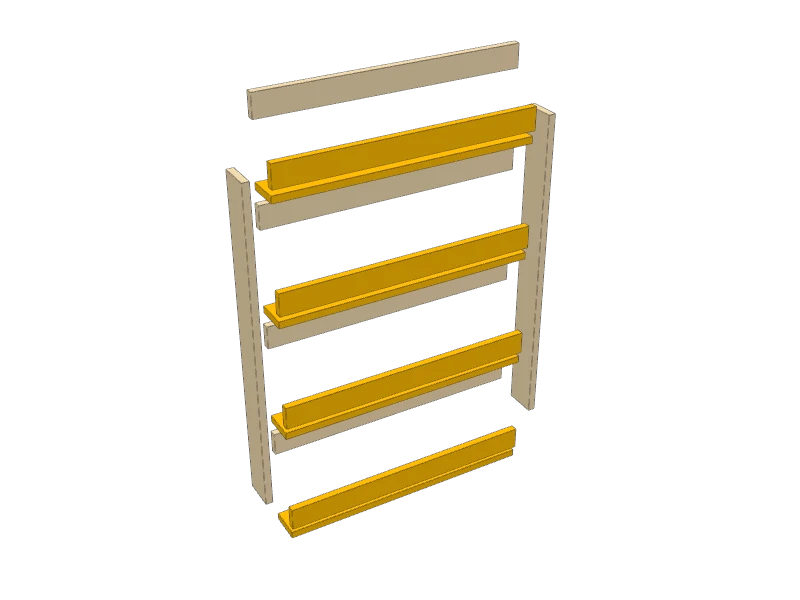
Make the four ledges
Stand a front lip (C) on edge along the front of each ledge (B), flush with the front and the ends. Glue it and drive three 1¼″ screws up through the ledge into the lip. The lip stands 2½″ tall and stops books from sliding off.
 03
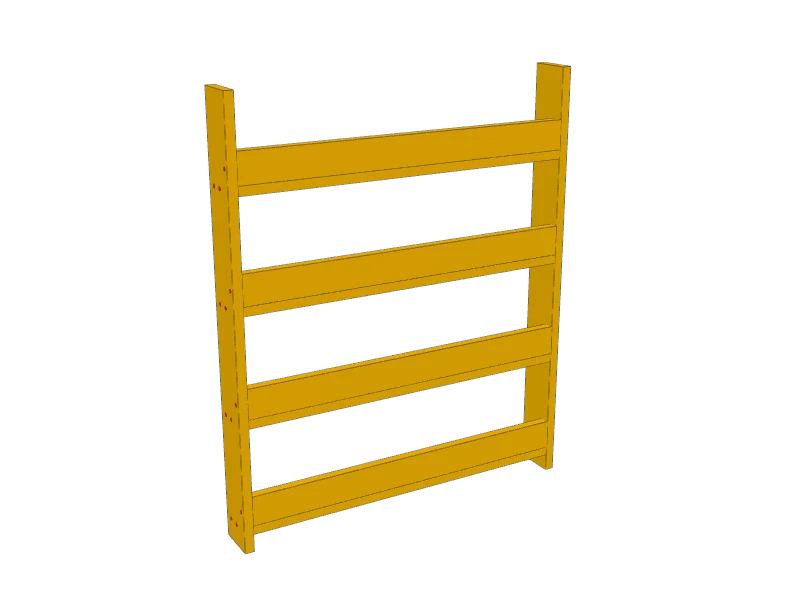
Screw the ledges between the sides
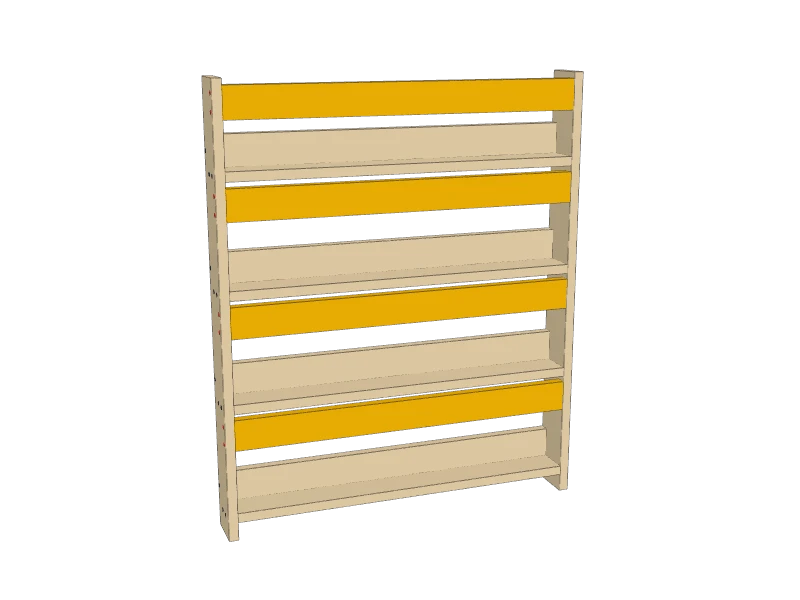
Mark the bottom of each ledge on the inside of both sides (A): 1½″, 10½″, 19½″ and 28½″ from the bottom. Glue each ledge (B) between the sides on its mark, flush at the front and back, and drive three 1¼″ screws through each side: two into the ledge and one into the lip (C).
 04
Add the back rails
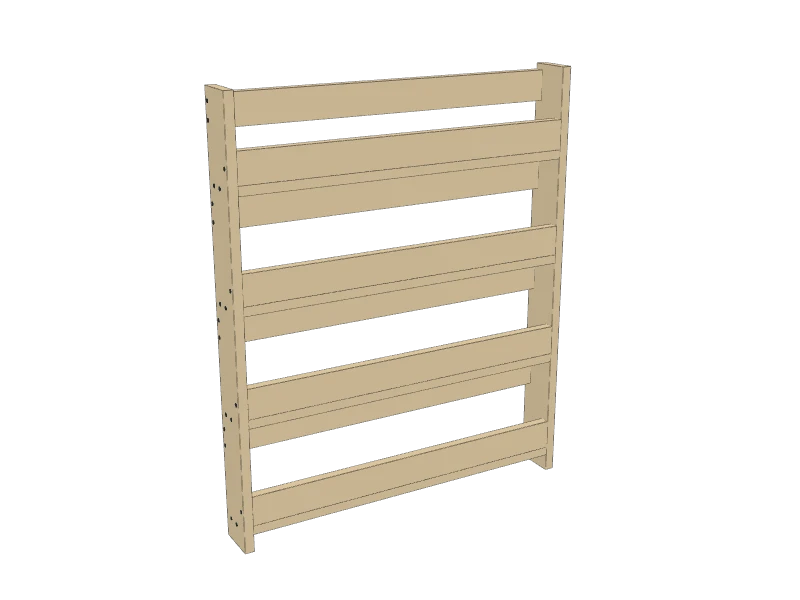
Glue a back rail (D) between the sides at the back of each tier, its top edge ½″ below the next ledge up (and ½″ below the top for the top tier). Screw through the sides. The books lean back against these rails.
 05
Finish and anchor it
Round over every corner and edge with sandpaper, and finish with a child-safe paint or clear finish. Let it cure fully before the books go in.
Watch outAnchor it to the wall: a shelf this shallow tips forward easily when a child pulls on a book. Screw a furniture anti-tip strap or two L-brackets from the top back rail into a wall stud.
Build at your own risk. Check every measurement against your own lumber before you cut, test-fit before you glue, and wear eye and ear protection.