Bracket Sawhorses
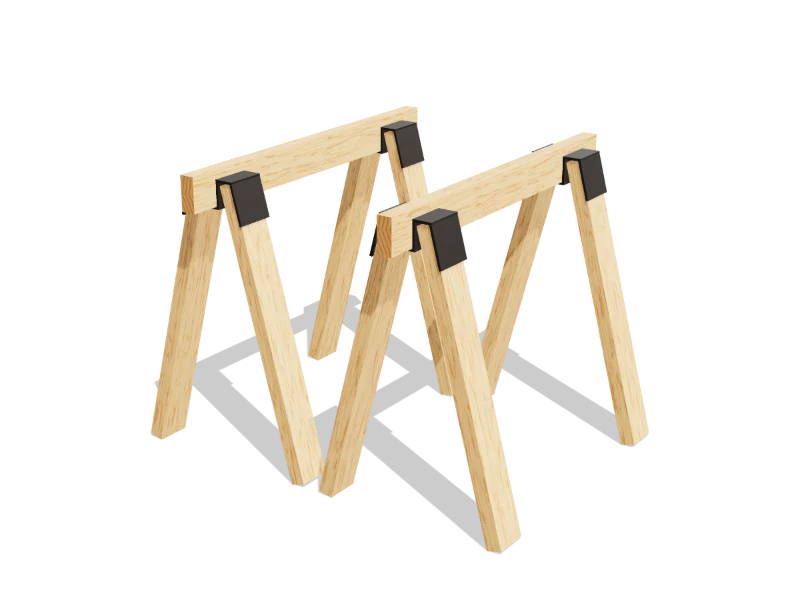
A pair of 30″ sawhorses from 2x4s and a set of sawhorse brackets. Every cut is square: the brackets set the angles for you.
- Skill
- Level 1 of 5 · Beginner
- Build time
- About 1 hour
- Lumber
- 4 2x4s
- Joinery
- Sawhorse brackets and screws
- Finished size
- about 36″ L × 20⅛″ W × 30″ H each
What you need
A 2x4 is actually 1½″ × 3½″. Every measurement in this plan uses the real size.
Shopping list
- 42x4, 8 ftConstruction grade is fine. Pick a straight one for each top rail.
- 2 pairsSawhorse brackets, for 2x4 legs and a 2x4 top railOne pair per sawhorse.
- ~301¼″ wood screwsOnly if your brackets don't come with screws.
Tools
- Miter saw or circular sawSquare cuts only.
- Drill/driver
- HammerTo seat the legs.
- Speed square, tape measure, pencil
Cut list
Ten pieces from four boards. Label each piece with its letter in pencil as you cut it.
| Part | Qty | Size, inches | From |
|---|---|---|---|
| ALegsSquare cuts at both ends. | 8 | 1½ × 3½ × 29½ | 2x4 |
| BTop rails | 2 | 1½ × 3½ × 36 | 2x4 |
Board layout. Each row is one board, cut left to right, with the remainder hatched. Dark lines are saw cuts, about ⅛″ wide.
Hardware & tools
Everything besides the lumber, with a link for each.
Links go to Amazon. Woodable earns a small commission at no cost to you.
Required part
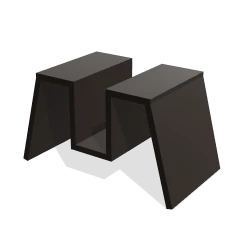 Sawhorse brackets (pair)Check your brackets' chart for leg length before you cut: this plan uses 29½″ legs for a 30″ horse.2 pairsView on Amazon
Fasteners
- 1¼″ wood screwsOnly if your brackets don't come with screws.~30View on Amazon
Tools
- Miter saw or circular sawSquare cuts only.View on Amazon
- Drill/driverCordless drill/driver with bits.View on Amazon
- HammerTo seat the legs.View on Amazon
- Speed square7″ rafter square for marking and guiding cuts.View on Amazon
- Tape measure25 ft tape measure.View on Amazon
Build it
Five steps. The 3D view follows along as you scroll. The parts you're working on are yellow, and the pocket holes or screws for that step are red.
- 01
Cut the pieces
Every cut is square. These pieces make a pair of sawhorses:
- A Legs, eight at 29½″
- B Top rails, two at 36″
Check the chart that came with your brackets first. Leg length depends on the bracket and on how tall you want the horses: with these brackets and a 2x4 top rail, 29½″ legs make a 30″ sawhorse.
Watch outCut all eight legs to exactly the same length: set up a stop block and cut them in a row. Uneven legs make a horse rock. - 02
Put the brackets on the top rail
Slide a bracket onto each end of a top rail (B), standing on edge, so the bracket's outside edge is 3″ in from the end of the rail. Drive the screws that came with the brackets through each side into the rail, or 1¼″ wood screws if yours came without.
- 03
Add the legs
Push a leg (A) all the way into each of the four sockets, tapping it home with a hammer. Drive two screws through each socket into its leg.
Stand the horse up on a flat floor. It should sit on all four feet without rocking. If it rocks, the legs aren't fully seated: tap the short one in further.
- 04
Build the second sawhorse
Build the second sawhorse the same way from the other top rail (B), four legs (A) and pair of brackets. Set the two side by side and check that the rails are level with each other.
- 05
Put them to work
Knock the sharp edges off the rails with sandpaper. No finish is needed.
Lay two 2x4s across the rails to hold a sheet of plywood while you cut it, or set a door or a sheet of plywood on top for a work table.
TipMost brackets let you knock the legs out for storage. When a rail gets chewed up by saw cuts, swap in a new 2x4.
Build at your own risk. Check every measurement against your own lumber before you cut, test-fit before you glue, and wear eye and ear protection. Full disclaimer.