Rolling Workbench
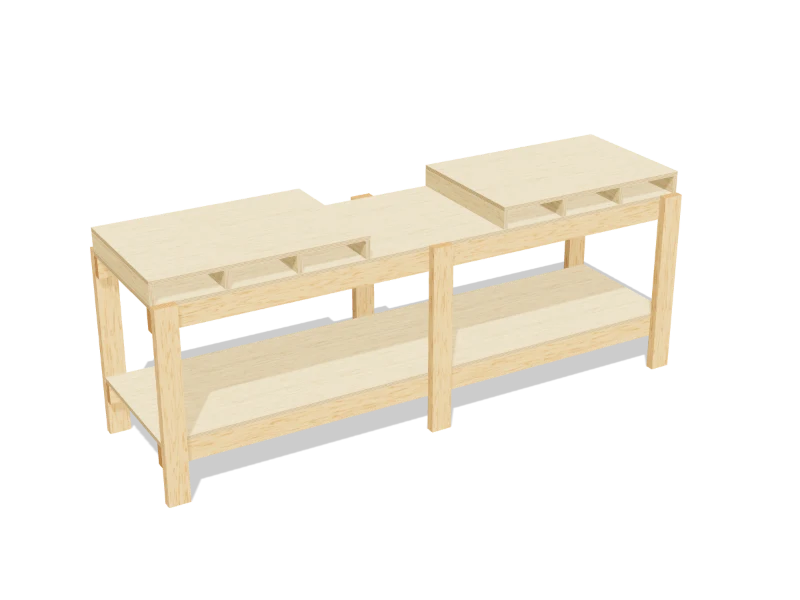
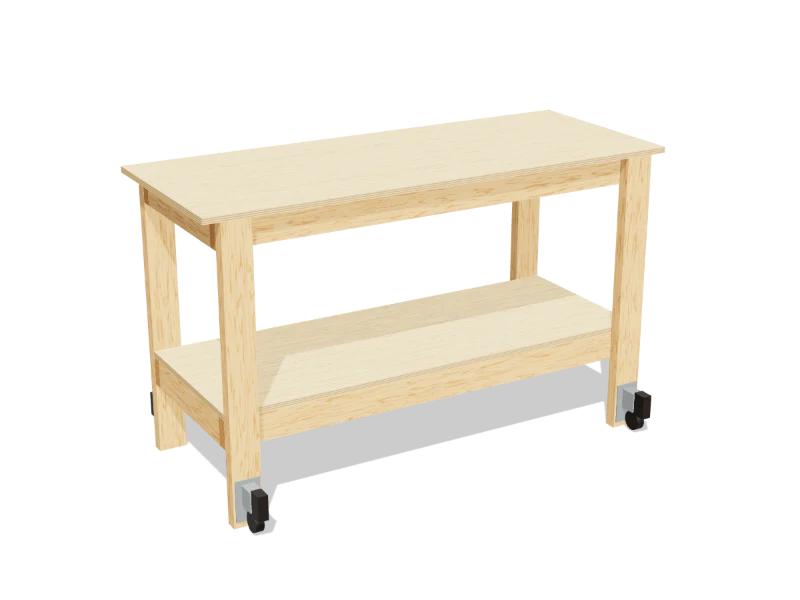
A 60″ workbench with a full shelf that stands solid on its legs and rolls when you step on a pedal: it's built around a set of retractable workbench casters.
- Skill
- Level 3 of 5 · Intermediate
- Build time
- 5 to 6 hours, plus finish
- Lumber
- 6 2x4s and 1 sheet of ¾″ plywood
- Joinery
- Structural screws
- Top
- 60″ × 24″, 36″ high. The casters stick out about 4″ front and back.
- Finished size
- about 60″ L × 32¼″ D × 36″ H
What you need
A 2x4 is actually 1½″ × 3½″. Every measurement in this plan uses the real size. ¾″ plywood is drawn at full thickness, but plywood sold that way is often a hair thinner, so measure yours and cut the pieces that fit between panels to match.
Shopping list
- 62x4, 8 ftLegs, rails and cross pieces. Pick straight ones for the legs.
- 1¾″ plywood, 4 × 8 ft sheetTop and shelf.
- 1 setRetractable workbench casters, set of 4With 2½″ wheels, rated 100 lb or more each.
- 16Screws for the caster bracketsThey come with the kit.
- ~603″ structural wood screwsSuch as GRK or Spax.
- ~301¼″ wood screws
- opt.Paste wax
Tools
- Circular sawOr have the store rip the plywood.
- Miter sawOr the circular saw, for the 2x4s.
- Drill/driver
- Level
- Tape measure, speed square, pencil
Cut list
Eighteen pieces from six boards and one sheet. Label each piece with its letter in pencil as you cut it.
| Part | Qty | Size, inches | From |
|---|---|---|---|
| ALegs | 4 | 1½ × 3½ × 35¼ | 2x4 |
| BLong rails | 4 | 1½ × 3½ × 56 | 2x4 |
| CCross pieces | 8 | 1½ × 3½ × 18 | 2x4 |
| DTop | 1 | ¾ × 24 × 60 | ¾″ plywood |
| EShelf | 1 | ¾ × 21 × 56 | ¾″ plywood |
Board layout. Each row is one board, cut left to right, with the remainder hatched. Dark lines are saw cuts, about ⅛″ wide.
Hardware & tools
Everything besides the lumber, with a link for each.
Links go to Amazon. Woodable earns a small commission at no cost to you.
Required part
 Retractable workbench casters (set of 4)Check your kit's instructions for where it mounts before you build: this plan keeps the bottom 9″ of each leg clear.1 set of 4View on Amazon
Fasteners
- 3″ structural wood screwsSuch as GRK or Spax.~60View on Amazon
- 1¼″ wood screws#8 × 1¼″, flat head, coarse thread.~30View on Amazon
Glue & finish
- Paste waxPaste wax for slick work surfaces.opt.View on Amazon
Tools
- Circular sawOr have the store rip the plywood.View on Amazon
- Miter sawOr the circular saw, for the 2x4s.View on Amazon
- Drill/driverCordless drill/driver with bits.View on Amazon
- Level24″ level.View on Amazon
- Tape measure25 ft tape measure.View on Amazon
- Speed square7″ rafter square for marking and guiding cuts.View on Amazon
Build it
Seven steps. The 3D view follows along as you scroll. The parts you're working on are yellow, and the pocket holes or screws for that step are red.
- 01
Cut the pieces
Before you buy lumber, look at your caster kit. Each caster screws to the outside face of a leg near the floor, so the bottom 9″ of every leg has to stay clear of rails. This plan keeps the lower frame 9″ up.
- A Legs, four at 35¼″
- B Long rails, four at 56″
- C Cross pieces, eight at 18″
- D Top, one at 24″ × 60″
- E Shelf, one at 21″ × 56″
TipAsk the store to rip the plywood sheet into a 24″ strip for the top and a 21″ strip for the shelf. Then crosscut them at home. - 02
Build the two frames
For each frame, stand two long rails (B) on edge 21″ apart at the outside and fit cross pieces (C) between them, flush with the top edges. The top frame gets five cross pieces, about 13″ apart; the lower frame gets three, at the ends and the middle. Drive two 3″ structural screws through the rails into each cross piece.
- 03
Screw the frames to the back legs
Lay the two back legs (A) on the floor and set the frames on them, back rail down, flush with the ends of the legs. The top frame is flush with the top of the legs. The lower frame's bottom edge is 9″ up from the floor end. Drive two 3″ screws through each leg into each rail.
- 04
Add the front legs
Stand the bench up and screw the two front legs (A) to the front rails the same way. Check that the top frame is level and the legs are plumb.
- 05
Add the top and shelf
Lay the shelf (E) on the lower frame and screw it down with 1¼″ screws into the rails and cross pieces. Center the top (D) on the upper frame, flush front and back with 2″ hanging past each end for clamping, and screw it down the same way.
- 06
Mount the casters
Read your caster kit's instructions now: they give the exact height of each bracket. Most mount so the wheel just clears the floor when the pedal is up.
Hold a caster against the outside face of each leg (A) at the bottom, centered on the leg, and mark the screw holes. Drill pilot holes and drive the screws that came with the kit. The pedals face out, two at the front and two at the back.
Step on each pedal in turn: the bench should lift about ¾″ and roll. Release them all and it sits back down on its legs.
Watch outUnload heavy tools before you roll it, and release all four pedals before you work at the bench. It must sit on its legs, not the wheels, when you saw or hammer. - 07
Finish
Ease the edges of the top with sandpaper. A coat of paste wax or oil on the top keeps glue from sticking.
Build at your own risk. Check every measurement against your own lumber before you cut, test-fit before you glue, and wear eye and ear protection. Full disclaimer.