Cornhole Boards (pair)
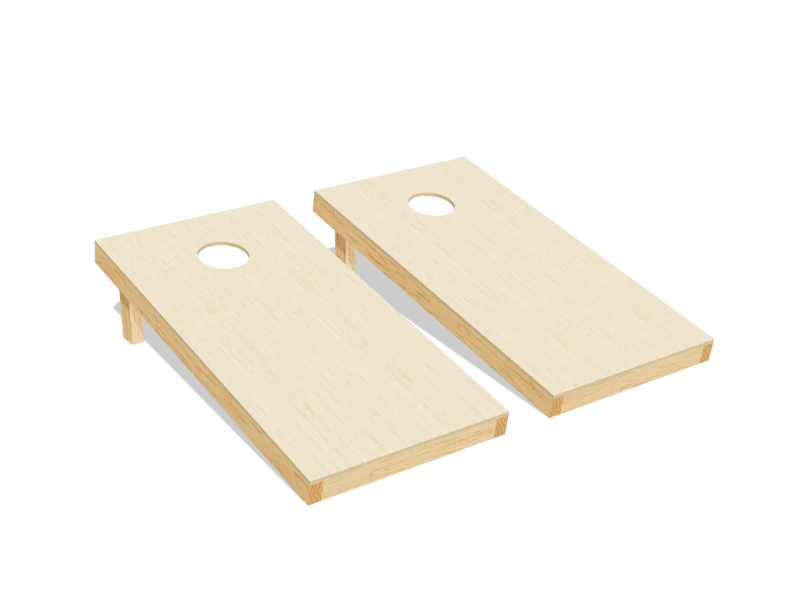
A pair of regulation cornhole boards: 24″ × 48″ tops with a 6″ hole, a 2x3 frame and folding legs that set the back edge at exactly 12″.
- Skill
- Level 3 of 5 · Intermediate
- Build time
- 5 to 6 hours, plus finish
- Lumber
- 4 2x3s and 2 panels of ½″ plywood
- Joinery
- Glue, screws and carriage bolts
- Playing surface
- 24″ × 48″, 6″ hole, 12″ high at the back
- Finished size
- about 24″ W × 47¾″ D × 12″ H each
What you need
A 2x3 is actually 1½″ × 2½″. Every measurement in this plan uses the real size. ½″ plywood is drawn at full thickness, but plywood sold that way is often a hair thinner, so measure yours and cut the pieces that fit between panels to match.
Shopping list
- 42x3, 8 ftPick the straightest ones: a twisted rail rocks the board.
- 2½″ plywood, 2 × 4 ft panelSanded plywood, birch if you can get it. The league asks for a wood top.
- 4⅜″ × 4″ carriage boltsWith washers and wing nuts.
- ~302½″ wood screws
- ~501¼″ wood screws
- 1Wood glue
- 1Wood filler
- —Paint or stain, clear polyurethane, sandpaper
Tools
- Miter saw or circular saw
- Jigsaw or 6″ hole sawFor the holes.
- Drill/driverWith a ⅜″ bit and a countersink.
- Compass
- Clamps
- Tape measure, speed square, pencil
Cut list
Sixteen pieces from four boards and two panels. Label each piece with its letter in pencil as you cut it.
| Part | Qty | Size, inches | From |
|---|---|---|---|
| ASide rails | 4 | 1½ × 2½ × 48 | 2x3 |
| BEnd rails | 4 | 1½ × 2½ × 21 | 2x3 |
| CCenter braces | 2 | 1½ × 2½ × 21 | 2x3 |
| DLegsTop cut at 10¾° with a rounded front corner. | 4 | 1½ × 2½ × 11⅛ | 2x3 |
| ETopsWith a 6″ hole. | 2 | ½ × 24 × 48 | ½″ plywood |
Board layout. Each row is one board, cut left to right, with the remainder hatched. Dark lines are saw cuts, about ⅛″ wide.
Hardware & tools
Everything besides the lumber, with a link for each.
Links go to Amazon. Woodable earns a small commission at no cost to you.
Fasteners
- ⅜″ × 4″ carriage boltsWith washers and wing nuts.4View on Amazon
- 2½″ wood screws#8 × 2½″, flat head, coarse thread.~30View on Amazon
- 1¼″ wood screws#8 × 1¼″, flat head, coarse thread.~50View on Amazon
Glue & finish
- Wood gluePVA wood glue for indoor projects.1View on Amazon
- Wood fillerStainable, sandable wood filler for screw and nail holes.1View on Amazon
- Sandpaper5″ hook-and-loop discs for a random orbit sander, 80 to 220 grit.View on Amazon
- Clear polyurethaneWater-based polyurethane, satin, for a clear topcoat.View on Amazon
- Wood stainOil-based or water-based interior wood stain.View on Amazon
- Furniture paintInterior paint for furniture: chalk-style or acrylic enamel.View on Amazon
Tools
- Miter saw or circular saw10″ compound miter saw: square, angled and beveled crosscuts.View on Amazon
- Jigsaw or 6″ hole sawFor the holes.View on Amazon
- Drill/driverWith a ⅜″ bit and a countersink.View on Amazon
- CompassCompass that holds a pencil, for marking curves.View on Amazon
- ClampsTwo or more bar clamps that open 24″ or more.View on Amazon
- Tape measure25 ft tape measure.View on Amazon
- Speed square7″ rafter square for marking and guiding cuts.View on Amazon
Build it
Seven steps. The 3D view follows along as you scroll. The parts you're working on are yellow, and the pocket holes or screws for that step are red.
- 01
Cut the pieces
Cut the rails, braces and legs from the 2x3s:
- A Side rails, four at 48″
- B End rails, four at 21″
- C Center braces, two at 21″
- D Legs, four at 11⅛″
- E Tops, two at 24″ × 48″
The tops (E) are the two panels as they come. Check that each measures 24″ × 48″: the league allows ¼″ either way.
- 02
Cut the holes
On each top (E), mark the hole center 9″ from one short edge (that's the back) and 12″ from each long edge. Draw a 6″ circle around it with a compass set to 3″.
Drill a starter hole inside the line and cut the circle with a jigsaw, or use a 6″ hole saw. Sand the edge of the hole smooth so bags drop through cleanly.
- 03
Build the frames
For each board, stand two side rails (A) on edge 24″ apart at the outside. Fit an end rail (B) between them at each end and a center brace (C) across the middle, 24″ from either end to its center.
Glue each joint and drive two 2½″ screws through the side rails into each end rail and brace. Check the frame is square: the two diagonals should match.
- 04
Glue and screw on the tops
Spread glue on the top edges of the frame and lay a top (E) on it, flush all round, with the hole at the back end. Drive 1¼″ screws every 8″ or so into the rails and brace.
Countersink every screw head a little below the surface and fill it, so nothing catches a sliding bag.
- 05
Add the folding legs
On each leg (D), mark a point on the center line 9½″ from the bottom: that's the bolt hole. Set a compass to 1¼″ on that mark and draw a circle. Cut the top of the leg at 10¾° so the cut just touches the top of the circle, then round the front top corner along the circle.
Drill a ⅜″ hole through each side rail 4″ from the back end, centered on the rail, and through each leg at its mark. Bolt a leg inside each side rail with a ⅜″ × 4″ carriage bolt, a washer and a wing nut, the rounded corner toward the front.
Stand the board on its legs. The back of the top should be 12″ off the ground and the front edge about 3″.
- 06
Fold the legs to carry them
Loosen the wing nuts and swing each leg (D) forward and up into the frame, where it lies flat under the top (seen here from underneath). The boards then lie flat and stack face to face. Tighten the wing nuts again before you play so the legs stay put.
- 07
Finish
Sand the tops with 120 then 220 grit. Paint or stain them and add two or three coats of clear polyurethane, sanding lightly between coats, for a smooth surface. Leave it to cure for a few days before you play.
TipSet the boards 27 ft apart, front edge to front edge, for regulation play. Store them indoors: plywood swells and warps if it stays wet.
Build at your own risk. Check every measurement against your own lumber before you cut, test-fit before you glue, and wear eye and ear protection. Full disclaimer.