Low Media Console
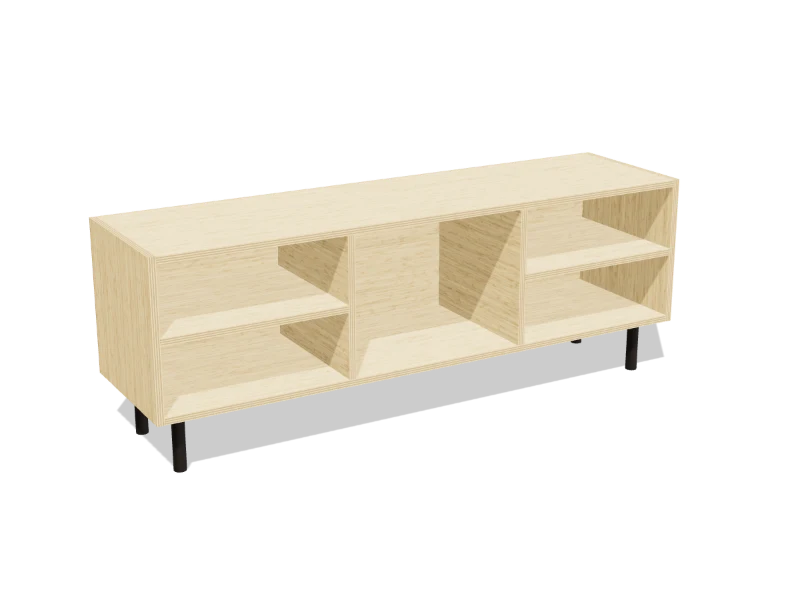
A low, modern TV console on short steel legs: three plywood bays, shelves at each end and an open middle for a game console or receiver.
- Skill
- Level 3 of 5 · Intermediate
- Build time
- 6 to 8 hours, plus finish
- Lumber
- 1 sheet of ¾″ plywood and 1 sheet of ¼″ plywood
- Joinery
- Pocket holes, glue and brads
- Finished size
- 60″ W × 16″ D × 22″ H
What you need
Every measurement in this plan uses the real size. ¾″ plywood and ¼″ plywood are drawn at full thickness, but plywood sold that way is often a hair thinner, so measure yours and cut the pieces that fit between panels to match.
Shopping list
- 1¾″ plywood, 4 × 8 ft sheetBirch or another hardwood plywood: the edges and faces show.
- 1¼″ plywood, 4 × 8 ft sheetThe back.
- 1 set6″ metal furniture legs, set of 4Rated 200 lb or more each.
- ~20#10 × ⅝″ pan-head screwsFor the legs, if yours don't come with screws.
- ~301¼″ coarse-thread pocket-hole screws
- ~301″ brad nailsFor the back.
- 1Iron-on edge banding, 25 ftTo match the plywood.
- 1Furniture anti-tip kitStrap or bracket with screws for a wall stud.
- 1Wood glue
- —Paint or clear finish, sandpaper
Tools
- Circular sawOr have the store cut the plywood.
- Pocket-hole jigSet for ¾″.
- Drill/driverWith a ⅛″ bit.
- 2½″ hole sawFor the cord hole.
- Brad nailer or hammer
- Clamps
- Clothes ironFor the edge banding.
- Stud finder
- Tape measure, square, pencil
Cut list
Nine pieces from two sheets. Label each piece with its letter in pencil as you cut it.
| Part | Qty | Size, inches | From |
|---|---|---|---|
| ASides | 2 | ¾ × 15¾ × 16 | ¾″ plywood |
| BTop and bottom | 2 | ¾ × 15¾ × 58½ | ¾″ plywood |
| CDividers | 2 | ¾ × 15¾ × 14½ | ¾″ plywood |
| DShelves | 2 | ¾ × 15¾ × 19 | ¾″ plywood |
| EBack | 1 | ¼ × 16 × 60 | ¼″ plywood |
Board layout. Each row is one board, cut left to right, with the remainder hatched. Dark lines are saw cuts, about ⅛″ wide.
Hardware & tools
Everything besides the lumber, with a link for each.
Links go to Amazon. Woodable earns a small commission at no cost to you.
Required part
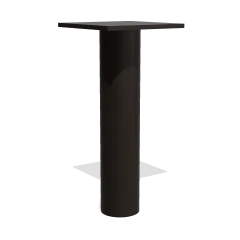 6″ metal furniture legs (set of 4)The plan is drawn for 6″ legs on plates about 2¾″ square. Check your legs' instructions for the screws before drilling.1 set of 4View on Amazon
Hardware
- Iron-on edge banding, 25 ftTo match the plywood.1View on Amazon
- Furniture anti-tip kitStrap or bracket with screws for a wall stud.1View on Amazon
Fasteners
- #10 × ⅝″ pan-head screwsFor the legs, if yours don't come with screws.~20View on Amazon
- 1¼″ coarse-thread pocket-hole screws#8 × 1¼″, coarse thread, washer head. For joining ¾″ boards.~30View on Amazon
- 1″ brad nailsFor the back.~30View on Amazon
Glue & finish
- Wood gluePVA wood glue for indoor projects.1View on Amazon
- Sandpaper5″ hook-and-loop discs for a random orbit sander, 80 to 220 grit.View on Amazon
- Clear polyurethaneWater-based polyurethane, satin, for a clear topcoat.View on Amazon
- Furniture paintInterior paint for furniture: chalk-style or acrylic enamel.View on Amazon
Tools
- Circular sawOr have the store cut the plywood.View on Amazon
- Pocket-hole jigSet for ¾″.View on Amazon
- Drill/driverWith a ⅛″ bit.View on Amazon
- 2½″ hole sawFor the cord hole.View on Amazon
- Brad nailer or hammer18 gauge brad nailer that takes ¾″ to 2″ brads.View on Amazon
- ClampsTwo or more bar clamps that open 24″ or more.View on Amazon
- Stud finderElectronic stud finder.View on Amazon
- Tape measure25 ft tape measure.View on Amazon
- Speed square7″ rafter square for marking and guiding cuts.View on Amazon
Build it
Eight steps. The 3D view follows along as you scroll. The parts you're working on are yellow, and the pocket holes or screws for that step are red.
- 01
Cut the pieces
Cut every piece from the plywood. Ask the store to rip the ¾″ sheet into 15¾″ strips if it won't fit in your car:
- A Sides, two at 15¾″ × 16″
- B Top and bottom, two at 15¾″ × 58½″
- C Dividers, two at 15¾″ × 14½″
- D Shelves, two at 15¾″ × 19″
- E Back, one at 16″ × 60″
TipIron-on edge banding hides the plywood layers. Put it on the front edges of the sides, top, bottom, dividers and shelves before you assemble them. - 02
Drill the pocket holes
With the jig set for ¾″, drill on the faces that won't show:
- Top (B): three at each end, on the underside.
- Bottom (B): two at each end, on the underside, in the middle so the legs don't cover them.
- Dividers (C): two at the top and two at the bottom, on one face.
- Shelves (D): two at each end, on the underside.
- 03
Build the case
Stand the two sides (A) up and fit the top and bottom (B) between them, flush at the front and back. Glue and drive 1¼″ pocket screws.
- 04
Add the dividers
Fit the two dividers (C) between the top and bottom so each bay is 19″ wide inside. Glue and pocket-screw them, holes facing the middle bay.
TipCut a 19″ spacer from scrap and stand it in the bay as you screw each divider. All three bays come out the same. - 05
Add the shelves
Fit a shelf (D) in each end bay, its bottom 6⅞″ above the case bottom, so both openings are the same height. Glue and pocket-screw it to the side and the divider.
- 06
Nail on the back
Turn the case face down. Check it's square: the two diagonals should match. Drill a 2½″ hole in the back (E) behind the middle bay for cords. Glue and nail the back to the sides, top, bottom and dividers with 1″ brads every 4″ or so.
- 07
Screw on the legs
Lay the case on its back on a blanket. Screw a leg under each corner of the bottom (B), its plate 1⅝″ in from the side and 1⅜″ in from the front and back. Drill ⅛″ pilot holes no deeper than ½″ and drive a #10 × ⅝″ pan-head screw in every hole.
Check your legs' own instructions first: the screws must be shorter than the ¾″ bottom is thick, or they'll poke through into the bay.
- 08
Finish and anchor it
Sand with 120 then 180 grit and ease the edges. Paint the case or seal it with a clear coat.
Set it in place and anchor the top to a wall stud with a furniture anti-tip strap, following the kit's instructions. Run cords through the hole in the back.
Watch outA TV makes this console top-heavy, and kids pull on stands to stand up. Always anchor it, and strap the TV to the wall or the console as its maker says. Keep the TV no wider than the console.
Build at your own risk. Check every measurement against your own lumber before you cut, test-fit before you glue, and wear eye and ear protection. Full disclaimer.