Slim Rolling Pantry
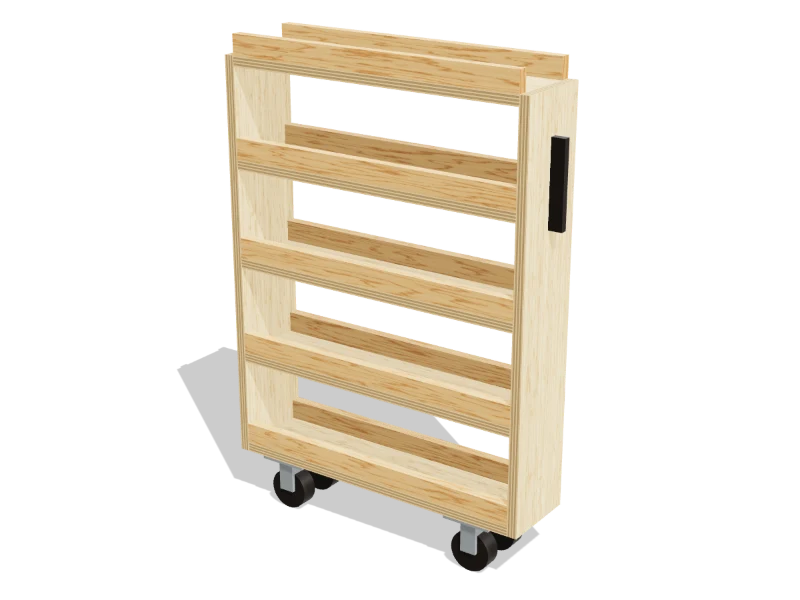
A 6″ wide rolling pantry that slides into the gap beside the fridge: five shelves for cans, jars and spices, railed on both sides, on locking casters.
- Skill
- Level 2 of 5 · Beginner
- Build time
- 4 to 5 hours, plus finish
- Lumber
- 3 1x2s and 2 panels of ¾″ plywood
- Joinery
- Pocket holes, glue and screws
- Each shelf
- 4½″ wide between the rails, 22½″ long, 6½″ tall
- Finished size
- 6″ W × 25″ D × 35¼″ H
What you need
A 1x2 is actually ¾″ × 1½″. Every measurement in this plan uses the real size. ¾″ plywood is drawn at full thickness, but plywood sold that way is often a hair thinner, so measure yours and cut the pieces that fit between panels to match.
Shopping list
- 21x2, 8 ftThe rails.
- 11x2, 6 ftThe rails.
- 2¾″ plywood, 2 × 4 ft panelBirch or another smooth plywood.
- 1 set3″ locking plate casters, set of 4Two locking. About 4″ tall overall.
- ~20#10 × ⅝″ pan-head screwsFor the caster plates.
- 1Cabinet pull handle
- ~301¼″ coarse-thread pocket-hole screws
- ~301¼″ wood screwsFor the rails.
- 1Wood glue
- —Sandpaper, 120 and 180 grit
- 1Wipe-on polyurethaneOr paint.
Tools
- Circular saw or table sawFor ripping the plywood.
- Miter sawOr the circular saw, for the rails.
- Pocket-hole jigSet for ¾″.
- Drill/driver
- Clamps
- Random orbit sander
- Tape measure, speed square, pencil
Cut list
Seventeen pieces from three boards and two panels. Label each piece with its letter in pencil as you cut it.
| Part | Qty | Size, inches | From |
|---|---|---|---|
| AEnd panels | 2 | ¾ × 6 × 29¾ | ¾″ plywood |
| BShelves | 5 | ¾ × 6 × 22½ | ¾″ plywood |
| CRails | 10 | ¾ × 1½ × 22½ | 1x2 |
Board layout. Each row is one board, cut left to right, with the remainder hatched. Dark lines are saw cuts, about ⅛″ wide.
Hardware & tools
Everything besides the lumber, with a link for each.
Links go to Amazon. Woodable earns a small commission at no cost to you.
Required part
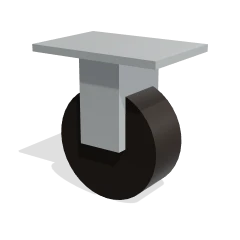 3″ locking plate casters (set of 4)Check your casters' overall height: the plan is drawn for 4″. Smaller plates fit too, but not bigger than 2½″ × 3⅝″.1 set of 4View on Amazon
Hardware
- Cabinet pull handleA 4″ to 6″ pull handle with machine screws long enough for a ¾″ panel.1View on Amazon
Fasteners
- #10 × ⅝″ pan-head screwsFor the caster plates.~20View on Amazon
- 1¼″ coarse-thread pocket-hole screws#8 × 1¼″, coarse thread, washer head. For joining ¾″ boards.~30View on Amazon
- 1¼″ wood screwsFor the rails.~30View on Amazon
Glue & finish
- Wood gluePVA wood glue for indoor projects.1View on Amazon
- Sandpaper, 120 and 180 grit5″ hook-and-loop discs for a random orbit sander, 80 to 220 grit.View on Amazon
- Wipe-on polyurethaneOr paint.1View on Amazon
Tools
- Circular saw or table sawFor ripping the plywood.View on Amazon
- Miter sawOr the circular saw, for the rails.View on Amazon
- Pocket-hole jigSet for ¾″.View on Amazon
- Drill/driverCordless drill/driver with bits.View on Amazon
- ClampsTwo or more bar clamps that open 24″ or more.View on Amazon
- Random orbit sander5″ random orbit sander.View on Amazon
- Tape measure25 ft tape measure.View on Amazon
- Speed square7″ rafter square for marking and guiding cuts.View on Amazon
Build it
Seven steps. The 3D view follows along as you scroll. The parts you're working on are yellow, and the pocket holes or screws for that step are red.
- 01
Cut the pieces
Cut every piece on the cut list. A table saw or a circular saw with a straight guide gives the cleanest 6″ strips:
- A End panels, two at 6″ × 29¾″
- B Shelves, five at 6″ × 22½″
- C Rails, ten at 22½″
- 02
Drill the pocket holes
With the pocket-hole jig set for ¾″, drill two pocket holes at each end of every shelf (B), on the underside.
- 03
Build the shelf unit
Lay one end panel (A) on the bench. Glue and pocket-screw the bottom shelf (B) to it, flush at the bottom and both sides, and the top shelf flush at the top. Add the three middle shelves with a 6½″ spacer block under each, so every opening is the same. Glue and screw the other end panel on the same way.
- 04
Add the rails
Glue a rail (C) along each open side of every shelf (B), standing on edge and flush with the outside. Drive two 1¼″ screws up through the shelf into each rail. The rails keep cans and jars from sliding off when it rolls.
- 05
Sand and finish
Sand with 120 then 180 grit and ease every edge. Paint it or give it two coats of wipe-on polyurethane. Wipeable is good near the fridge.
- 06
Add the casters
Check your casters' own instructions and their overall height before you drill: the plan is drawn for 4″. Turn the unit upside down. Screw a caster under each corner of the bottom shelf (B), 4″ in from each end, with four #10 × ⅝″ pan-head screws each. Put the two locking casters at the front.
- 07
Add the pull and roll it in
Screw a cabinet pull to the front end panel (A), about 6″ below the top. Stand the pantry up and roll it into the gap beside the fridge. It needs a gap at least 6½″ wide and 25″ deep.
Watch outIt's tall and narrow. Keep the heavy cans on the bottom two shelves, pull it by the handle and not the top, and lock the front casters when it's parked.
Build at your own risk. Check every measurement against your own lumber before you cut, test-fit before you glue, and wear eye and ear protection. Full disclaimer.