Tall Planter
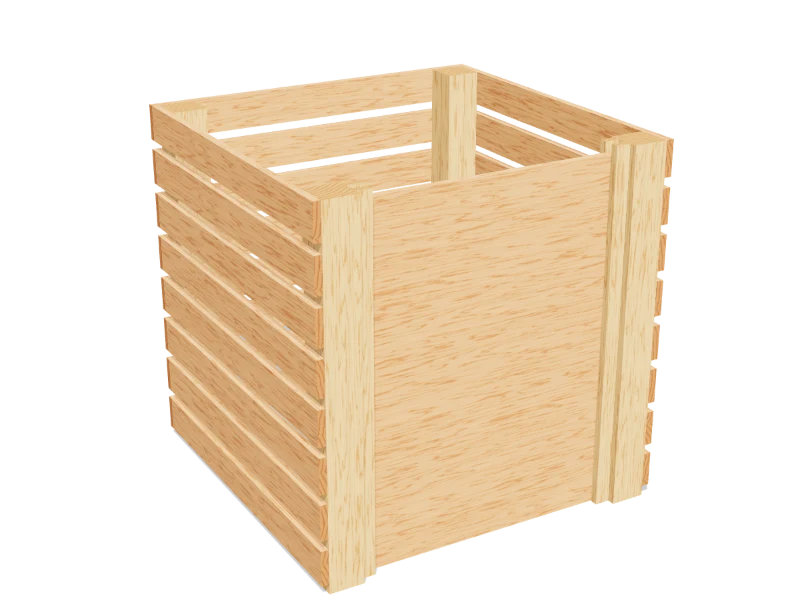
Draft · not yet checked by a carpenterA 30″ tall cedar planter with clean horizontal slats and slim 2x2 legs. The floor sits 12″ down, so it takes far less soil than it looks.
- Skill
- Beginner
- Build time
- 2 to 3 hours, plus finish
- Lumber
- 2 2x2s and 6 pickets
- Joinery
- Screws
- Finished size
- 15¾″ L × 15¾″ W × 30″ H
What you need
A 2x2 is actually 1½″ × 1½″ and a cedar fence picket is usually ⅝″ × 5½″. Every measurement in this plan uses the real size.
Shopping list
- 2Cedar 2x2, 8 ftFor the legs and floor cleats.
- 6Cedar picket, 6 ftFor the sides and floor. Most are ⅝″ thick, but check yours.
- ~1101¼″ exterior screwsCoated or stainless, so they don't stain the cedar.
- 1Landscape fabricAbout 4 sq ft, plus a few staples.
- opt.Clear exterior sealer
Tools
- Miter saw or circular saw
- Drill/driverWith a ⅛″ bit for pilot holes.
- Staple gun
- Speed square, tape measure, pencil
Cut list
Twenty-eight pieces from eight boards. Label each piece with its letter in pencil as you cut it.
| Part | Qty | Size, inches | From |
|---|---|---|---|
| ALegs | 4 | 1½ × 1½ × 30 | 2x2 |
| BFront and back pickets | 10 | ⅝ × 5½ × 15¾ | fence picket |
| CSide pickets | 10 | ⅝ × 5½ × 14½ | fence picket |
| DFloor cleats | 2 | 1½ × 1½ × 11½ | 2x2 |
| EFloor boards | 2 | ⅝ × 5½ × 14½ | fence picket |
Board layout. Each row is one board, cut left to right, with the remainder hatched. Dark lines are saw cuts, about ⅛″ wide.
Build it
Five steps. The 3D view follows along as you scroll. The parts you're working on are yellow, and the pocket holes or screws for that step are red.
- 01
Cut the pieces
Cut the dog-eared top off every picket first, then cut every piece on the cut list:
- A Legs, four at 30″
- B Front and back pickets, ten at 15¾″
- C Side pickets, ten at 14½″
- D Floor cleats, two at 11½″
- E Floor boards, two at 14½″
TipCedar pickets vary a little in width. Cut all the pickets for one side from the same few boards, and set aside any that are cupped or split. - 02
Make the two sides
Lay two legs (A) on the bench, 14½″ apart at the outside edges. Screw five side pickets (C) across them, flush with the leg edges, starting 2½″ up from the leg bottoms and butting each picket tight to the one below. Leave the top picket flush with the leg tops.
Pre-drill and use two 1¼″ exterior screws at each end of each picket. Build the second side to match.
Watch outCedar splits easily near the ends. Pre-drill every screw hole with a ⅛″ bit, about ¾″ from the end. - 03
Wrap the front and back
Stand the two sides up, pickets facing out. Screw the front and back pickets (B) across the legs, lined up with the side pickets. They're 1¼″ longer so they cover the ends of the side pickets and close the corners.
- 04
Add the floor
Screw a floor cleat (D) to the inside of each side, between the legs, with its top edge 12″ down from the top of the planter. Drive two screws through the side pickets into each cleat.
Lay the two floor boards (E) across the cleats with a ½″ gap between them for drainage, and screw them down.
TipThat leaves 12″ of soil depth. For a smaller pot, drop it straight in and skip the soil. - 05
Line and finish
Staple landscape fabric inside, over the floor and up the sides, so soil stays in and water drains out.
Leave the cedar bare to weather to silver-gray, or brush on a clear exterior sealer on the outside only.
Build at your own risk. Check every measurement against your own lumber before you cut, test-fit before you glue, and wear eye and ear protection. Full disclaimer.