Cold Frame
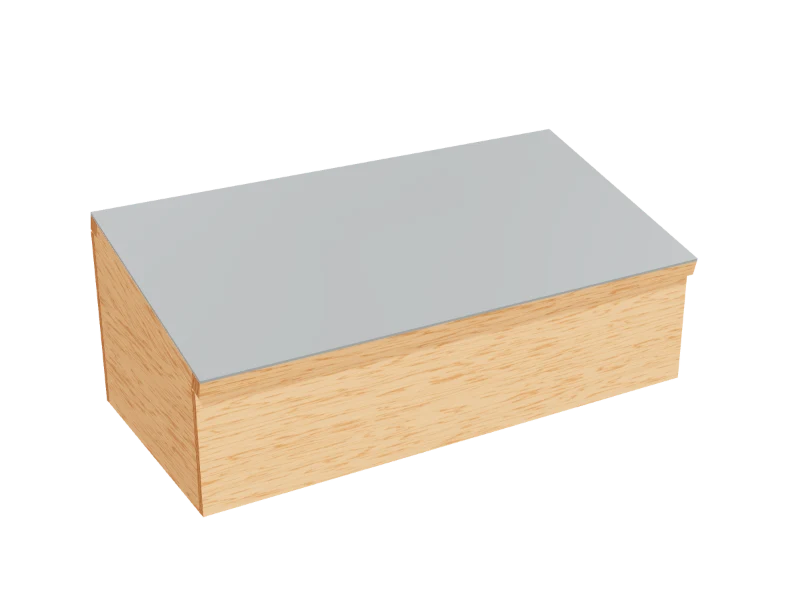
A cedar cold frame that starts seedlings early and keeps greens going late: a box taller at the back, with a sloped lid of clear twin-wall polycarbonate that props open to vent.
- Skill
- Level 2 of 5 · Beginner
- Build time
- 4 to 6 hours, plus finish
- Lumber
- 5 1x6s, 3 2x2s and 1 1x2
- Joinery
- Exterior screws
- Lid slope
- 14¼°, 16½″ at the back and 11″ at the front
- Finished size
- about 48″ W × 23¾″ D × 18⅜″ H
What you need
A 1x6 is actually ¾″ × 5½″, a 2x2 is 1½″ × 1½″ and a 1x2 is ¾″ × 1½″. Every measurement in this plan uses the real size.
Shopping list
- 3Cedar 1x6, 8 ftCedar boards, not fence pickets. The walls.
- 2Cedar 1x6, 6 ftCedar boards, not fence pickets. The walls.
- 3Cedar 2x2, 8 ftCedar. The posts, cleats and lid frame.
- 1Cedar 1x2, 6 ftCedar. The prop stick.
- 1Twin-wall polycarbonate panel, 24″ × 48″ × 6 mmClear, UV-protected on one side.
- ~601⅝″ exterior screwsCoated or stainless.
- ~203″ exterior screwsFor the lid frame.
- ~20#10 × 1¼″ roofing screws with sealing washersPanel to the lid frame.
- 11¼″ exterior screwWith two flat washers, the prop stick pivot.
- 23″ stainless steel butt hingesWith their screws.
- 1Sealing tape for twin-wall polycarbonateSolid for the top edge, vented for the bottom edge.
- opt.Automatic vent openerRated to lift the lid, about 7 lb.
- opt.Exterior oilFor the outside only.
Tools
- Miter saw or circular saw
- JigsawOr a circular saw, for the taper cuts.
- Drill/driverWith a ¼″ bit for the panel.
- StraightedgeTo mark the tapers.
- Speed square, tape measure, pencil
Cut list
Twenty-three pieces from nine boards. Label each piece with its letter in pencil as you cut it.
| Part | Qty | Size, inches | From |
|---|---|---|---|
| ABack and front boards | 5 | ¾ × 5½ × 48 | 1x6 |
| BSide boards | 4 | ¾ × 5½ × 21 | 1x6 |
| CTaper boardsRipped on a taper from 5½″ to ¼″. | 2 | ¾ × 5½ × 21 | 1x6 |
| DBack posts | 2 | 1½ × 1½ × 16 | 2x2 |
| EFront posts | 2 | 1½ × 1½ × 11 | 2x2 |
| FSide cleats | 2 | 1½ × 1½ × 13½ | 2x2 |
| GLid rails | 2 | 1½ × 1½ × 48 | 2x2 |
| HLid stiles | 3 | 1½ × 1½ × 21 | 2x2 |
| IProp stick | 1 | ¾ × 1½ × 18 | 1x2 |
Board layout. Each row is one board, cut left to right, with the remainder hatched. Dark lines are saw cuts, about ⅛″ wide.
Hardware & tools
Everything besides the lumber, with a link for each.
Links go to Amazon. Woodable earns a small commission at no cost to you.
Required part
 Twin-wall polycarbonate panel, 24″ × 48″ × 6 mmCheck your panel is 24″ × 48″ before you cut: the lid frame is the panel's size. 4 mm to 8 mm thick all fit.1View on Amazon
Hardware
- 3″ stainless steel butt hingesWith their screws.2View on Amazon
- Sealing tape for twin-wall polycarbonateSolid for the top edge, vented for the bottom edge.1View on Amazon
- Automatic vent openerRated to lift the lid, about 7 lb.opt.View on Amazon
Fasteners
- 1⅝″ exterior screwsCoated or stainless.~60View on Amazon
- 3″ exterior screwsFor the lid frame.~20View on Amazon
- #10 × 1¼″ roofing screws with sealing washersPanel to the lid frame.~20View on Amazon
- 1¼″ exterior screwWith two flat washers, the prop stick pivot.1View on Amazon
Glue & finish
- Exterior oilFor the outside only.opt.View on Amazon
Tools
- Miter saw or circular saw10″ compound miter saw: square, angled and beveled crosscuts.View on Amazon
- JigsawOr a circular saw, for the taper cuts.View on Amazon
- Drill/driverWith a ¼″ bit for the panel.View on Amazon
- StraightedgeTo mark the tapers.View on Amazon
- Speed square7″ rafter square for marking and guiding cuts.View on Amazon
- Tape measure25 ft tape measure.View on Amazon
Build it
Nine steps. The 3D view follows along as you scroll. The parts you're working on are yellow, and the screws for that step are red.
- 01
Cut the pieces
Check your panel first. This frame is sized for one twin-wall polycarbonate panel 48″ × 24″. Turn it so its flutes, the hollow channels, run along the 24″ side: they should run down the slope so water and condensation drain out.
Cut every piece from cedar:
- A Back and front boards, five at 48″
- B Side boards, four at 21″
- C Taper boards, two at 21″
- D Back posts, two at 16″
- E Front posts, two at 11″
- F Side cleats, two at 13½″
- G Lid rails, two at 48″
- H Lid stiles, three at 21″
- I Prop stick, one at 18″
- 02
Cut the taper boards
On each taper board (C), mark the full 5½″ width at one end and ¼″ up from the bottom edge at the other end. Join the marks with a straightedge and cut on the line with a jigsaw or circular saw. The two boards are the same: one goes on each side, the wide end at the back.
- 03
Build the two sides
Lay a back post (D), a side cleat (F) and a front post (E) on the bench, bottoms lined up: the back post at one end, the front post at the other and the cleat with its center 10½″ from the back end of the side boards. Screw two side boards (B) across them, one above the other, flush with the bottoms and with the outside faces of the posts. Use two 1⅝″ exterior screws through each board into each post and the cleat.
Set a taper board (C) on top, wide end at the back post. Screw it to the back post and the cleat. Build the other side as a mirror image.
- 04
Add the back and front
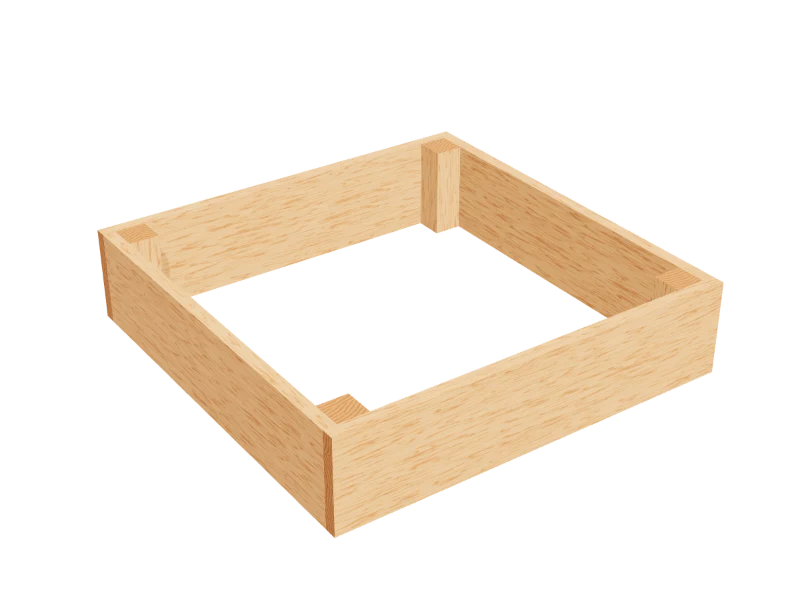
Stand the two sides up, 48″ apart at the outside. Screw three back and front boards (A) across the back posts, stacked flush with the bottoms, and two across the front posts. The ends are flush with the outside faces of the sides. Check the box is square by measuring its diagonals.
TipBuild it where it will sit, or on a flat floor. A frame that's out of square won't let the lid sit tight. - 05
Build the lid frame
Lay the two lid rails (G) on a flat surface with the three lid stiles (H) between them: one at each end and one in the middle. The frame is 48″ × 24″, exactly the size of the panel. Pre-drill and drive two 3″ exterior screws through each rail into the end of each stile. Check the diagonals match.
- 06
Screw on the panel
Check your panel's own instructions for which face goes up: most have a UV-protected side, marked on the film. Seal the top edge with solid tape and the bottom edge with vented tape, then peel the film.
Lay the panel on the frame (G, H), flutes running from the back rail to the front rail, edges flush all round. Drill a ¼″ hole through the panel at each screw spot, a little bigger than the screw so the plastic can grow and shrink. Drive the #10 × 1¼″ sealing-washer screws snug, not tight: the washers should just squash.
Get this hardware: Twin-wall polycarbonate panel, 24″ × 48″ × 6 mm
- 07
Hinge the lid
Set the lid on the box, back rail (G) flush with the back of the box, panel up. It rests on the taper boards (C) and the top edges of the back and front, and overhangs the front a little so rain runs off.
Screw two 3″ stainless butt hinges across the back, 6″ in from each end: one leaf on the back of the lid's back rail, the other on the top back board (A).
- 08
Add the prop stick
Drill a ¼″ hole ¾″ from one end of the prop stick (I). Screw it to the inside of the front wall (A), the hole centered side to side and 5″ up from the bottom, with a 1¼″ exterior screw and a washer on each side. Leave the screw a little loose so the stick swings.
To vent the frame, lift the lid and swing the stick up under the middle stile (H). The lid opens about 11¾″ at the front. Lay the stick down flat along the front wall to close it.
TipFor a smaller gap on cool days, prop the lid on a scrap block instead. Or fit an automatic vent opener: it lifts the lid by itself as the frame warms up. Check the opener's own instructions for the lid weight, about 7 lb. - 09
Set it out
Set the frame on level ground in full sun, the low side facing south. Rake the soil inside level, or set it over a bed you've already planted. Leave the cedar bare, or oil the outside only.
Watch outA closed cold frame can cook plants on a sunny day, even in winter. Open it whenever the sun is on it and the air is above about 45 °F, and close it before evening. Don't leave it propped open in strong wind: a gust can catch the lid.
Build at your own risk. Check every measurement against your own lumber before you cut, test-fit before you glue, and wear eye and ear protection. Full disclaimer.