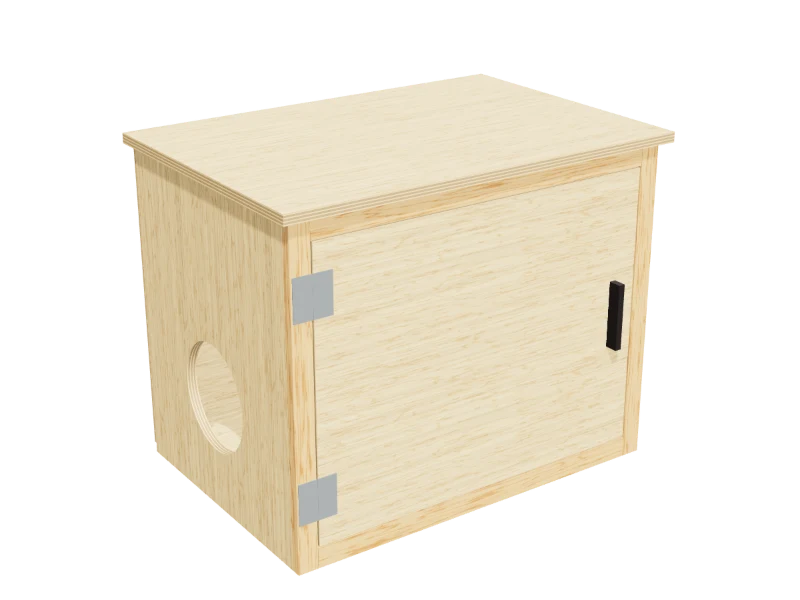
Dog Crate End Table
A wooden dog crate that doubles as an end table: slatted walls for air, a front door with two barrel bolts, and a plywood top for a lamp. Sized for a medium dog up to about 40 lb.
- Skill
- Level 3 of 5 · Intermediate
- Build time
- 8 to 10 hours, plus finish
- Lumber
- 2 2x2s, 3 1x4s, 7 1x3s, 1 1x2 and 2 panels of ¾″ plywood
- Joinery
- Pocket holes, glue and screws
- Finished size
- 23″ W × 33½″ D × 27″ H
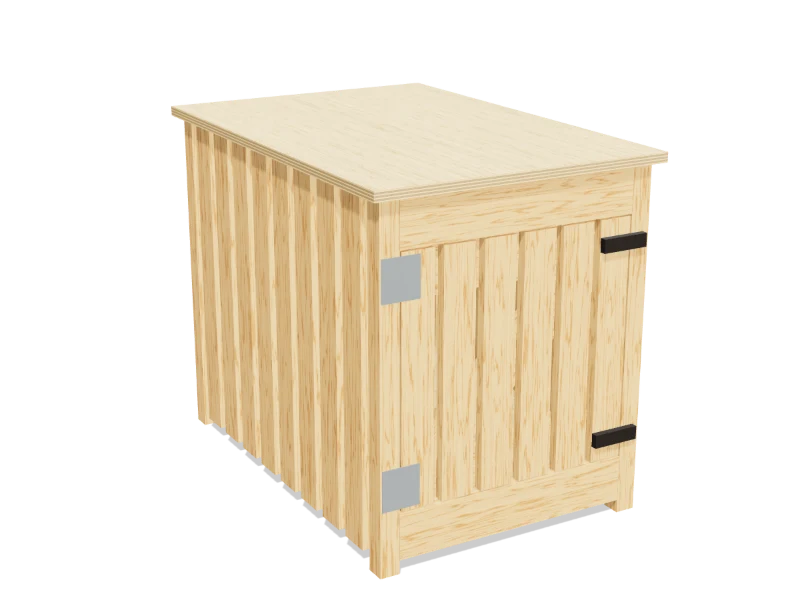
What you need
A 2x2 is actually 1½″ × 1½″, a 1x4 is ¾″ × 3½″, a 1x3 is ¾″ × 2½″ and a 1x2 is ¾″ × 1½″. Every measurement in this plan uses the real size. ¾″ plywood is drawn at full thickness, but plywood sold that way is often a hair thinner, so measure yours and cut the pieces that fit between panels to match.
Shopping list
- 22x2, 8 ftThe corner posts. Sight down each one to make sure it's straight.
- 31x4, 8 ftRails, door battens and brace.
- 71x3, 8 ftWall and door slats. Select pine or poplar.
- 11x2, 8 ftFloor cleats.
- 2¾″ plywood, 2 × 4 ft panelBirch or another smooth hardwood plywood, for the floor and top.
- ~501¼″ coarse-thread pocket-hole screws
- ~901¼″ wood screwsFor the slats, cleats, floor and door.
- 23″ butt hingesWith their screws.
- 2Barrel bolts, 3″With their keepers and screws.
- 1Wood glue
- opt.Iron-on edge bandingFor the plywood edges of the top.
- —Sandpaper, 120 and 180 grit
- 1Pet-safe water-based paint or clear finishLabeled safe for toys or pets once cured.
Tools
- Miter saw or circular saw
- Circular sawFor the plywood, or have the store cut it.
- Pocket-hole jigSet for ¾″.
- Drill/driverWith a countersink bit.
- Clamps
- Sander
- Clothes ironFor the edge banding.
- Tape measure, speed square, pencil
Cut list
48 pieces from thirteen boards and two panels. Label each piece with its letter in pencil as you cut it.
| Part | Qty | Size, inches | From |
|---|---|---|---|
| ACorner posts | 4 | 1½ × 1½ × 26¼ | 2x2 |
| BBack and front rails | 4 | ¾ × 3½ × 18½ | 1x4 |
| CSide rails | 4 | ¾ × 3½ × 29 | 1x4 |
| DSide slats | 16 | ¾ × 2½ × 25¼ | 1x3 |
| EBack slats | 5 | ¾ × 2½ × 25¼ | 1x3 |
| FSide cleats | 2 | ¾ × 1½ × 28¼ | 1x2 |
| GEnd cleats | 2 | ¾ × 1½ × 18½ | 1x2 |
| HFloor | 1 | ¾ × 18½ × 29¾ | ¾″ plywood |
| ITop | 1 | ¾ × 23 × 33½ | ¾″ plywood |
| JDoor slats | 6 | ¾ × 2½ × 18 | 1x3 |
| KDoor battens | 2 | ¾ × 3½ × 17¼ | 1x4 |
| LDoor braceEnds cut at 47½°, parallel. | 1 | ¾ × 3½ × 20¼ | 1x4 |
Board layout. Each row is one board, cut left to right, with the remainder hatched. Dark lines are saw cuts, about ⅛″ wide.
Hardware & tools
Everything besides the lumber, with a link for each.
Links go to Amazon. Woodable earns a small commission at no cost to you.
Hardware
- 3″ butt hingesWith their screws.2View on Amazon
- Barrel bolts, 3″With their keepers and screws.2View on Amazon
- Iron-on edge bandingFor the plywood edges of the top.opt.View on Amazon
Fasteners
- 1¼″ coarse-thread pocket-hole screws#8 × 1¼″, coarse thread, washer head. For joining ¾″ boards.~50View on Amazon
- 1¼″ wood screwsFor the slats, cleats, floor and door.~90View on Amazon
Glue & finish
- Wood gluePVA wood glue for indoor projects.1View on Amazon
- Sandpaper, 120 and 180 grit5″ hook-and-loop discs for a random orbit sander, 80 to 220 grit.View on Amazon
- Pet-safe water-based paint or clear finishLabeled safe for toys or pets once cured.1View on Amazon
Tools
- Miter saw or circular saw10″ compound miter saw: square, angled and beveled crosscuts.View on Amazon
- Circular sawFor the plywood, or have the store cut it.View on Amazon
- Pocket-hole jigSet for ¾″.View on Amazon
- Drill/driverWith a countersink bit.View on Amazon
- ClampsTwo or more bar clamps that open 24″ or more.View on Amazon
- Sander5″ random orbit sander.View on Amazon
- Tape measure25 ft tape measure.View on Amazon
- Speed square7″ rafter square for marking and guiding cuts.View on Amazon
Build it
Ten steps. The 3D view follows along as you scroll. The parts you're working on are yellow, and the pocket holes or screws for that step are red.
- 01
Cut the pieces
Measure your dog first. This crate is 18½″ wide, 29″ deep and 21¾″ tall inside, about the size of a standard 30″ (medium) wire crate. It suits a dog up to about 40 lb that measures up to about 26″ from nose to the base of the tail and 19″ from the floor to the top of its head when sitting. The dog should be able to stand, turn around and lie down stretched out.
- A Corner posts, four at 26¼″
- B Back and front rails, four at 18½″
- C Side rails, four at 29″
- D Side slats, sixteen at 25¼″
- E Back slats, five at 25¼″
- F Side cleats, two at 28¼″
- G End cleats, two at 18½″
- H Floor, one at 18½″ × 29¾″
- I Top, one at 23″ × 33½″
- J Door slats, six at 18″
- K Door battens, two at 17¼″
- L Door brace, one at 20¼″
TipPick straight, knot-free 1x3s for the slats and sand them before you put them up: it's much easier now than between the posts later. - 02
Drill the pocket holes
With the jig set for ¾″, drill two pocket holes at each end of every rail (B, C). On the back and side rails drill them on the outside face, where the slats will hide them. On the two front rails drill them on the inside face.
Add pocket holes along the top edge of the four top rails, on the inside face: two in the back and front rails (B) and three in each side rail (C). They hold the top on.
- 03
Build the frame
Lay two corner posts (A) on the bench and join a bottom and a top back rail (B) between them: the bottom rail 1″ up from the bottom of the posts and the top rail flush with the tops. Set the rails flush with the inside face of the posts, so they sit back ¾″ from the outside. Glue and drive 1¼″ pocket screws.
Build the front pair of posts the same way with the front rails (B), but flush with the front face. Then join the two pairs with the side rails (C), flush with the inside of the posts.
TipCut a 1″ spacer block and stand each bottom rail on it while you screw. Every bottom rail comes out at the same height. - 04
Check that it is square
Measure the frame corner to corner across the top and across each side. When the diagonals match, it's square. Push on the long corners to adjust while the glue is still wet.
The opening between the front rails (B) is the doorway: 18½″ wide and 18¼″ tall.
- 05
Screw on the slats
Stand the side slats (D) and back slats (E) against the outside of the side and back rails, flush with the outside of the posts, bottoms flush with the bottom rails and tops flush with the posts. Space them evenly, 1″ apart, with the same gap next to each post.
Glue each slat and drive one 1¼″ screw from the inside through each rail into it.
Watch outKeep every gap at about 1″ or less, so paws and jaws can't get caught between the slats.TipRip a scrap to the gap width and use it as a spacer between slats. - 06
Add the cleats and floor
Screw the side cleats (F) and the end cleats (G) to the inside of the bottom rails, their tops ¾″ below the top of the rails. Use 1¼″ screws.
Drop the floor (H) onto the cleats. Its top sits flush with the top of the front rail, so the dog walks in without a step. Screw it down into the cleats.
- 07
Add the top
Lay the top (I) upside down on a blanket and center the crate upside down on it, with ¾″ of overhang all round. Drive 1¼″ pocket screws up through the top rails into it.
TipIron edge banding onto the plywood edges of the top, or round them over and paint them. - 08
Build the door
Lay the six door slats (J) face down, the outside ones flush with the edges, about ⅝″ apart. Screw the two door battens (K) across them, flush with the top and bottom ends and ½″ in from the edges, with one 1¼″ screw into each slat.
Lay the door brace (L) between the battens, running from the bottom batten on the hinge side (left, seen from the front) up to the top batten on the latch side. Mark its ends along the battens, cut them at 47½°, and screw through it into the slats.
TipThe brace has to run up from the bottom hinge. Turned the other way, it lets the door sag. - 09
Hang the door
Set the door in the doorway on ⅛″ spacers. Lay two 3″ butt hinges flat across the joint between the left front post (A) and the door, at the battens (K), with their pins right at the gap. Screw them on with the screws that come with them.
Screw a barrel bolt to the door at each batten on the right, with its keeper on the right front post. Two bolts keep a dog from pushing out a corner of the door.
- 10
Finish
Round over every edge inside and out, the slat ends and the door edges especially, and sand smooth with 120 then 180 grit. Paint or seal it with a water-based finish that's labeled safe for pets or toys once cured. Let it cure for a full week before the dog goes in.
Lay a crate pad or a folded blanket on the floor. Take your dog's collar off before it goes in: tags can catch on the slats.
Watch outThis crate is for a calm, crate-trained dog. A dog that chews or tries to escape can get through wood: use a metal crate for it. The top is a table, not a seat: don't sit or stand on it, and keep hot drinks away from the edge above the door.
Build at your own risk. Check every measurement against your own lumber before you cut, test-fit before you glue, and wear eye and ear protection. Full disclaimer.