Wall Lumber Rack
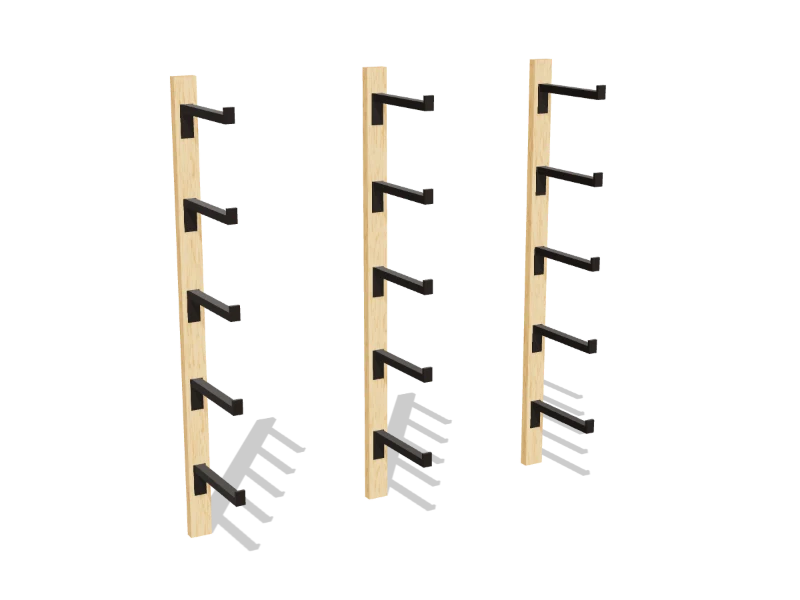
Get your lumber off the garage floor: three 2x4 uprights screwed into the studs, fifteen steel rack arms, five levels of boards in a strip of wall 6 ft wide.
- Skill
- Level 2 of 5 · Beginner
- Build time
- 2 to 3 hours
- Lumber
- 3 2x4s
- Joinery
- 5″ structural screws into the studs
- Storage
- Five levels, 14″ apart; the top arms 84″ off the floor
- Finished size
- about 67½″ W × 17½″ D × 72″ H
What you need
A 2x4 is actually 1½″ × 3½″. Every measurement in this plan uses the real size.
Shopping list
- 32x4, 8 ftStraight ones. The uprights.
- 15Steel lumber rack arms, 16″Rated 100 lb or more each.
- ~605″ structural screwsThrough the uprights and the arm plates into the studs.
Tools
- Miter saw or circular saw
- Drill/driverAn impact driver makes the long screws easy.
- Stud finder
- LevelA 4 ft level, or a laser level.
- Tape measure, speed square, pencil
Cut list
Three pieces from three boards. Label each piece with its letter in pencil as you cut it.
| Part | Qty | Size, inches | From |
|---|---|---|---|
| AUprights | 3 | 1½ × 3½ × 72 | 2x4 |
Board layout. Each row is one board, cut left to right, with the remainder hatched. Dark lines are saw cuts, about ⅛″ wide.
Hardware & tools
Everything besides the lumber, with a link for each.
Links go to Amazon. Woodable earns a small commission at no cost to you.
Required part
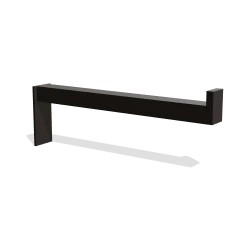 Steel lumber rack arms, 16″Check your arms' rating, reach and screw holes before you buy the screws. Arms that reach 14″ to 18″ all work.15View on Amazon
Fasteners
- 5″ structural screwsThrough the uprights and the arm plates into the studs.~60View on Amazon
Tools
- Miter saw or circular saw10″ compound miter saw: square, angled and beveled crosscuts.View on Amazon
- Drill/driverAn impact driver makes the long screws easy.View on Amazon
- Stud finderElectronic stud finder.View on Amazon
- LevelA 4 ft level, or a laser level.View on Amazon
- Tape measure25 ft tape measure.View on Amazon
- Speed square7″ rafter square for marking and guiding cuts.View on Amazon
Build it
Four steps. The 3D view follows along as you scroll. The parts you're working on are yellow, and the screws for that step are red.
- 01
Cut the uprights
Check your arms first. This rack is designed around steel lumber rack arms that reach 16″ from the upright, rated 100 lb or more each, with a flat plate and two holes for ¼″ screws. Read their own instructions and rating before you buy the screws.
- A Uprights, three at 72″
On each upright (A), mark the top of every arm: 12″, 26″, 40″, 54″ and 68″ from the bottom end. Square the marks across the face.
- 02
Screw the uprights to the studs
Find the studs with a stud finder and mark the centers of three of them, 32″ apart: every other stud. Draw a level line 16″ above the floor across all three. It puts the top arms at 84″, about as high as most people can load from the floor.
Hold each upright (A) flat on the wall, centered on its stud, bottom on the line and plumb. Drive a 5″ structural screw through the center into the stud in each space between the arm marks, six per upright. Check the three uprights with a long level: the marks must line up across all three.
Watch outInto wood studs only. Never use drywall anchors: a loaded rack weighs hundreds of pounds. On a concrete or block wall, use concrete screws rated for the load instead. - 03
Screw on the arms
Hold each arm with the top of its arm on a mark, centered on the upright (A), tip pointing up. Drill pilot holes and drive two 5″ structural screws through the plate and the upright into the stud. Fifteen arms, five on each upright.
Push down hard on the tip of each arm. It shouldn't move at all.
- 04
Load it
Lay boards across all three arms of a level, never on just one or two, and keep the heaviest boards on the lowest levels. Keep each arm under its rating: an 8 ft 2x4 weighs about 10 lb, so 100 lb per arm is about thirty 2x4s on a level.
TipBoards from 6 ft to 12 ft long fit, overhanging the end uprights. Thin boards and trim sag between the arms: lay them on a couple of straight 2x4s on a level of their own. Keep short offcuts in a bin on the floor below the rack, not on the arms.
Build at your own risk. Check every measurement against your own lumber before you cut, test-fit before you glue, and wear eye and ear protection. Full disclaimer.