Vinyl Record Console
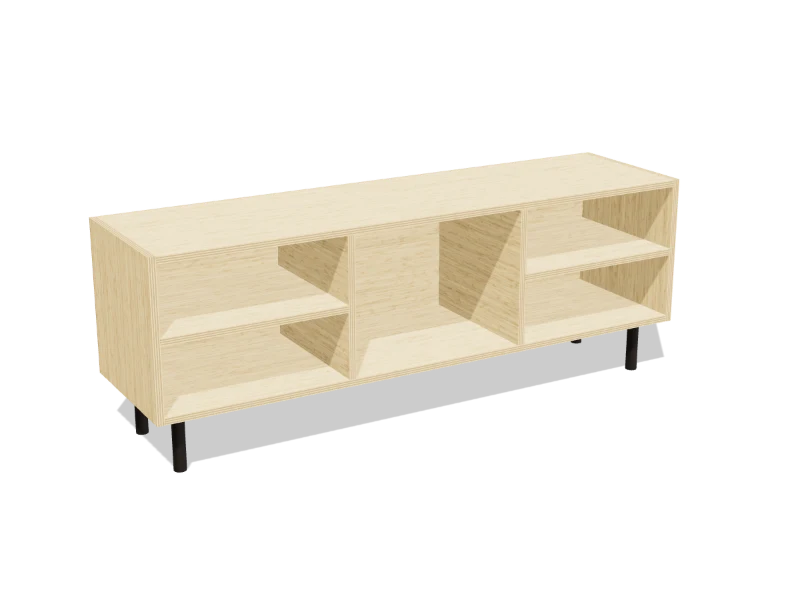
A low console for a record collection: three bays sized for LPs, holding about 200 records depending on the sleeves, with a top at turntable height.
- Skill
- Level 3 of 5 · Intermediate
- Build time
- 5 to 7 hours, plus finish
- Lumber
- 2 2x2s, 1 sheet of ¾″ plywood and 1 panel of ¼″ plywood
- Joinery
- Pocket holes, glue and brads
- Finished size
- 48″ W × 16″ D × 27″ H
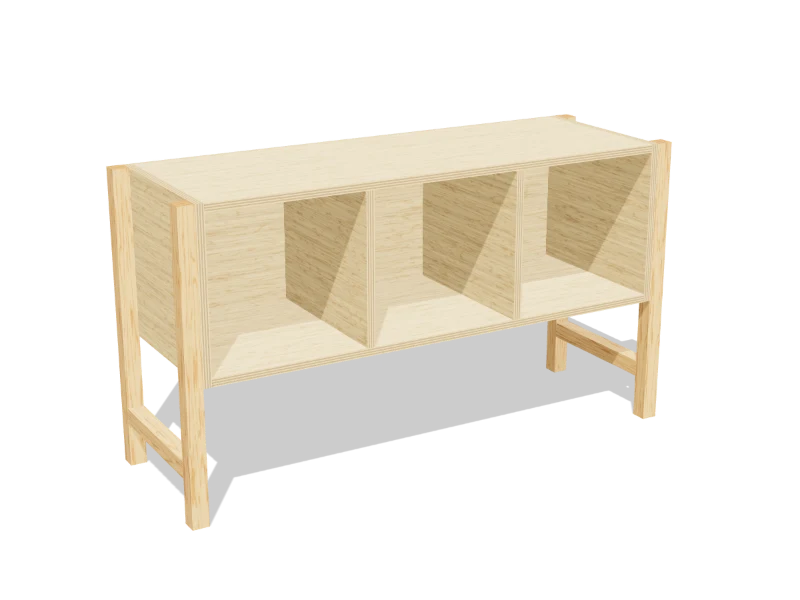
What you need
A 2x2 is actually 1½″ × 1½″. Every measurement in this plan uses the real size. ¾″ plywood and ¼″ plywood are drawn at full thickness, but plywood sold that way is often a hair thinner, so measure yours and cut the pieces that fit between panels to match.
Shopping list
- 22x2, 8 ftThe legs and stretchers.
- 1¾″ plywood, 4 × 8 ft sheetBirch or another hardwood plywood: the edges and faces show.
- 1¼″ plywood, 2 × 4 ft panelThe back.
- ~301¼″ coarse-thread pocket-hole screws
- ~101¼″ wood screwsFor the legs.
- ~301″ brad nailsFor the back.
- 1Iron-on edge banding, 25 ftTo match the plywood.
- 1Wood glue
- —Paint or clear finish, sandpaper
Tools
- Circular sawOr have the store cut the plywood.
- Pocket-hole jigSet for ¾″.
- Drill/driver
- Brad nailer or hammer
- Clamps
- Clothes ironFor the edge banding.
Cut list
Thirteen pieces from two boards and two panels. Label each piece with its letter in pencil as you cut it.
| Part | Qty | Size, inches | From |
|---|---|---|---|
| ASides | 2 | ¾ × 15¾ × 15 | ¾″ plywood |
| BTop and bottom | 2 | ¾ × 15¾ × 43½ | ¾″ plywood |
| CDividers | 2 | ¾ × 15¾ × 13½ | ¾″ plywood |
| DBack | 1 | ¼ × 15 × 45 | ¼″ plywood |
| ELegs | 4 | 1½ × 1½ × 27 | 2x2 |
| FSide stretchers | 2 | 1½ × 1½ × 13 | 2x2 |
Board layout. Each row is one board, cut left to right, with the remainder hatched. Dark lines are saw cuts, about ⅛″ wide.
Hardware & tools
Everything besides the lumber, with a link for each.
Links go to Amazon. Woodable earns a small commission at no cost to you.
Hardware
- Iron-on edge banding, 25 ftTo match the plywood.1View on Amazon
Fasteners
- 1¼″ coarse-thread pocket-hole screws#8 × 1¼″, coarse thread, washer head. For joining ¾″ boards.~30View on Amazon
- 1¼″ wood screwsFor the legs.~10View on Amazon
- 1″ brad nailsFor the back.~30View on Amazon
Glue & finish
- Wood gluePVA wood glue for indoor projects.1View on Amazon
- Sandpaper5″ hook-and-loop discs for a random orbit sander, 80 to 220 grit.View on Amazon
- Clear polyurethaneWater-based polyurethane, satin, for a clear topcoat.View on Amazon
- Furniture paintInterior paint for furniture: chalk-style or acrylic enamel.View on Amazon
Tools
- Circular sawOr have the store cut the plywood.View on Amazon
- Pocket-hole jigSet for ¾″.View on Amazon
- Drill/driverCordless drill/driver with bits.View on Amazon
- Brad nailer or hammer18 gauge brad nailer that takes ¾″ to 2″ brads.View on Amazon
- ClampsTwo or more bar clamps that open 24″ or more.View on Amazon
Build it
Seven steps. The 3D view follows along as you scroll. The parts you're working on are yellow, and the pocket holes or screws for that step are red.
- 01
Cut the pieces
Cut the plywood parts first, then the legs and stretchers:
- A Sides, two at 15¾″ × 15″
- B Top and bottom, two at 15¾″ × 43½″
- C Dividers, two at 15¾″ × 13½″
- D Back, one at 15″ × 45″
- E Legs, four at 27″
- F Side stretchers, two at 13″
TipIron-on edge banding hides the plywood layers on the front edges. Put it on the sides, top, bottom and dividers before you assemble them. - 02
Drill the pocket holes
With the jig set for ¾″, drill three pocket holes at each end of the top and bottom (B) on their undersides, and two at the top and bottom of each divider (C) on one face.
- 03
Build the case
Stand the two sides (A) up and fit the top and bottom (B) between them, flush at the front and back. Glue and drive 1¼″ pocket screws.
- 04
Add the dividers
Fit the two dividers (C) between the top and bottom so each bay is 14″ wide inside. Glue and pocket-screw them.
TipCut a 14″ spacer from scrap and stand it in the bay as you screw each divider. All three bays come out the same. - 05
Nail on the back
Turn the case face down. Check it's square: the two diagonals should match. Glue and nail the back (D) to the sides, top, bottom and dividers with 1″ brads every 4″ or so.
- 06
Add the legs
Join each pair of legs (E) with a side stretcher (F), its bottom 4″ up from the floor, using pocket screws on the inside. Clamp each leg pair to the outside of the case, the legs flush with the top and with the front and back of the case.
Drive two 1¼″ screws through the case side into each leg from inside, with glue. Check the console sits flat with no rock.
- 07
Finish
Sand everything with 120 then 180 grit and ease the edges. Paint the case or seal it with a clear coat, and stain or oil the legs.
TipStore records standing straight up, never leaning or stacked, and keep the console away from heaters and sunny windows.
Build at your own risk. Check every measurement against your own lumber before you cut, test-fit before you glue, and wear eye and ear protection. Full disclaimer.