Standing Desk Top
A 60″ desk top, 1½″ thick, for an electric sit-stand frame: two layers of plywood inside a solid wood edge, with a cable tray underneath.
- Skill
- Level 2 of 5 · Beginner
- Build time
- 3 to 4 hours, plus finish
- Lumber
- 2 1x2s and 1 sheet of ¾″ plywood
- Joinery
- Glue, screws and brads
- Height
- About 29½″ to 50″, set by the frame
- Finished size
- 60″ W × 24″ D × 29½″ H
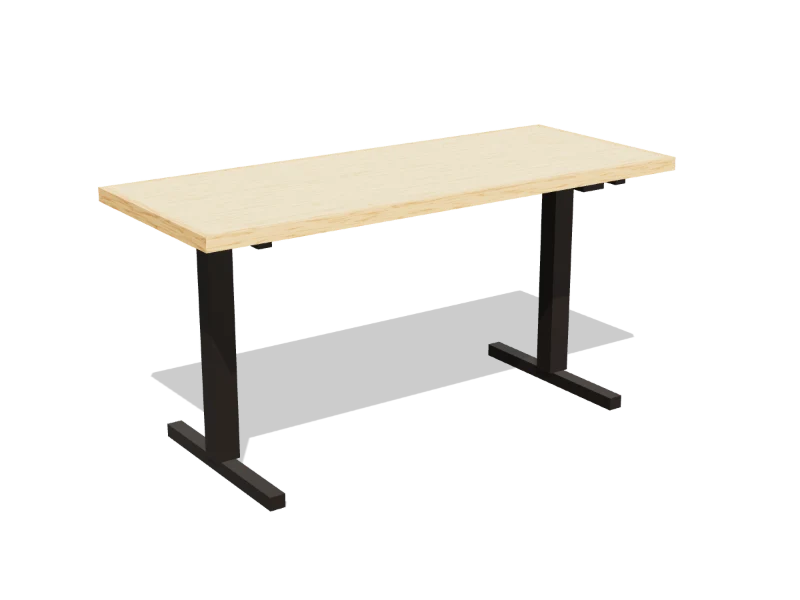
What you need
A 1x2 is actually ¾″ × 1½″. Every measurement in this plan uses the real size. ¾″ plywood is drawn at full thickness, but plywood sold that way is often a hair thinner, so measure yours and cut the pieces that fit between panels to match.
Shopping list
- 21x2, 8 ftHardwood (oak or maple) for the edges.
- 1¾″ plywood, 4 × 8 ft sheetBirch or another hardwood plywood: both layers come from one sheet.
- 1Electric sit-stand desk frameDual motor, fits a 60″ × 24″ top.
- ~20Screws for the frameThey come with the frame.
- 1Under-desk cable trayAbout 40″ long, with screws.
- ~10Screws for the trayThey come with the tray. No longer than 1″.
- ~201¼″ wood screwsTo join the layers.
- ~501¼″ brad nailsFor the edges.
- 1Wood glue
- —Sandpaper and water-based polyurethane
Tools
- Circular sawWith a straight board clamped on as a guide.
- Miter sawFor the mitered edges.
- Drill/driver
- Brad nailer or hammer
- Clamps
- Random orbit sander
- Tape measure, speed square, pencil
Cut list
Six pieces from two boards and one sheet. Label each piece with its letter in pencil as you cut it.
| Part | Qty | Size, inches | From |
|---|---|---|---|
| ATop layers | 2 | ¾ × 22½ × 58½ | ¾″ plywood |
| BLong edgesBoth ends mitered at 45°, long point to long point. | 2 | ¾ × 1½ × 60 | 1x2 |
| CShort edgesBoth ends mitered at 45°, long point to long point. | 2 | ¾ × 1½ × 24 | 1x2 |
Board layout. Each row is one board, cut left to right, with the remainder hatched. Dark lines are saw cuts, about ⅛″ wide.
Hardware & tools
Everything besides the lumber, with a link for each.
Links go to Amazon. Woodable earns a small commission at no cost to you.
Required part
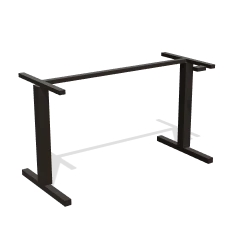 Electric sit-stand desk frameCheck your frame's instructions for the top size and screw length before cutting.1View on Amazon
Hardware
- Under-desk cable trayAbout 40″ long, with screws.1View on Amazon
Fasteners
- 1¼″ wood screwsTo join the layers.~20View on Amazon
- 1¼″ brad nailsFor the edges.~50View on Amazon
Glue & finish
- Wood gluePVA wood glue for indoor projects.1View on Amazon
- Sandpaper5″ hook-and-loop discs for a random orbit sander, 80 to 220 grit.View on Amazon
- Clear polyurethaneWater-based polyurethane, satin, for a clear topcoat.View on Amazon
Tools
- Circular sawWith a straight board clamped on as a guide.View on Amazon
- Miter sawFor the mitered edges.View on Amazon
- Drill/driverCordless drill/driver with bits.View on Amazon
- Brad nailer or hammer18 gauge brad nailer that takes ¾″ to 2″ brads.View on Amazon
- ClampsTwo or more bar clamps that open 24″ or more.View on Amazon
- Random orbit sander5″ random orbit sander.View on Amazon
- Tape measure25 ft tape measure.View on Amazon
- Speed square7″ rafter square for marking and guiding cuts.View on Amazon
Build it
Eight steps. The 3D view follows along as you scroll. The parts you're working on are yellow, and the pocket holes or screws for that step are red.
- 01
Cut the pieces
Cut both top layers from one sheet of plywood, then the edges:
- A Top layers, two at 22½″ × 58½″
- B Long edges, two at 60″
- C Short edges, two at 24″
Check firstCheck your frame's instructions before cutting: the top size it takes, the thickness (most take 1″ to 1½″) and how far in its legs sit. This plan is a 60″ × 24″ top, 1½″ thick. - 02
Glue the two layers together
Lay one top layer (A) good side down on a flat floor. Roll glue over the whole back of it, lay the second layer (A) on top, line up the edges and screw it down from the back with 1¼″ screws in two rows. Stack something heavy on it while the glue sets.
TipKeep the screws 2″ or more away from where the frame's legs will sit, so the frame's own screws don't hit them. - 03
Add the edges
Miter both ends of the long edges (B) and short edges (C) at 45°, each as long as the top on its long point. Glue them around the layers, flush with the top face, and nail them on with 1¼″ brads.
- 04
Sand and seal the top
Sand the top (A) flat with 120 then 180 grit, rounding the edges a little. Wipe on three coats of water-based polyurethane, sanding lightly between coats. Seal the underside with one coat so the top stays flat.
- 05
Put the frame together
Put the frame together on the floor, following its instructions. Slide its crossbeam out until the legs are 46″ apart, center to center, so each one sits 7″ in from an end of the top.
- 06
Screw the frame to the top
Lay the top upside down on a blanket and set the frame on it upside down, centered, with the control box toward the back. Check the screw length in the frame's instructions: it must be shorter than 1½″. Drill pilot holes and drive the frame's screws through the side arms into the top.
- 07
Hang the cable tray
Screw the cable tray to the underside of the top, centered and about 1½″ in from the back edge. Set a power strip in it, plug the frame's control box into the strip, and tie the cords to the tray.
- 08
Stand it up and set the height
With a helper, turn the desk over onto its feet. Run it all the way up and down once and check nothing catches: a wall, a windowsill, a shelf, the cords. Set the sitting and standing heights in the hand switch.
Watch outLeave slack in every cord so it can reach the top at full height. Keep feet, chairs and pets clear of the frame while it moves.
Build at your own risk. Check every measurement against your own lumber before you cut, test-fit before you glue, and wear eye and ear protection. Full disclaimer.